portfolio
06/05/17


David hockney
5/25/17
David Hockney is an english painter,draughtsman,printmaker,stage designer and was born he was born on July 9, 1937 , Bradfford, United Kingdom. His photograph and paintings emulate what we are doing in class because when I look at his artwork its very different from what you would regularly see around and the way were formatting the picture can relate to his theme he's trying to portray.
What I did to make this photograph the way it is was I first went into photoshop and before I did that I picked a couple of photos that I wanted to use and then I dragged the main photograph that I used to the center because I wanted that to be the main photo.
What I did to make this photograph the way it is was I first went into photoshop and before I did that I picked a couple of photos that I wanted to use and then I dragged the main photograph that I used to the center because I wanted that to be the main photo.
Magazine cover:
5/18/17

The magazine I went with for the magazine project was about Nissan and the reason for why I decide to go with the Nissan company was because Ive always been a fan of their sports car like the Nissan GTR I used in my image. What I did to emulate the magazine was trying to have the car movie fast and giving details about the car in the captions. The front style I used was a moving abject which was the Nissan GTR moving fast and the colors was a mixture of light and dark colors. My set up was just an image of myself and some captions and pictures I got off the internet and when I had all my images I used Adobe Photoshop CS6 to create my magazine. A strobe light or stroboscopic lamp, commonly called a strobe, is a device used to produce regular flashes of light.Mood Creating Aspects of Lighting.
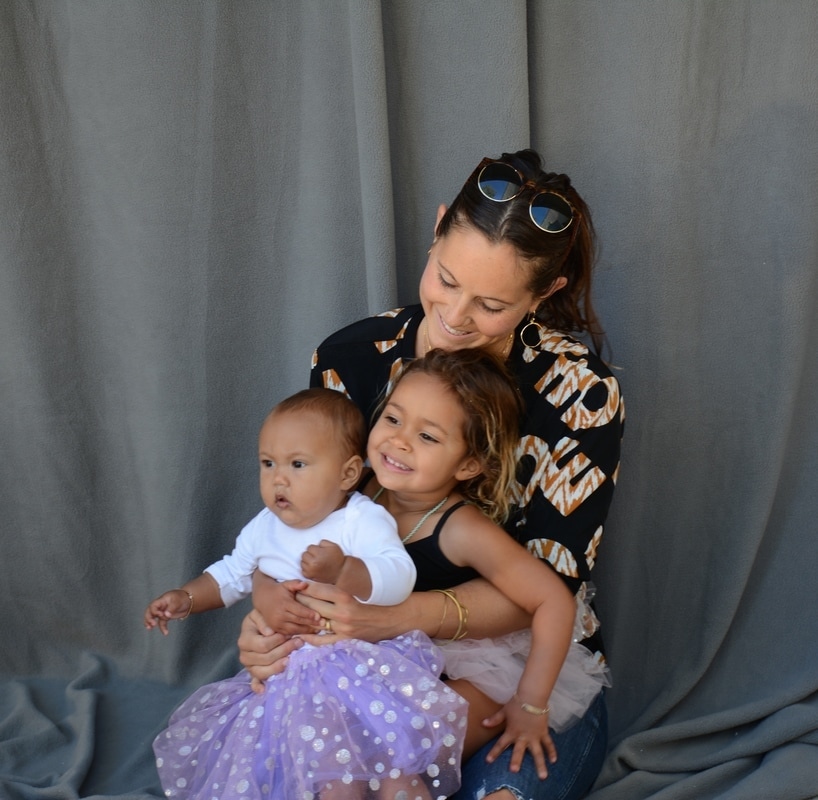
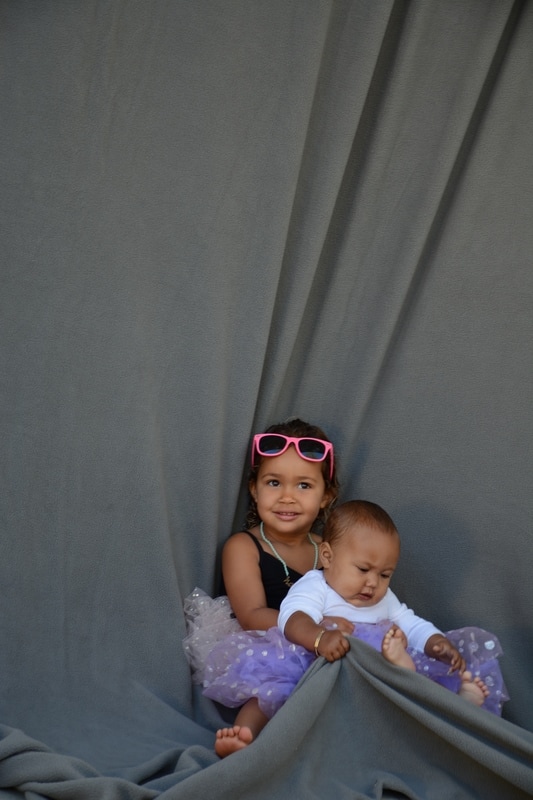
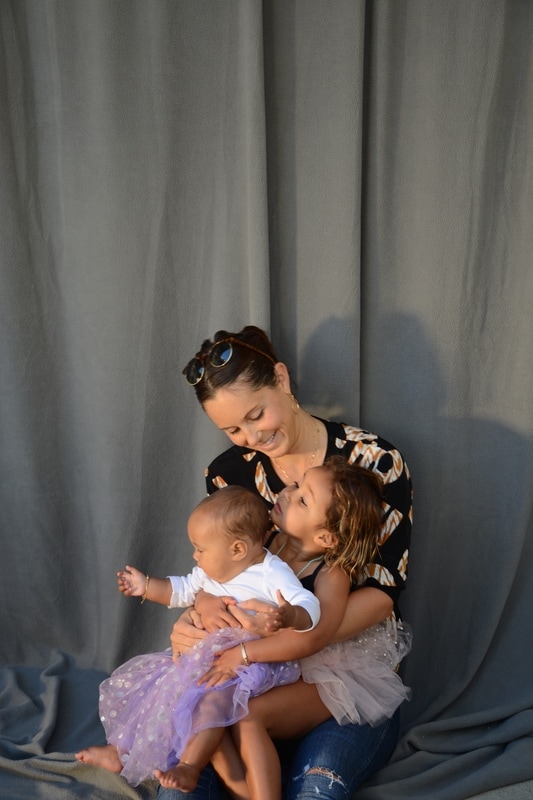
Family
5/4/17

DEl mar fair
5/2/17
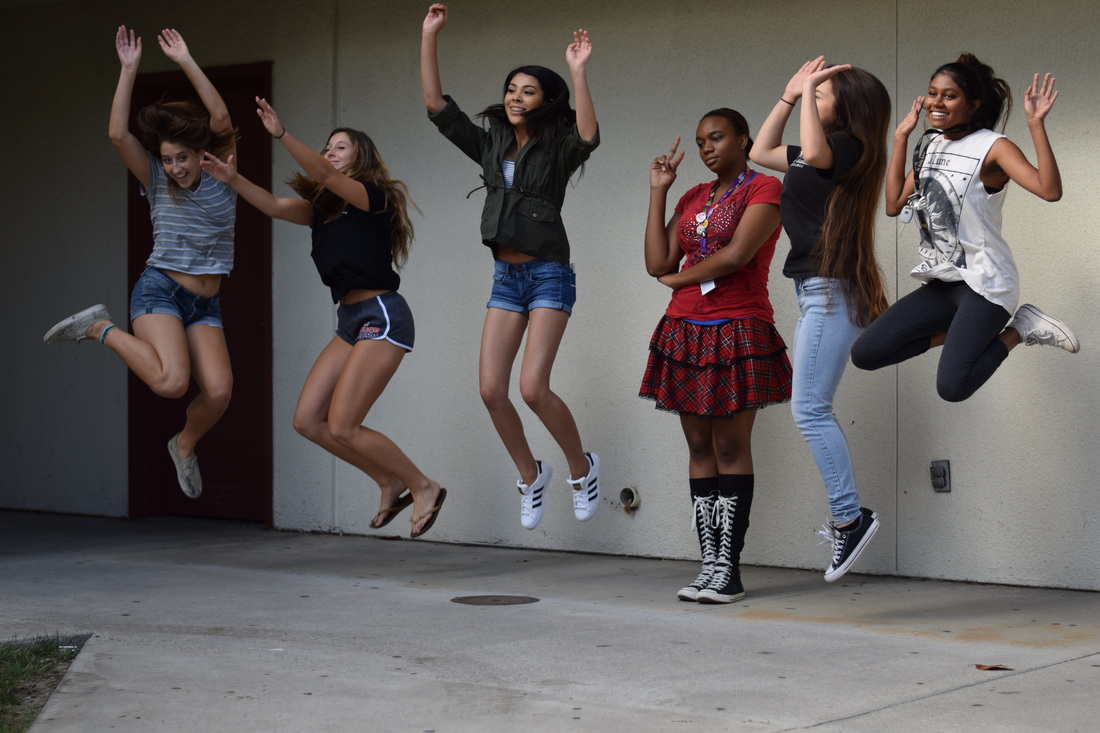
 ISO 400, f/9, Shutter Speed 1/800
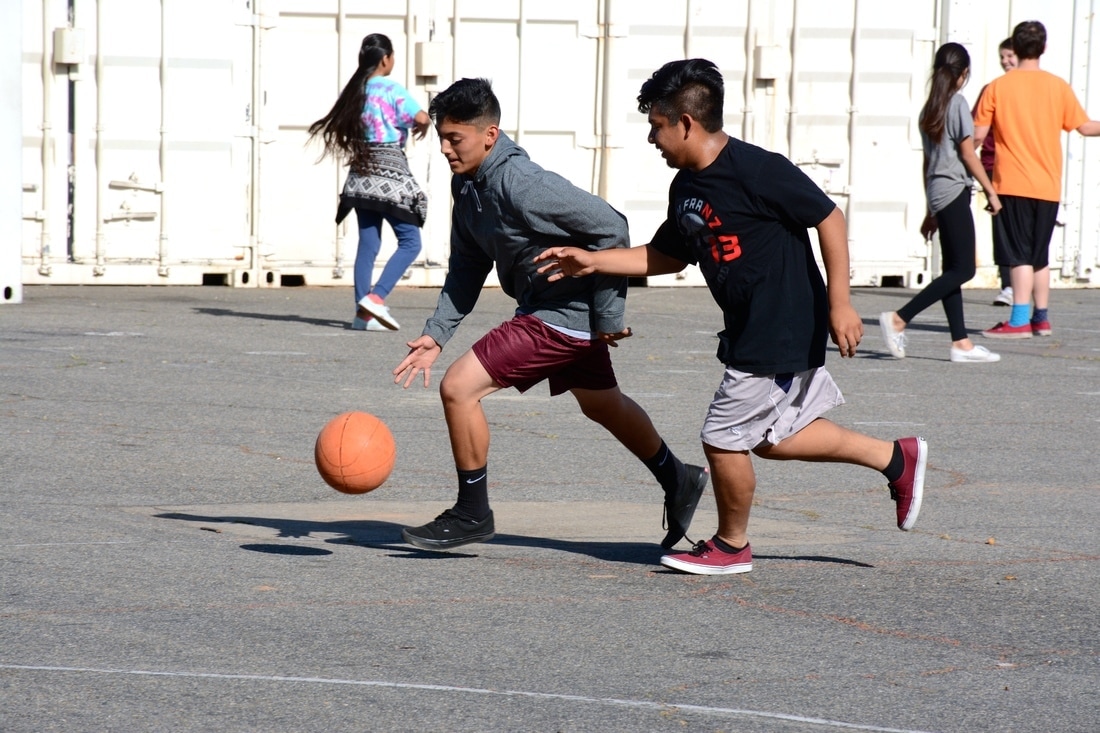
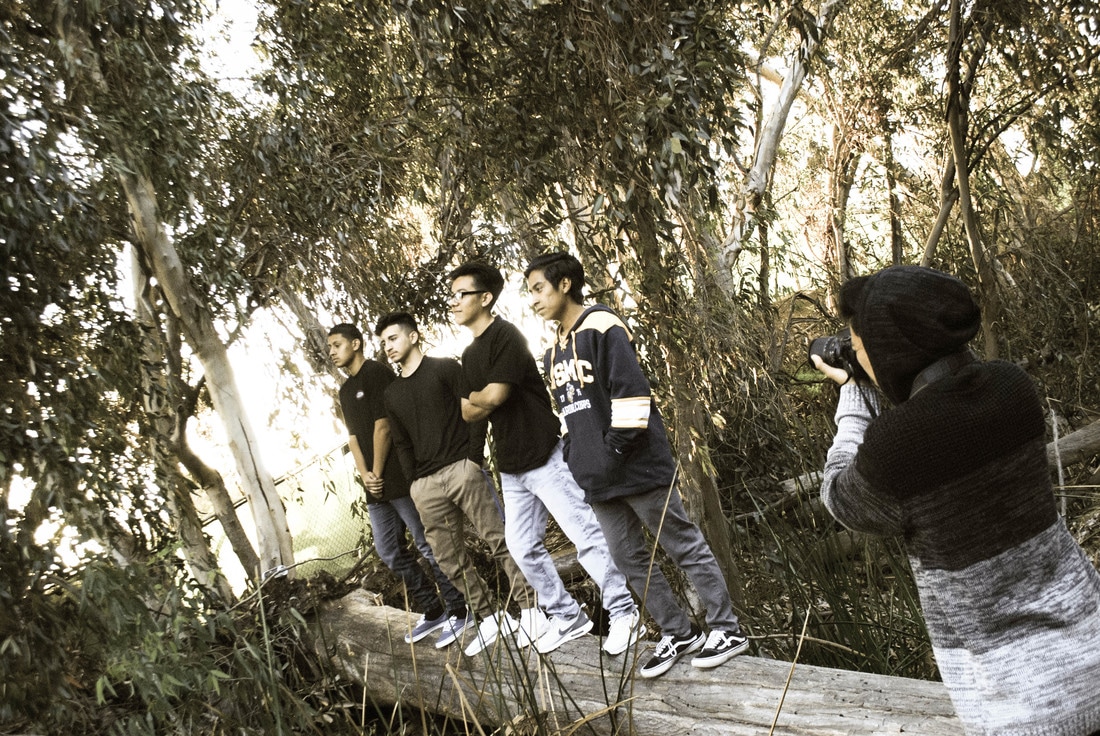
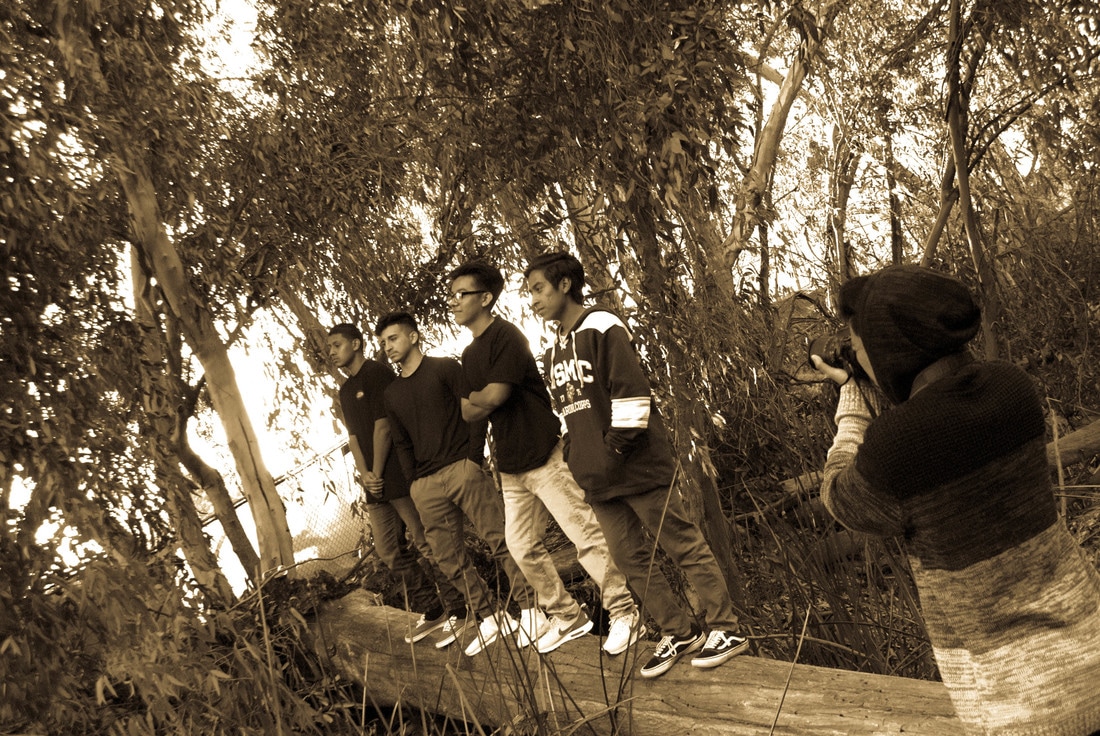
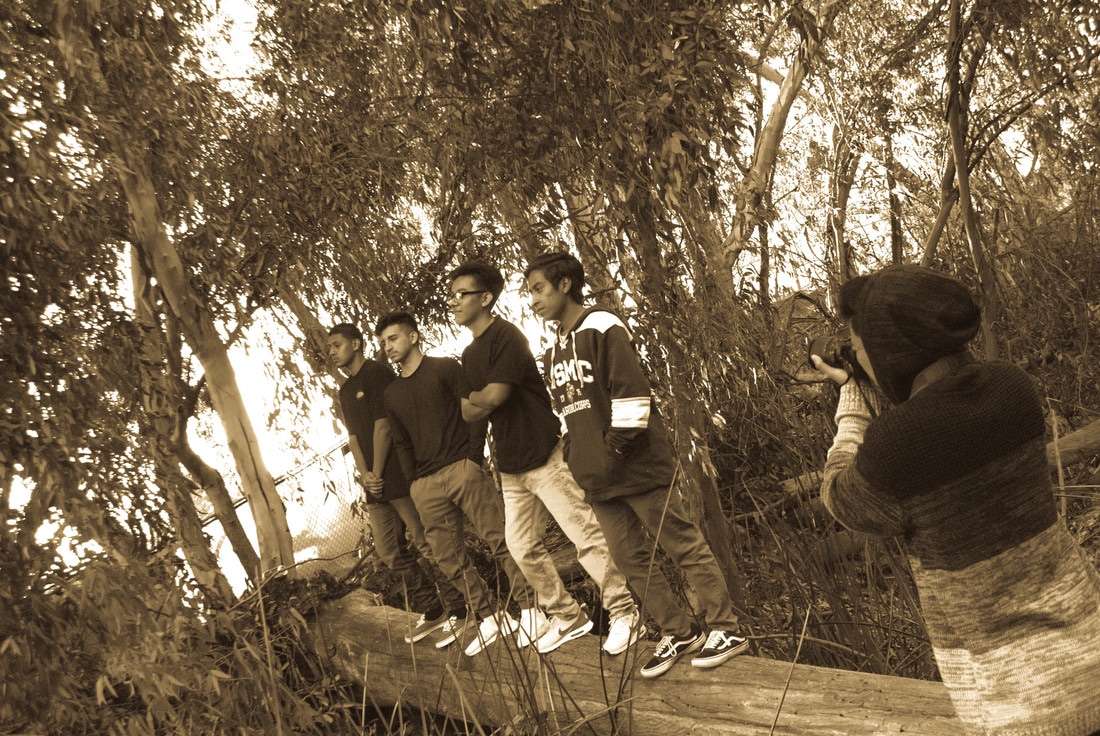
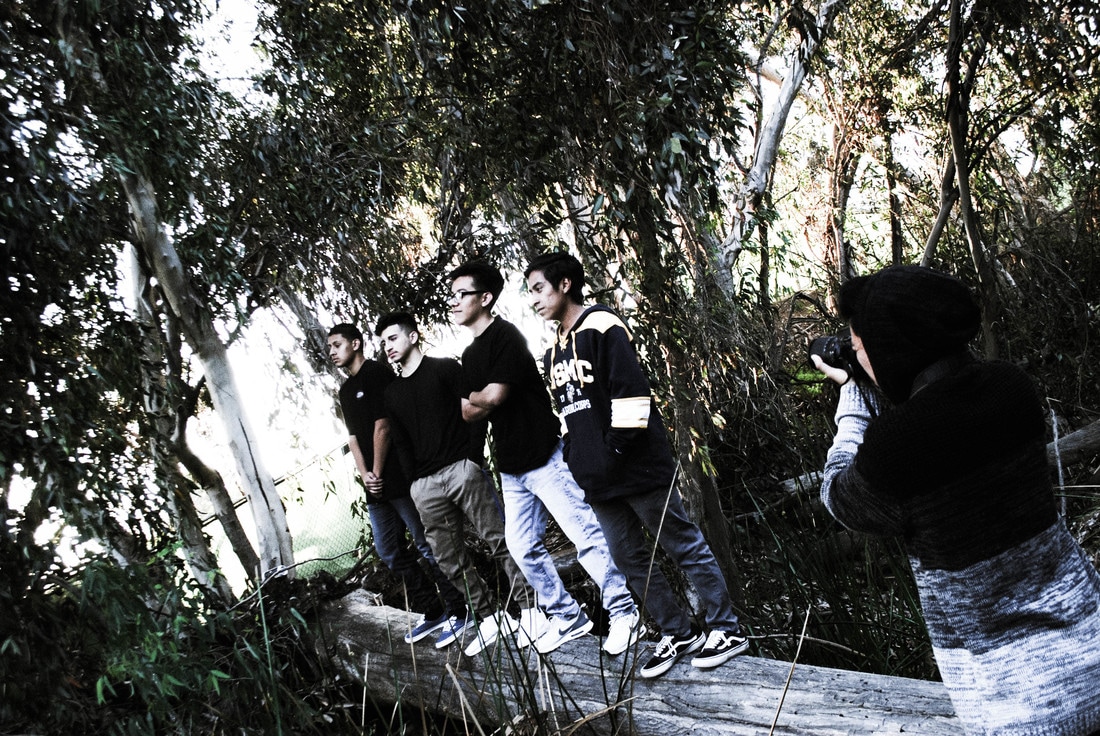
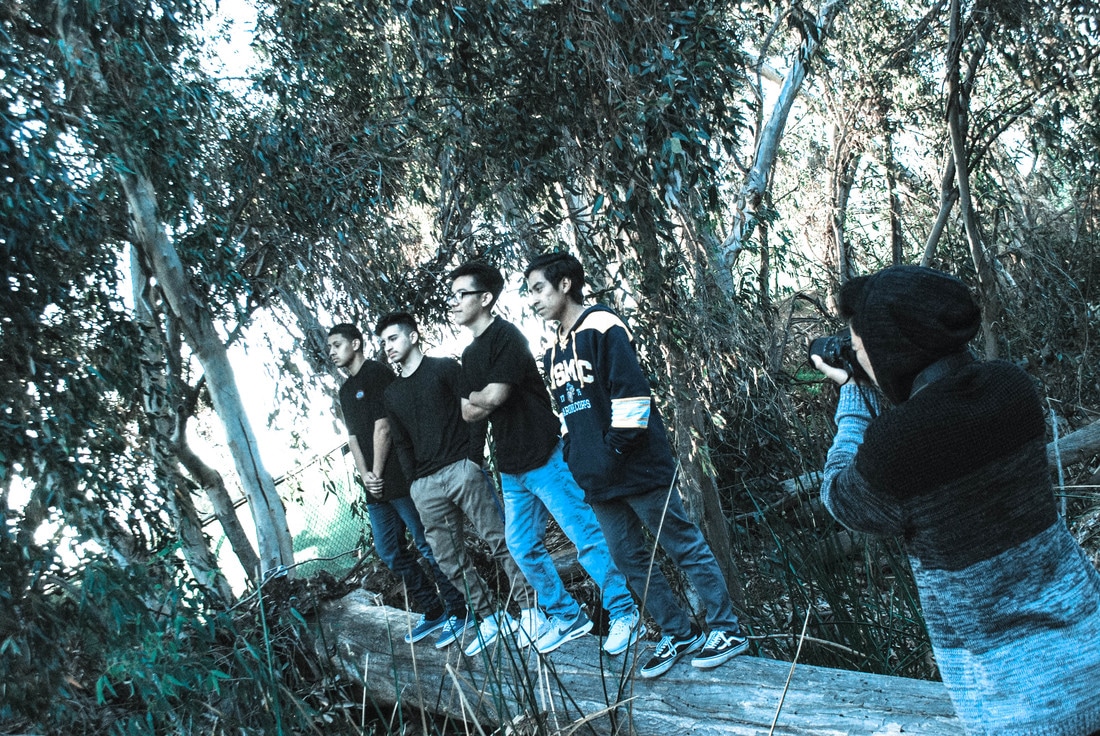
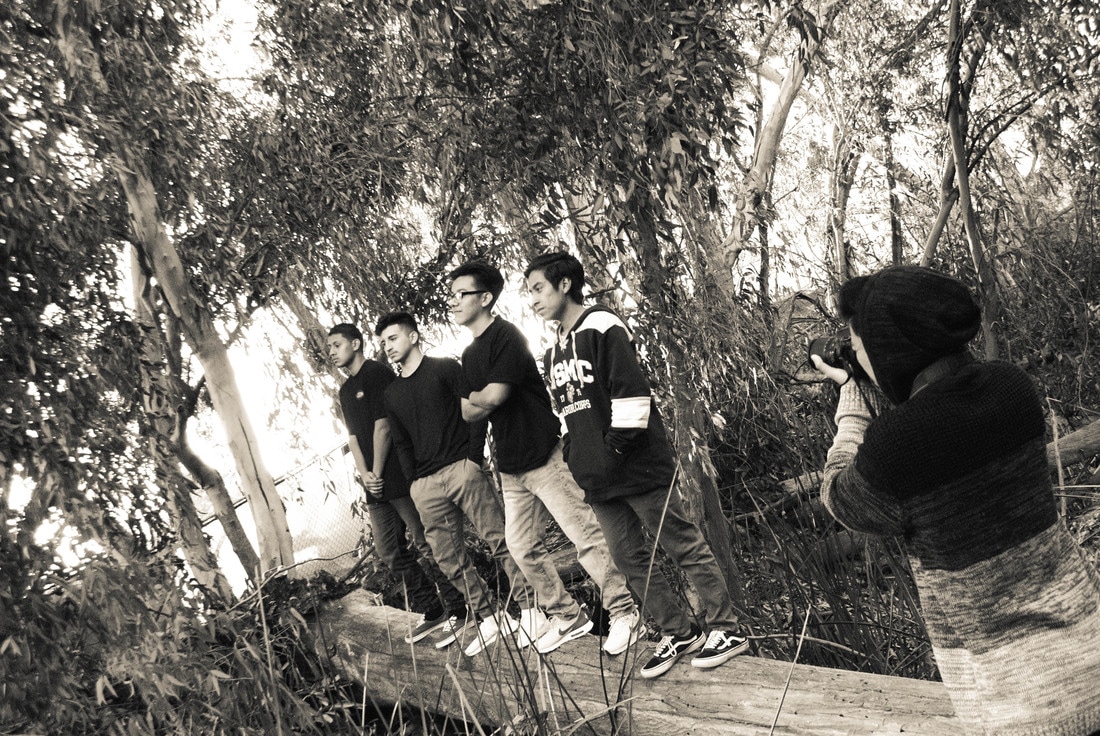
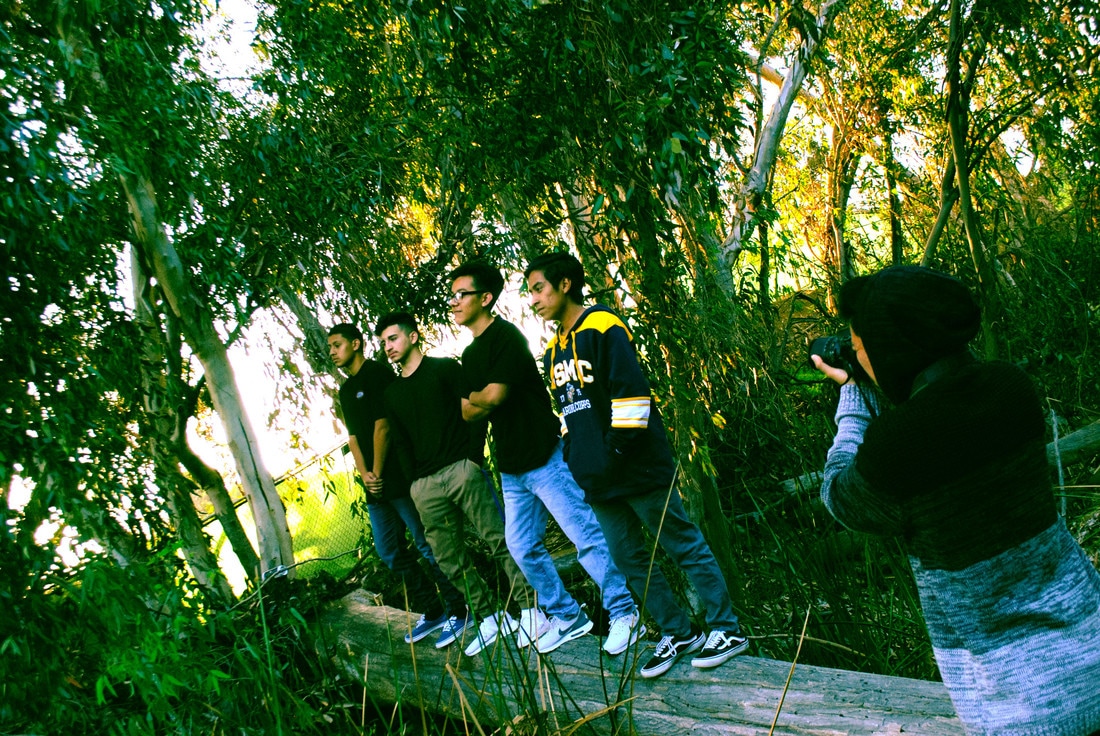
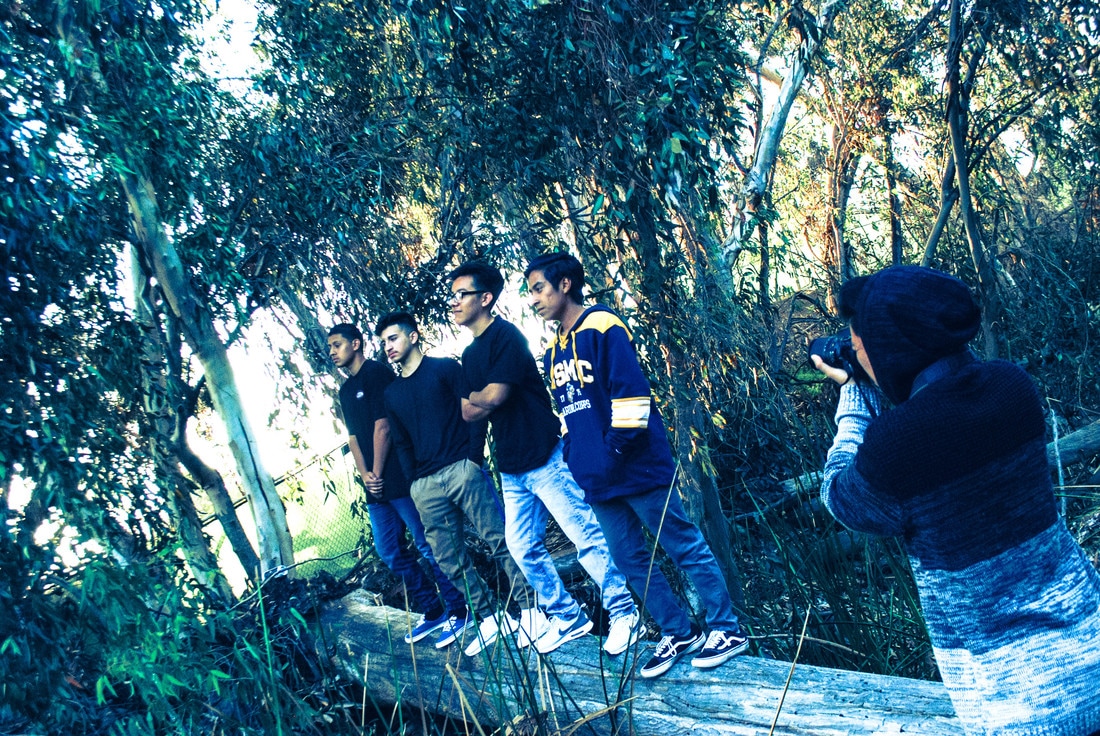
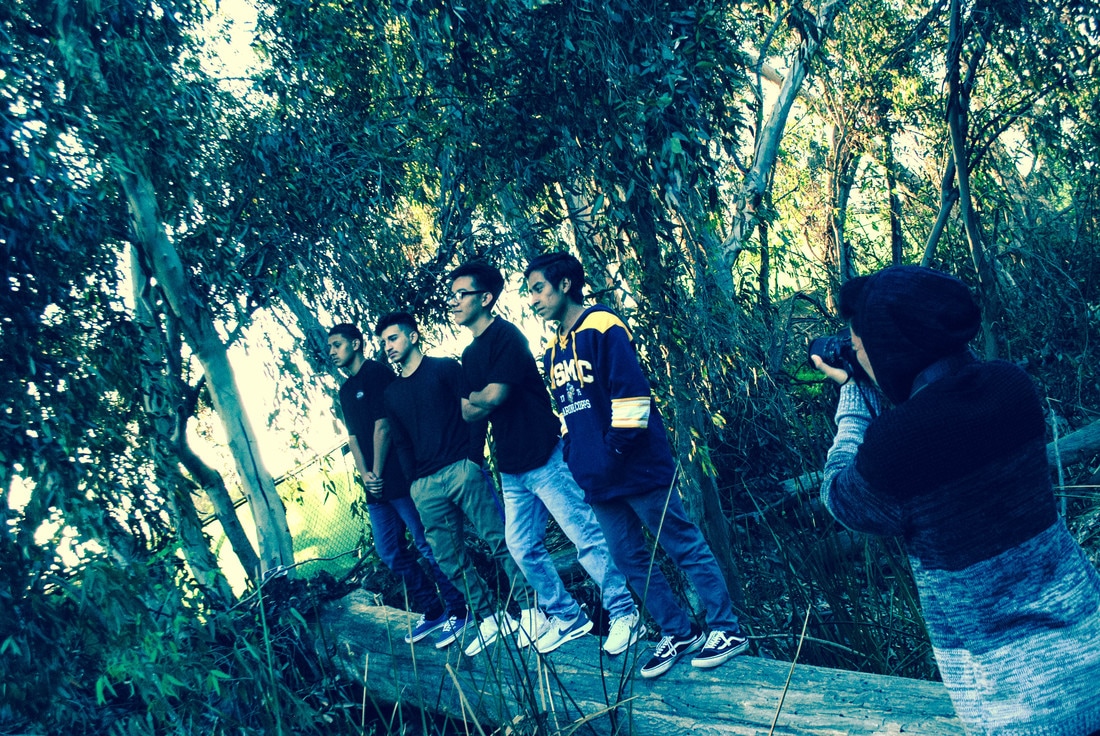
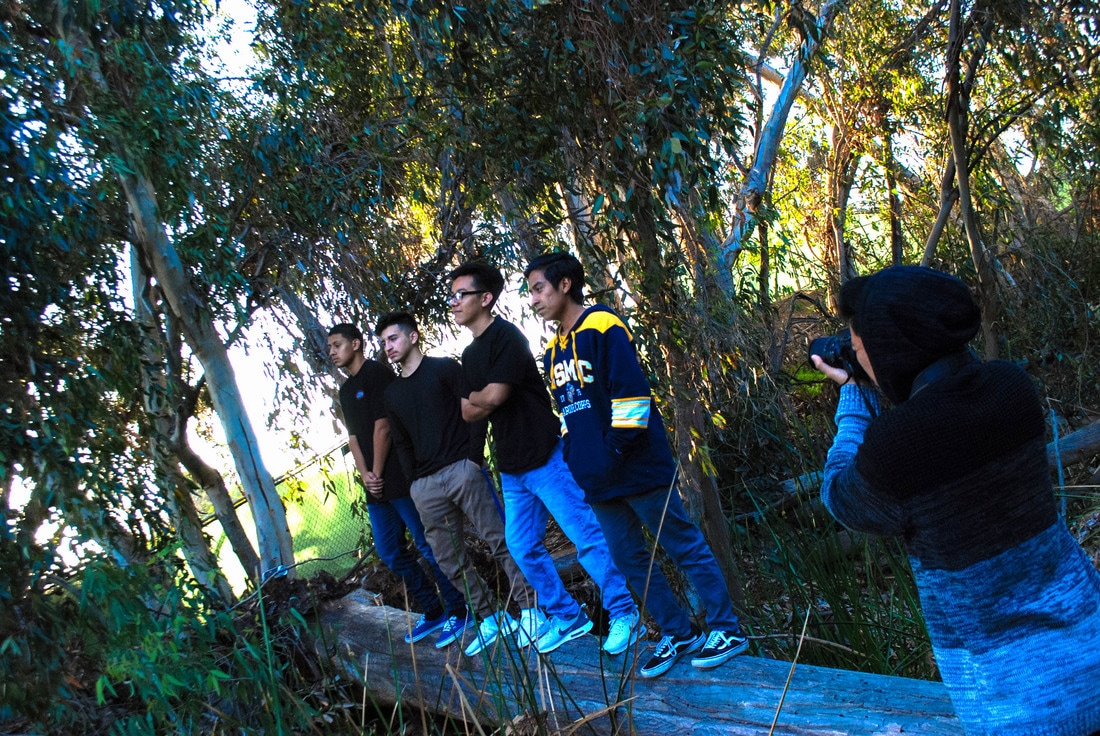
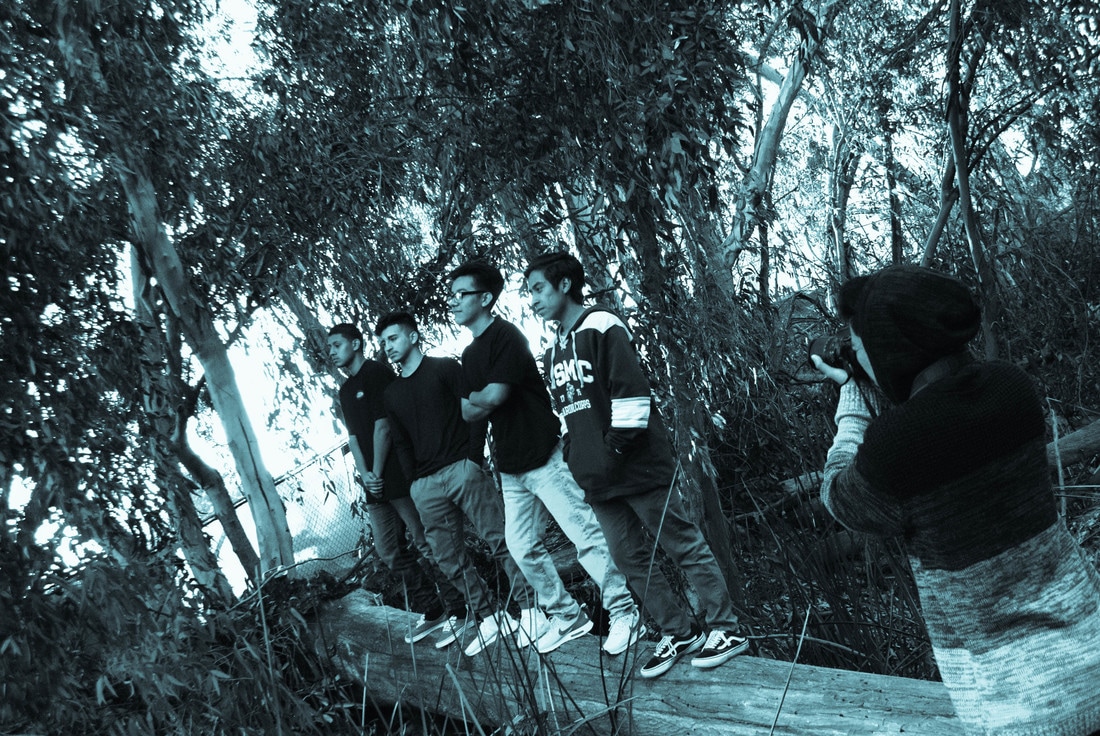
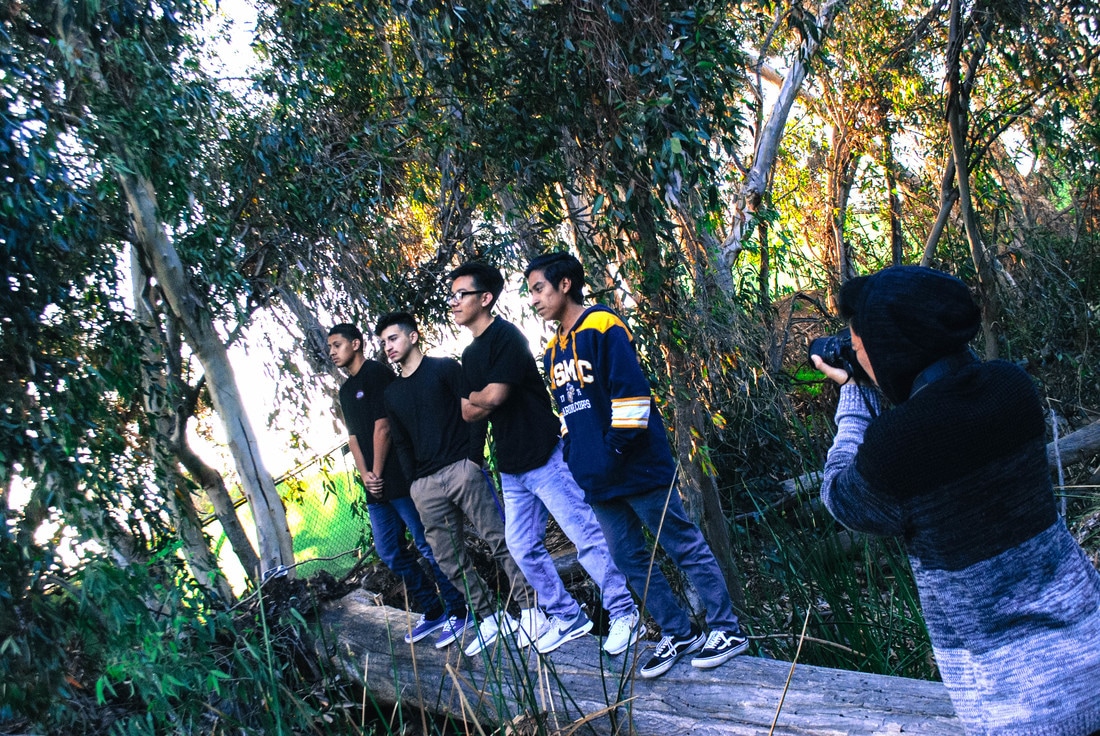
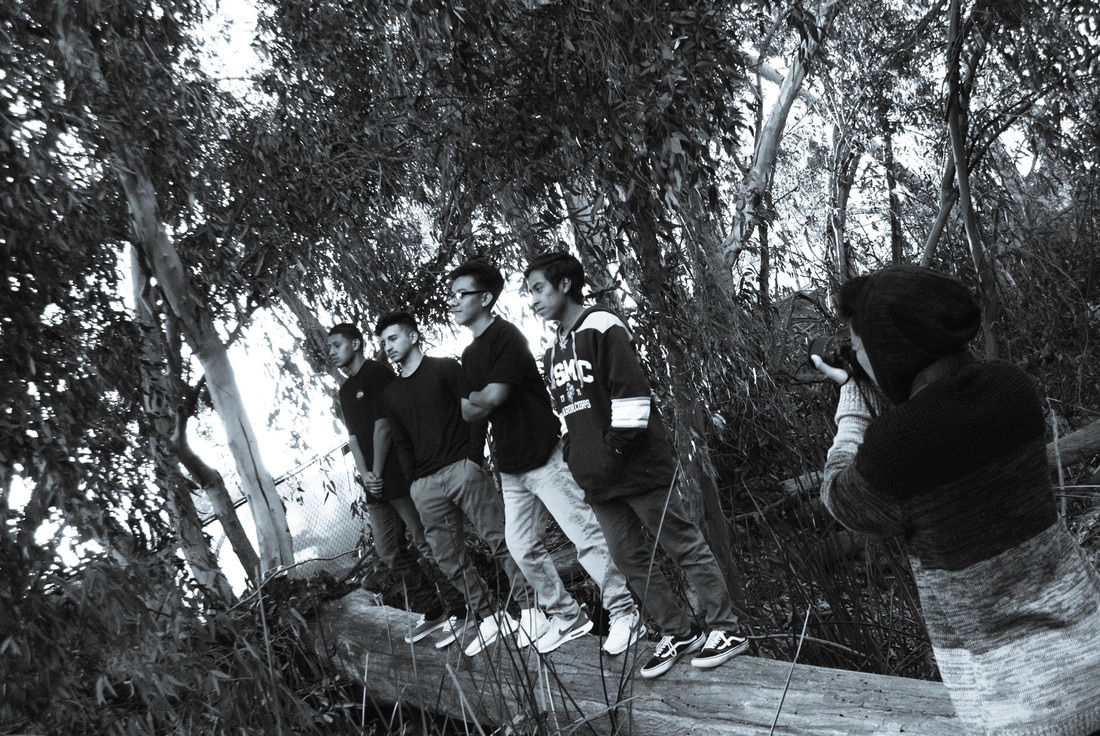
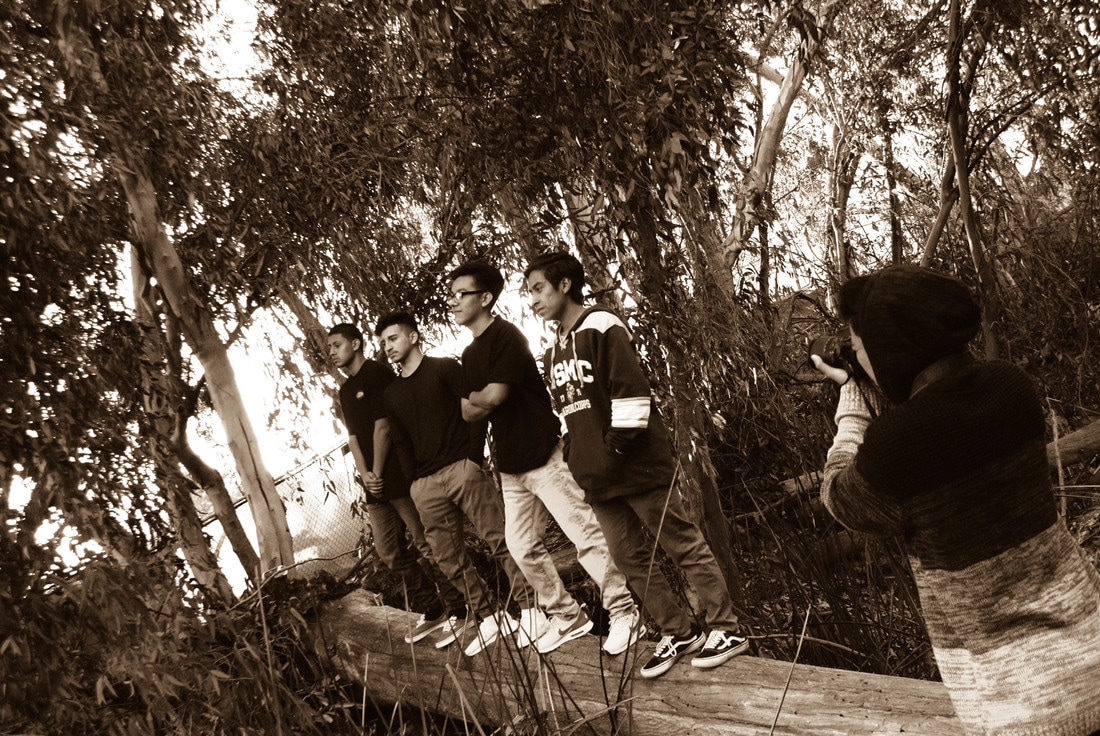
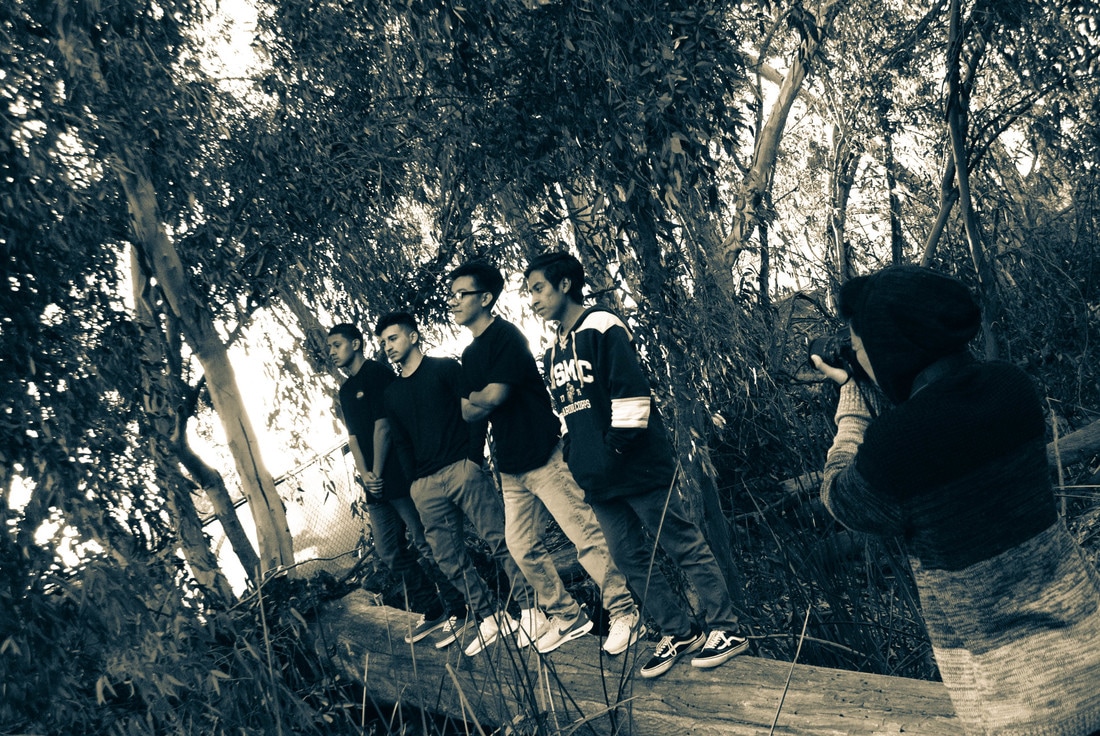
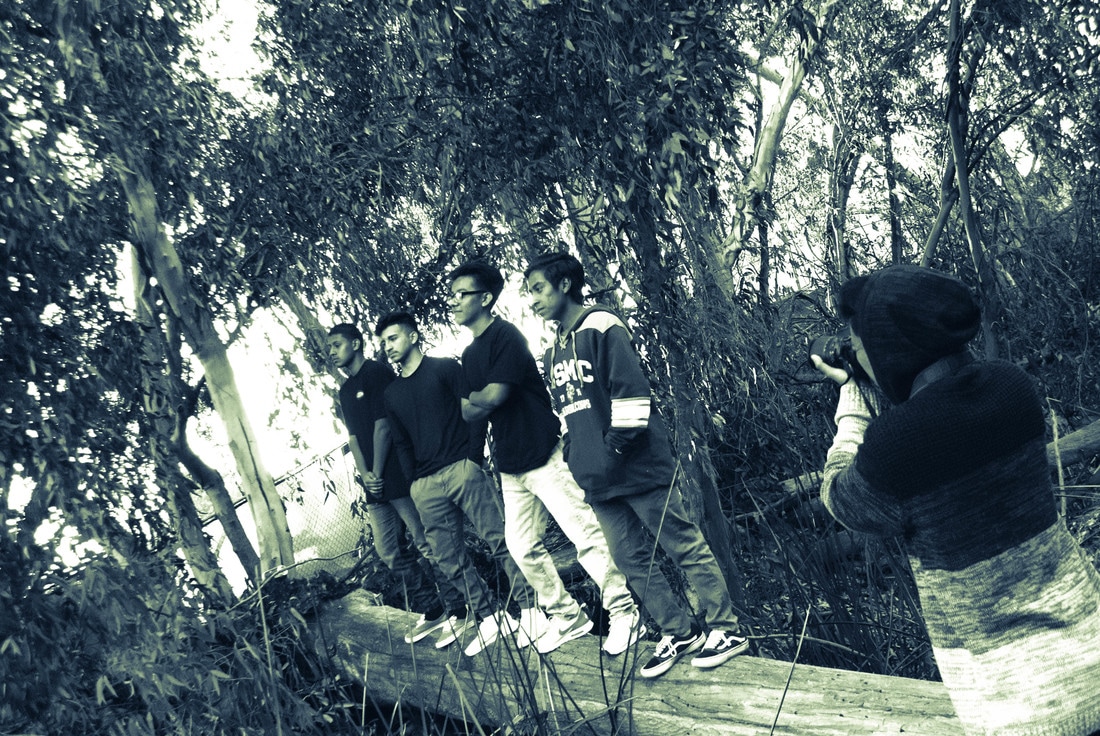
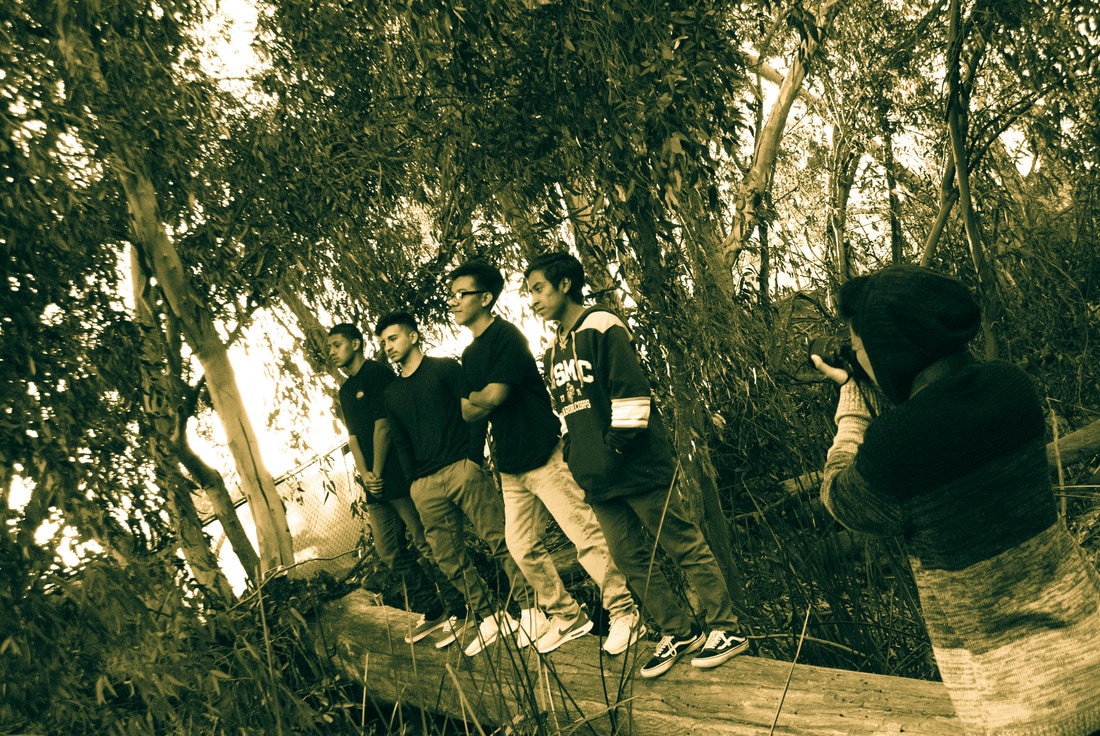
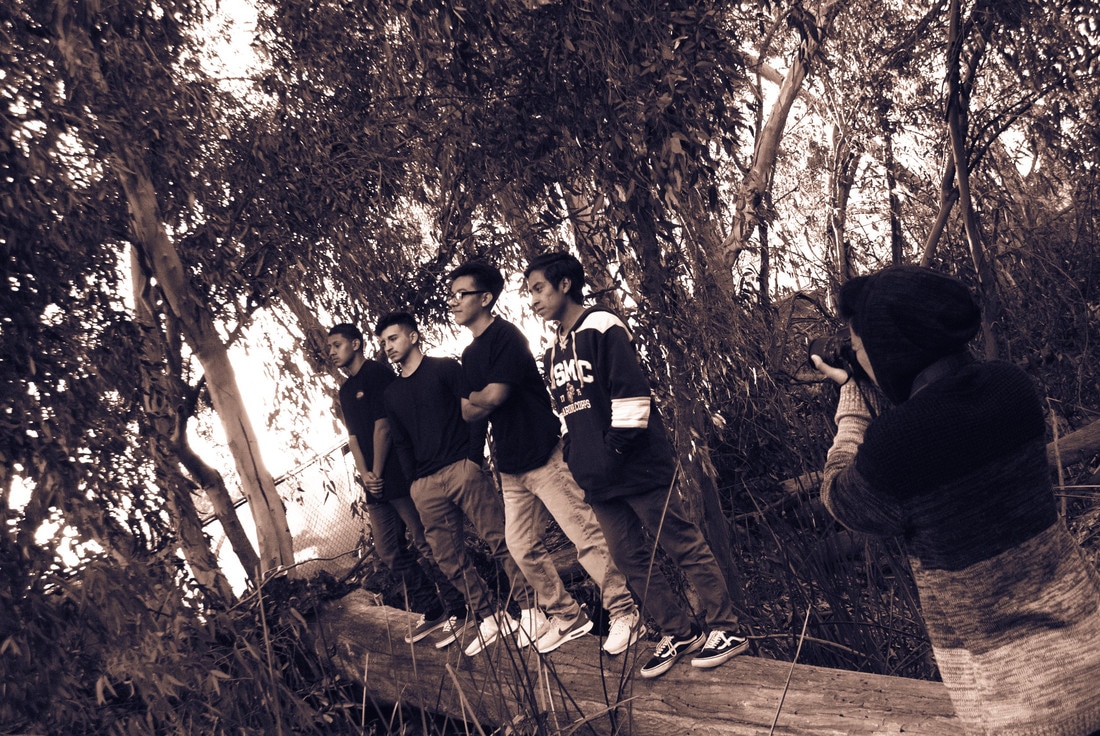
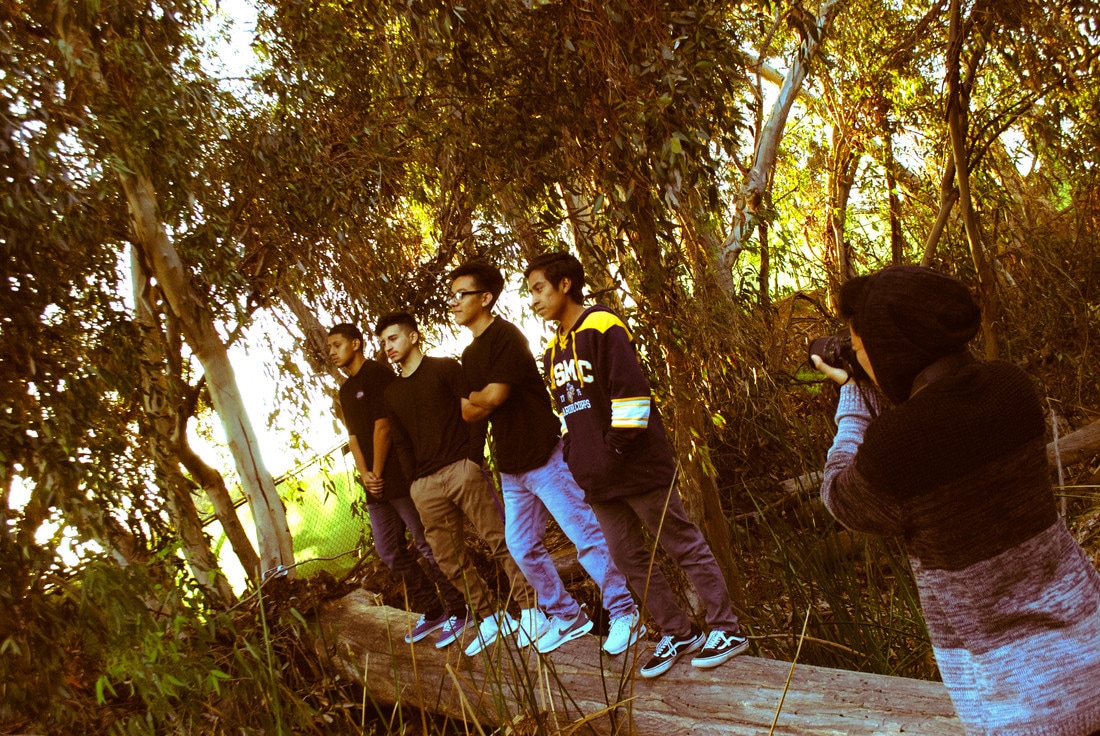
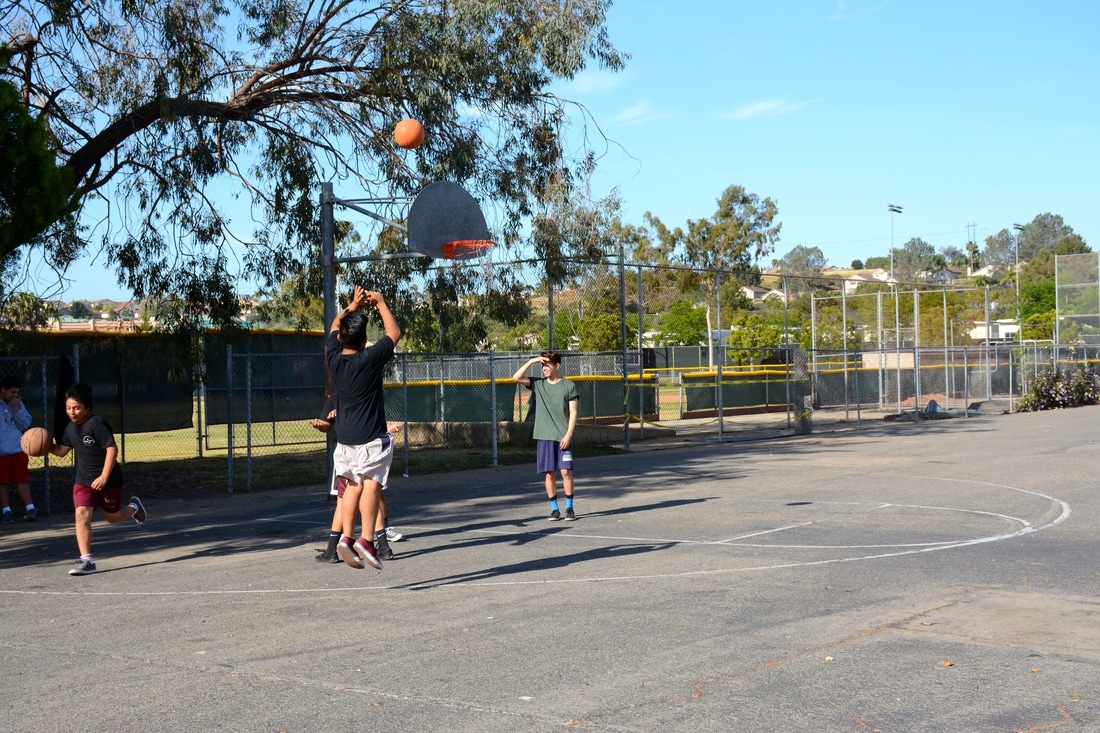
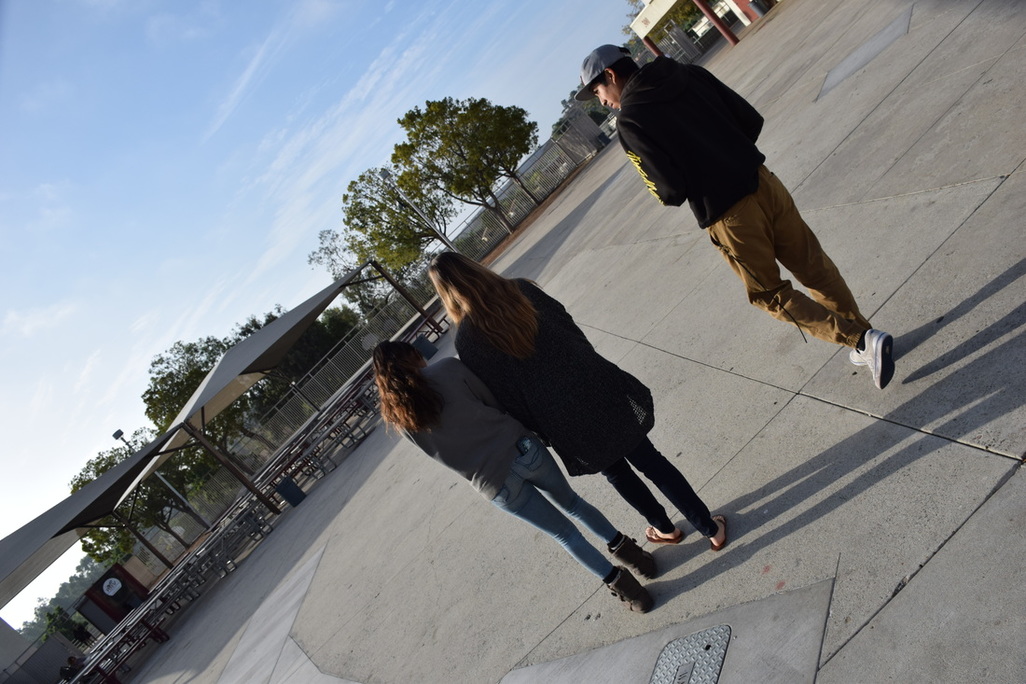
This Photograph was taken at the duck pond near the Rancho Buena Vista High School. The location of this picture was really amazing I liked the fact that it was taken outside on a nice sunny day. When I was taking this picture I wasn’t think of anything I just wanted to take pictures of my friends and when I captured it, it really surprised me how it came out it almost looked as if I was using a leading line for the image. The camera I was using for this image was a Nikon D5300 with a 18- 140mm lens. The software I decide to with was the Adobe Photoshop and the iPhoto and it came out amazing. The colors I used was its original colors that day we went to the duck pond that day.
lightroom
4/28/17
sports
4/27/17

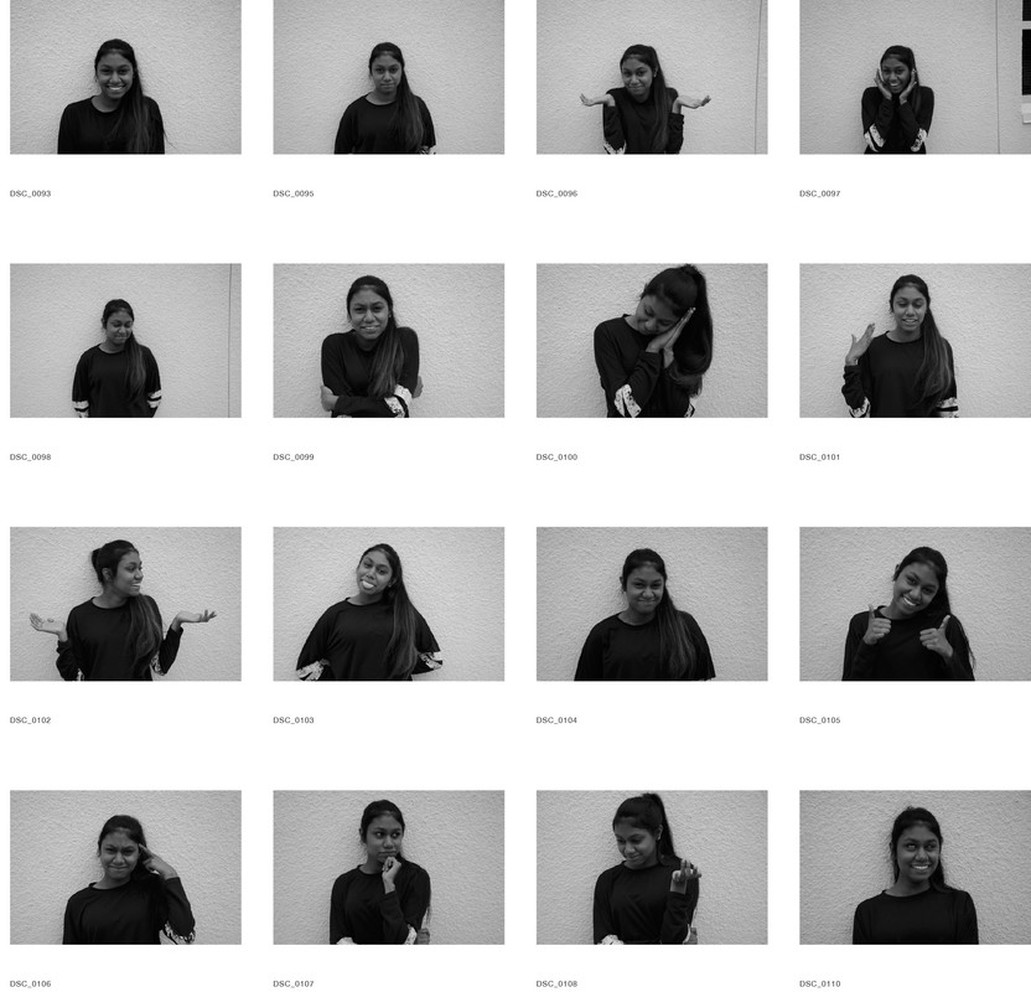
MoodPortraits
4/21/17

composite
4/18/19
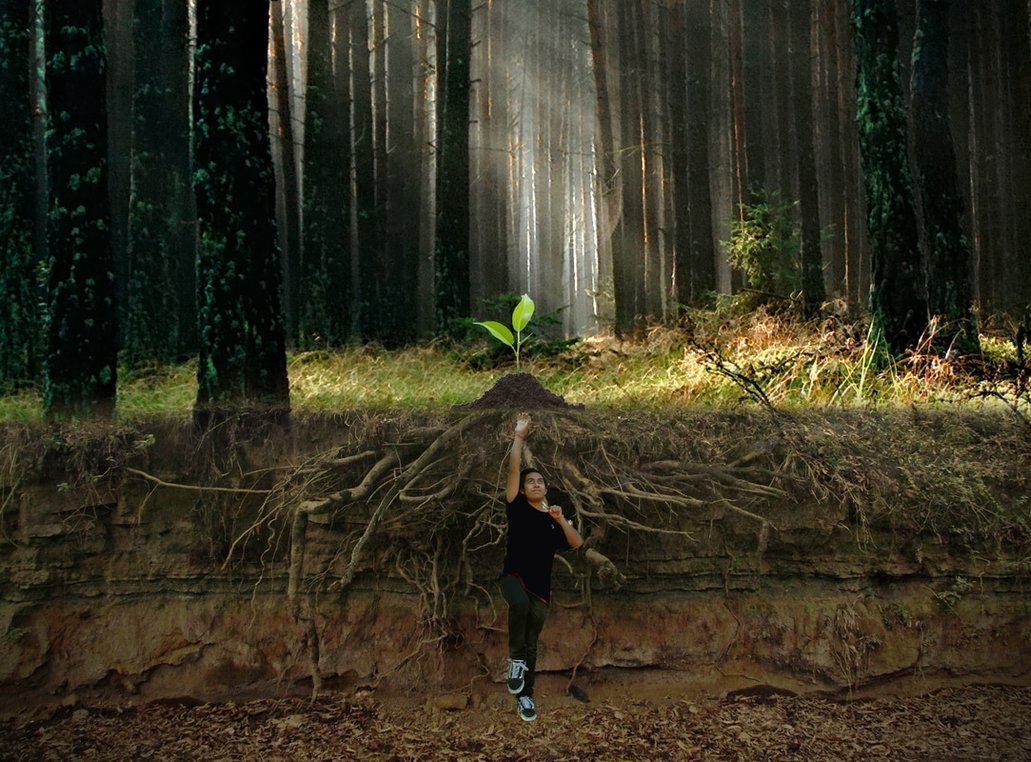
"Sometimes I wonder if I'll ever make it, but there's only on way I'ma know, I'm like a seed planted in the dirt, Feels like I've been waiting forever to grow." -Logic
The song I chose to use for this composite project was Inception by the rapper logic, one of my biggest idol out there. The reason why I chose this specific song was because of the words he uses and the way the song sounds is so amazing. The one line in the song that really caught my attention was "Sometimes I wonder if I'll ever make it, but there's only on way I'ma know, I'm like a seed planted in the dirt, Feels like I've been waiting forever to grow." That one line really hit me and I knew that I had to use the song for my project. From that one line I felt like i knew what the message he was trying to give out to his fans so i decide to make this photoshop relate to that one line and i think that it really combines really good to the song.
Flying
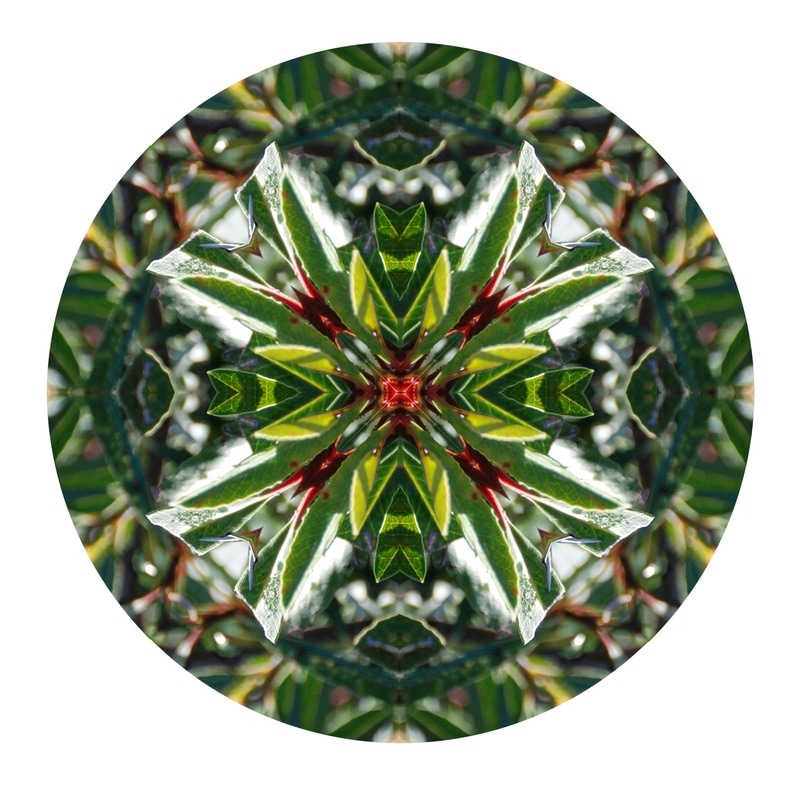
Mandala
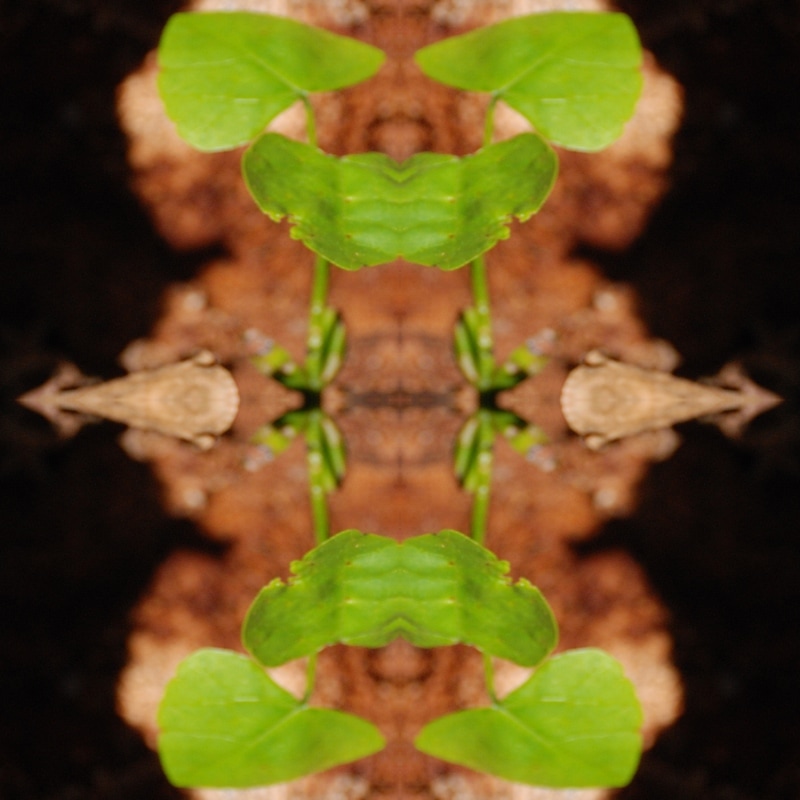
Mandala is a circular picture that is slit up into triangles. In each triangle there is a pattern or a section of a photograph. Them it is repeated, which in turn create shapes or geometric designs in it. In making the mandala, I found out that I like seeing the form of the mandala happen. I didn't know it some of them were going to work but as I was making them I saw that they were going to work.My favorite one was the on made from a picture of a tree because it came out amazing. If I had to do this again I would've made the colors pop more after I made the mandala.
1.First you'll want to open up two tabs on Photoshop: first tab will be the template and the second tab will be to photo you want to use.
2. One the mandala template click on the magic wand tool (under the quick selection tool) and select one section on the mandala.
3. Drag the section selected over the photo you want to use (do not click to move tool stay on the magic wand tool). Place it on the part you want to be the mandala and press command+c
4. Go back to the mandala tab and press command+v in the section and duplicate that layer.
tessellation
A tessellation is a flat surface tile like picture with an image that has been rotated to create a more geometric look. it is an arrangement of shapes and images that closely fit together and create a repeating pattern. I liked how each picture could be manipulated into some cool and abstract. My favorite image was probably the plant because it looked so cool, but if were to do this again i would do it more differently.
1. Open up adobe flash and go to file--> new then go to custom: make sure it is 8in by 8in image with 300 resolution.
2. Then go to view--> new guide layout and place the number of rows and columns wanted: use this to ensure that each image is the same size and that the pictures fit perfectly
3. Then go to file --> open and choose a picture to transform. If you are doing a 4x4 tessellation then make sure the image is 2in wide and 2in in height.
portraiture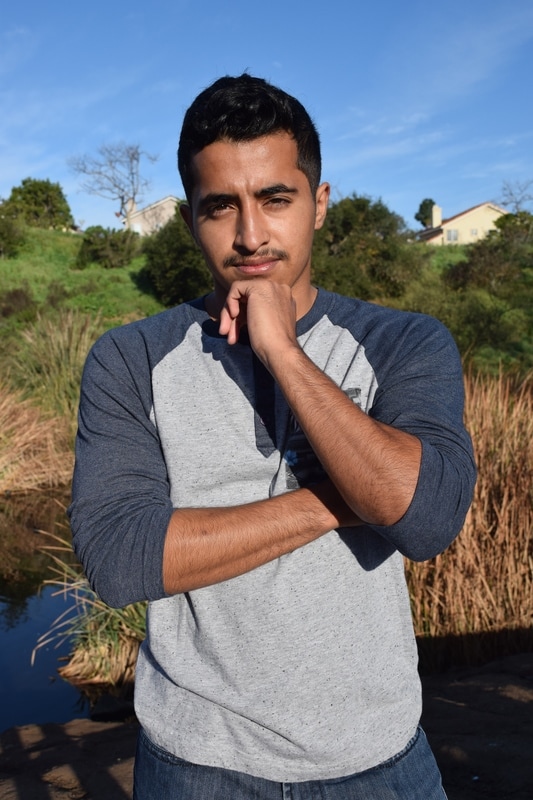
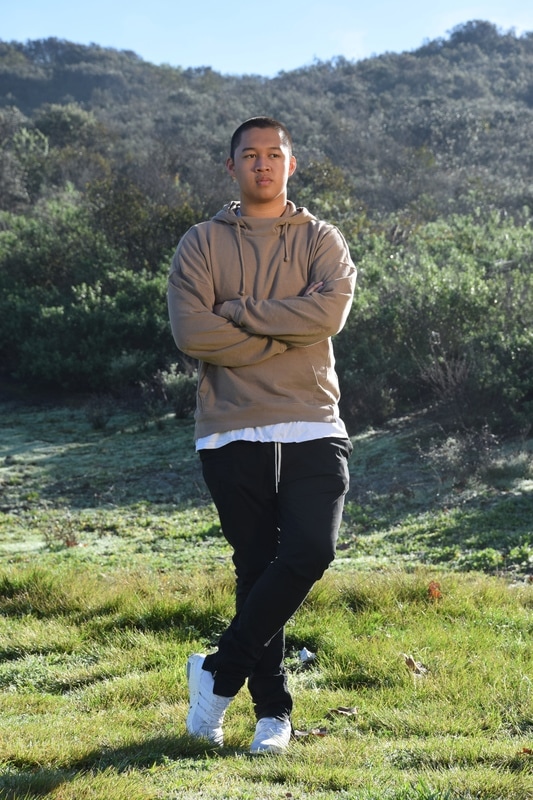
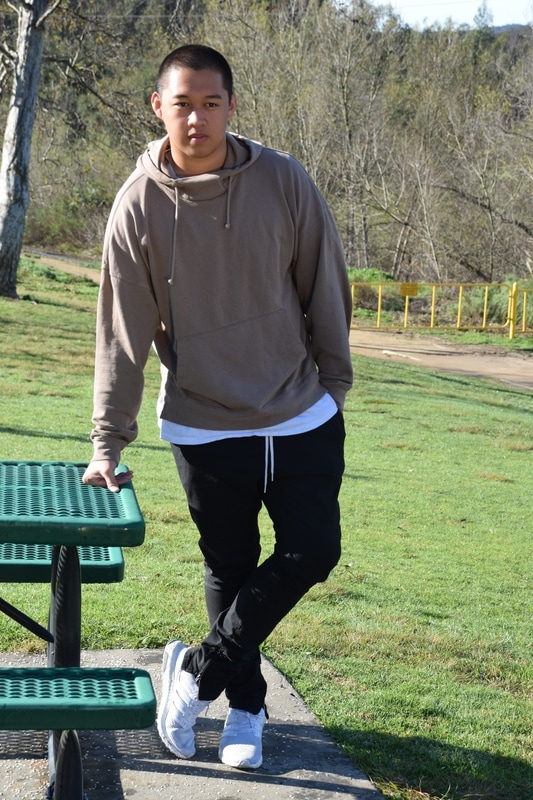
Aperture-f/8, ISO-200, Shutter Speed-1/350
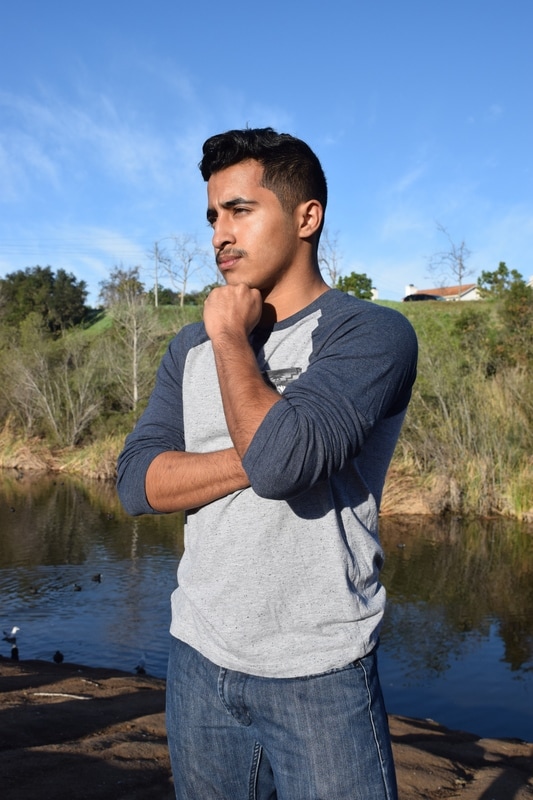
Aperture-f/8, ISO-200, Shutter Speed-1/350

Aperture-f/8, ISO-200, Shutter Speed-1/350
|
Aperture-f/8, ISO-200, Shutter Speed-1/350
Aperture-f/8, ISO-200, Shutter Speed-1/350

Aperture-f/8, ISO-200, Shutter Speed-1/350
|
portraiture project
While doing this portraiture project I learned so much like learning how to using diffrent Aperture,ISO,Shutter Speed. What I also learned from portraiture was that taking photos from a close up angle or just from a angle is really cool. Also using the reflector was a really neat thing to use, we decided on the poses based on our preferences and how we would like to show ourselves as. The thing I used to decide what poses is that I asked the person posing which one he felt comfortable doing so that it would be better for the both of us.A top professional would charge $200-$500+ per hour / $250-$1,500 per image. Thats for people looking for a really top notch picture.
While doing this portraiture project I learned so much like learning how to using diffrent Aperture,ISO,Shutter Speed. What I also learned from portraiture was that taking photos from a close up angle or just from a angle is really cool. Also using the reflector was a really neat thing to use, we decided on the poses based on our preferences and how we would like to show ourselves as. The thing I used to decide what poses is that I asked the person posing which one he felt comfortable doing so that it would be better for the both of us.A top professional would charge $200-$500+ per hour / $250-$1,500 per image. Thats for people looking for a really top notch picture.
Education For all contest:

Education For All
I once read a very inspiring quote and it said “Education is the most powerful weapon which you can use to change the world” by Nelson Mandela. I believe what Nelson was trying you say was that education is one major key to get to places where you want to get. Once you have reached your goal you have the power to change the world that you choose to live in. So with amazing opportunity that we have, I believe we should take advantage of it to create a better world not only for us but for the next generation of people that will carry out our dreams.
I once read a very inspiring quote and it said “Education is the most powerful weapon which you can use to change the world” by Nelson Mandela. I believe what Nelson was trying you say was that education is one major key to get to places where you want to get. Once you have reached your goal you have the power to change the world that you choose to live in. So with amazing opportunity that we have, I believe we should take advantage of it to create a better world not only for us but for the next generation of people that will carry out our dreams.
Aperture-f/1.8
ISO-200
Aperture-f/1.8
ISO-200
Aperture-f/1.8
ISO-200
Aperture-f/1.8
ISO-200

Aperture-f/1.8
ISO-200
Aperture-f/1.8
ISO-200
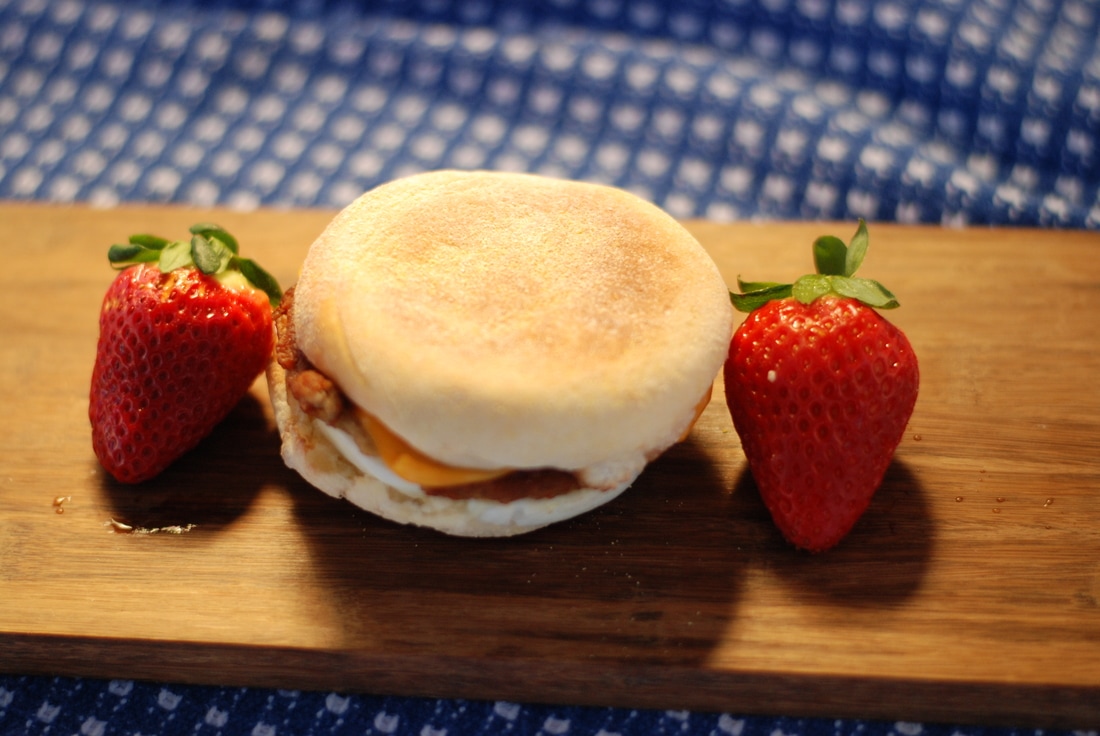
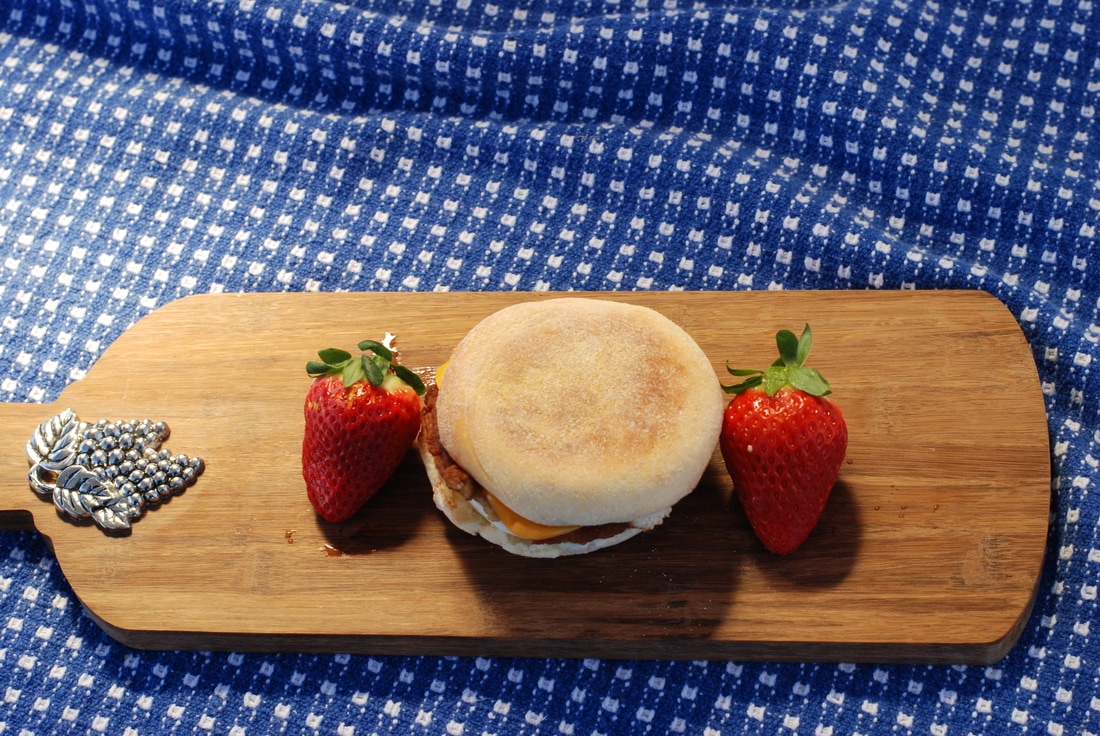
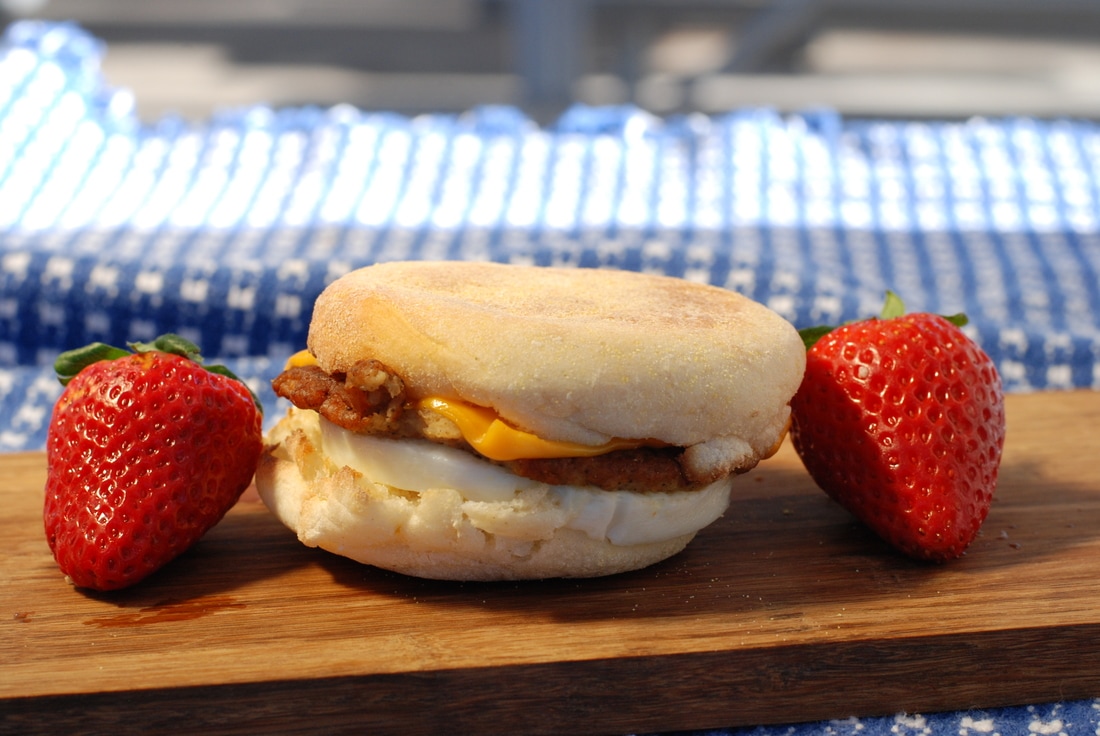
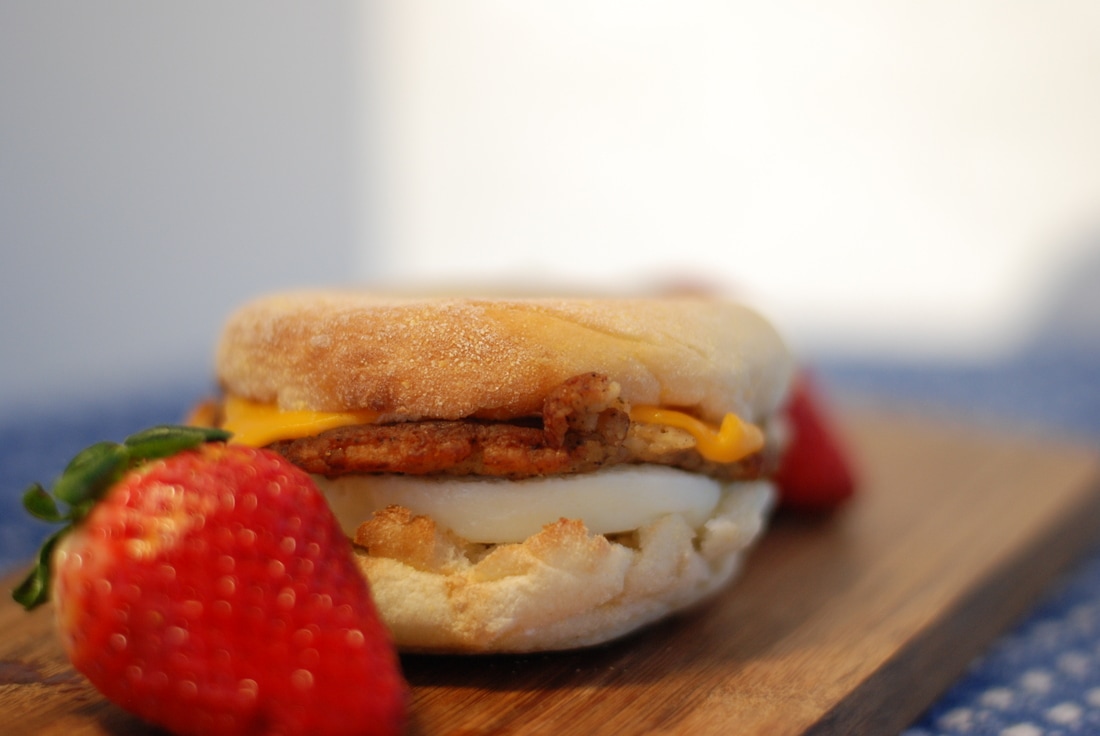
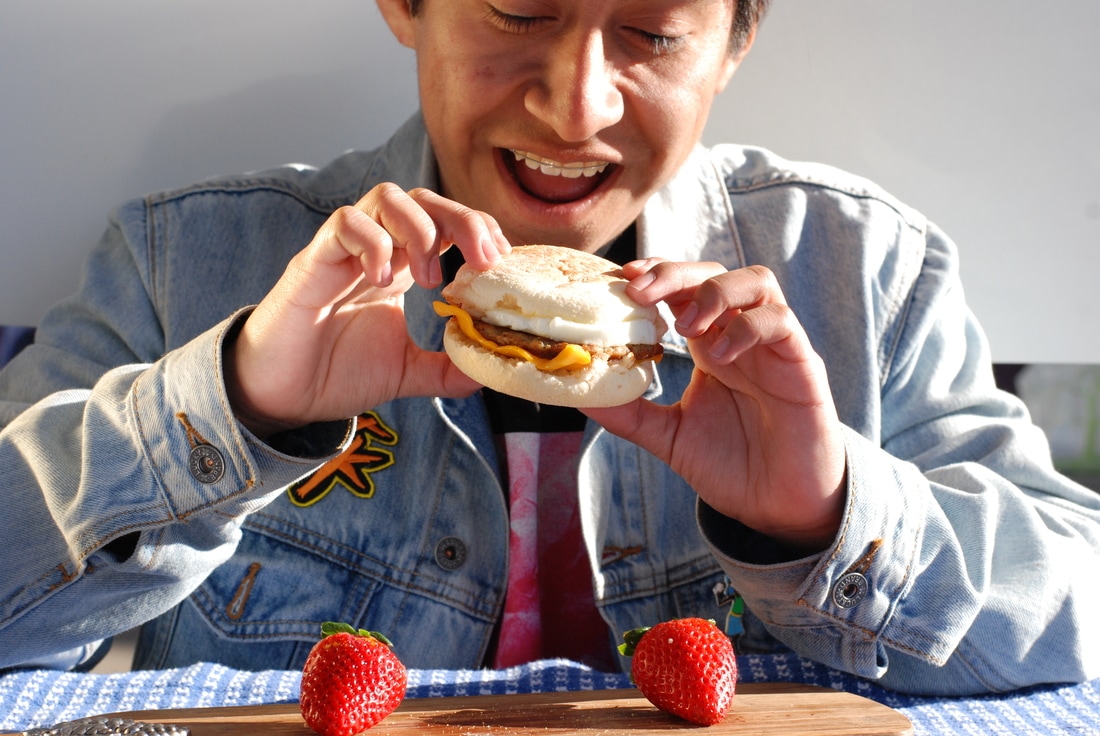
Food Project
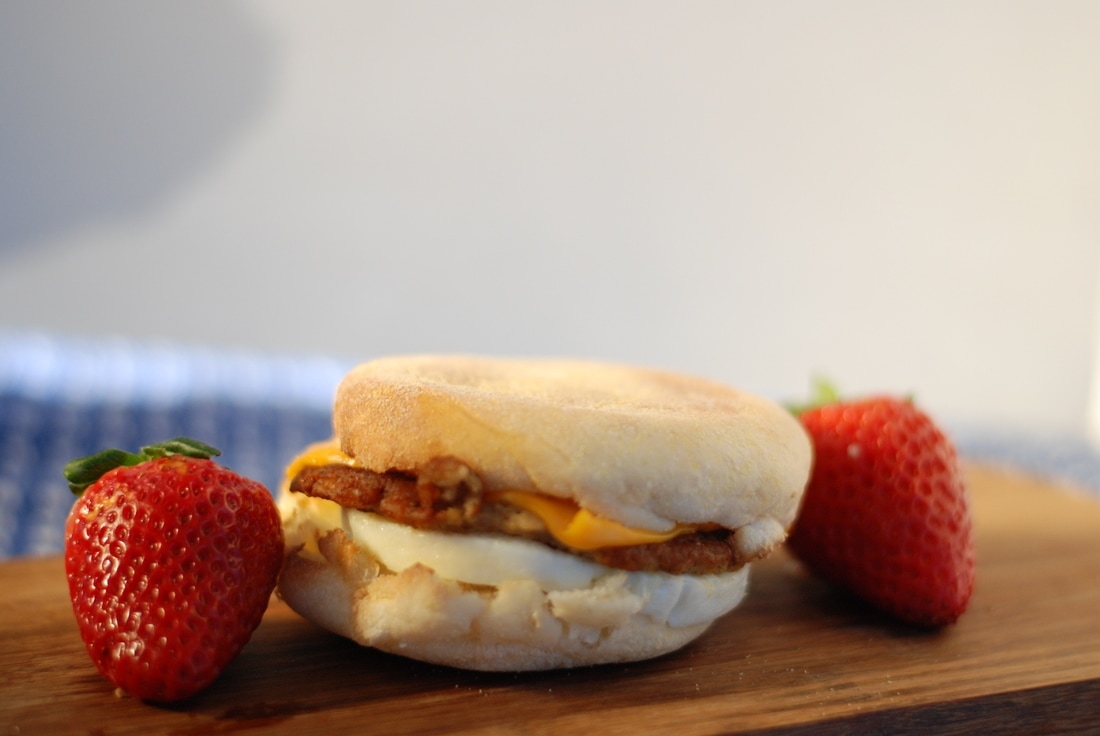
For this project i decided to use a burger from McDonalds the burger came with cheese,egg,buns, and a piece if meat. The props I decided to use was a fancy cutting board and also some strawberries I learned that it takes hours to set up a photograph that involves food just to get the perfect image. I knew most of the fake food that is used like glue, dry ice, baby oil, etc. I put a lot of thought into the set up, and the food itself to make it look as best as possible, wether it was props or the way I positioned my food to make it look commercialized as possible.
For this project i decided to use a burger from McDonalds the burger came with cheese,egg,buns, and a piece if meat. The props I decided to use was a fancy cutting board and also some strawberries I learned that it takes hours to set up a photograph that involves food just to get the perfect image. I knew most of the fake food that is used like glue, dry ice, baby oil, etc. I put a lot of thought into the set up, and the food itself to make it look as best as possible, wether it was props or the way I positioned my food to make it look commercialized as possible.


Ansel Adams project:
To photograph the moon:
1. Use a tripod! A flat surface will only allow you to shoot straight, and shooting the moon means that you'll be shooting up and constantly re-adjusting the tripod as the moon moves throughout the night.
2. Use a shutter release cord, remote or the camera's self timer if you don't have one, so that you don't move the camera when pressing the shutter release during a long exposure.
3. Use a zoom lens and zoom in as much as you can to the moon. It's okay if it's not a super fancy lens, this was shot using a 15 year old $100 lens. Focus in on the craters and details on the moon.
4. ISO 1250- 1600, so that you can use as fast a shutter speed as you can without losing detail-the longer the shutter speed, the more chances you have the camera will shake even slightly in the wind, resulting in an out of focus photograph.
5. Aperture priority of f/5.6 since you are not worried about capturing any details other then the moon.
6. Bracket your exposure, meaning over expose and underexpose the photograph from what the camera is telling you. Generally the camera will overexpose the moon, so you'll get nothing but a white blob in the sky. Use the exposure compensation button (the +/- button below the shutter release) and change the exposure to -0.5, then -1.0, then -1.5 and so on, until you start seeing detail in the moon. You may go as far as -5.0 exposure compensation to get what you need.
7. Take a fair amount of photos and keep refocusing as the night progresses. The photographs may look focused on the camera's display, but you won't really see if they're completely in focus until you upload them

Principles of art:
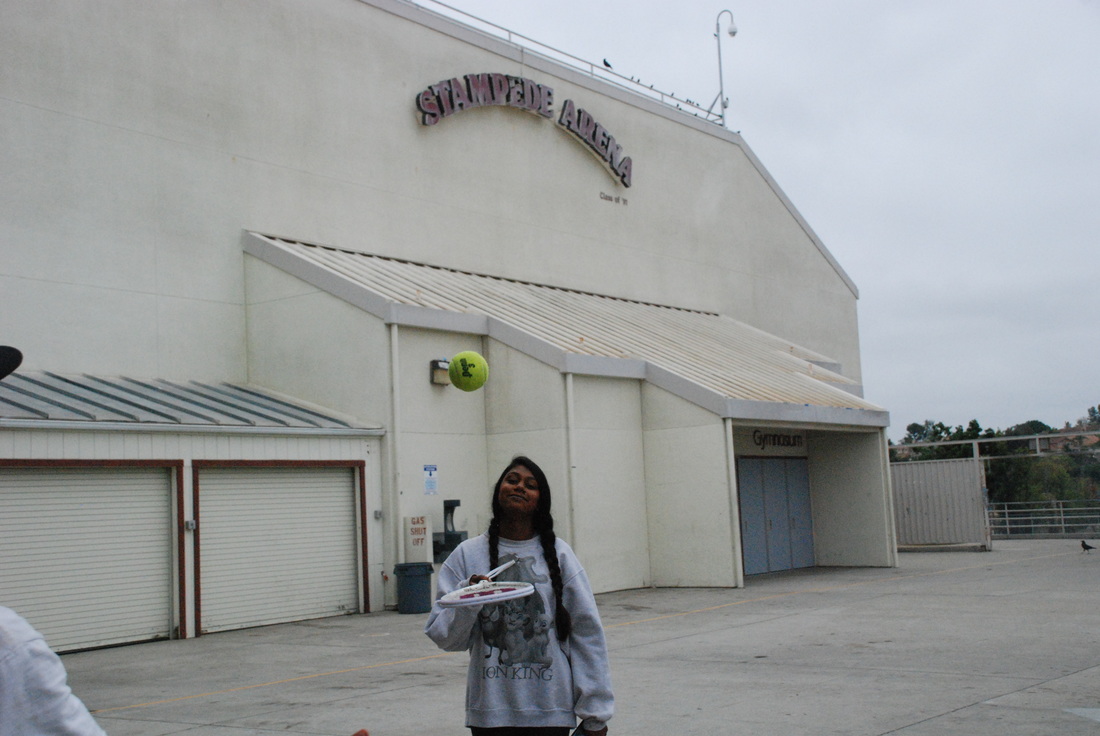
 Aperture f/8, Shutter Speed 1/800, ISO 400
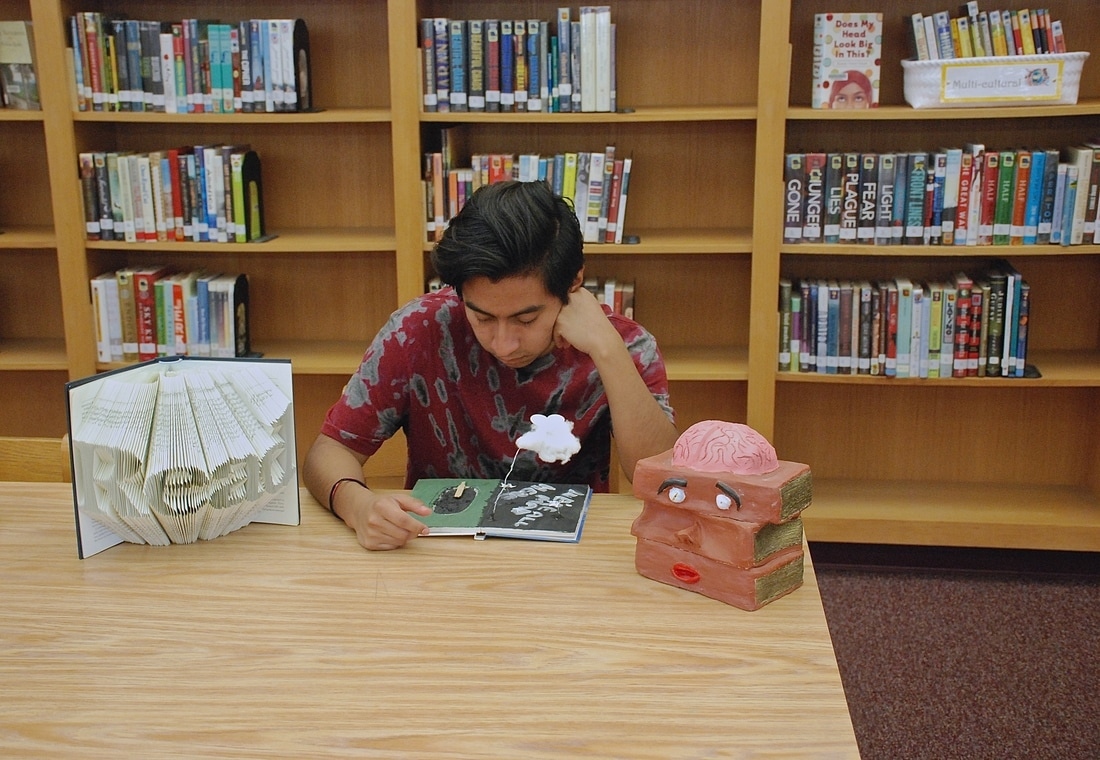
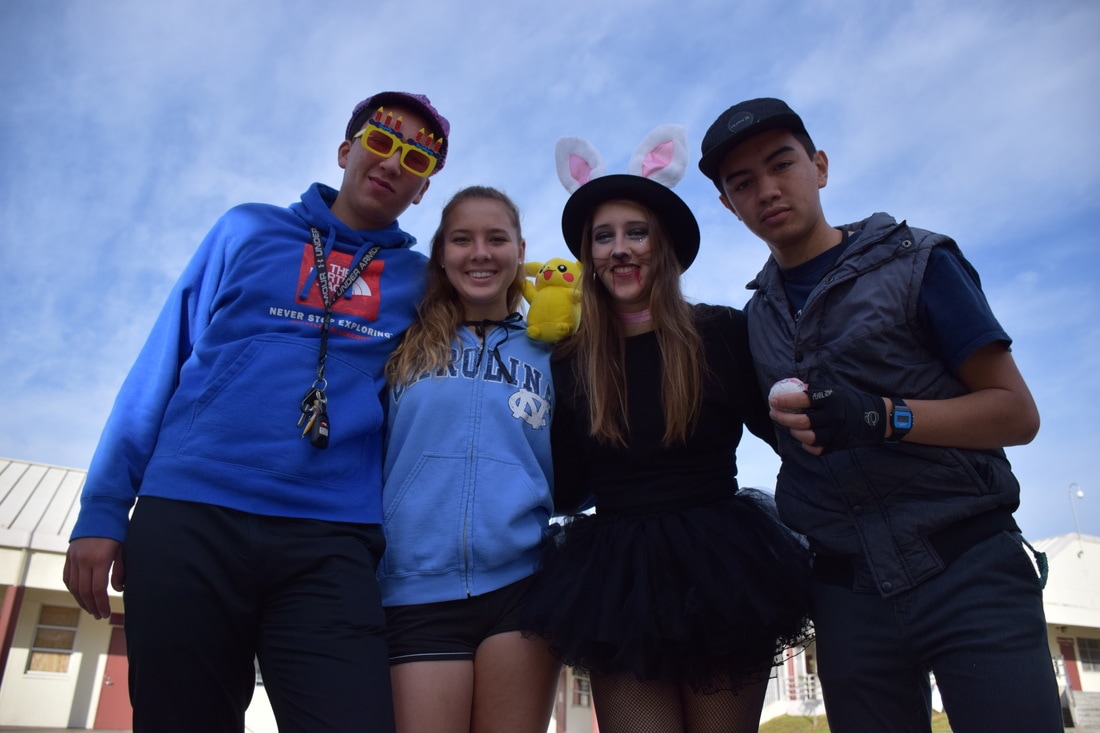
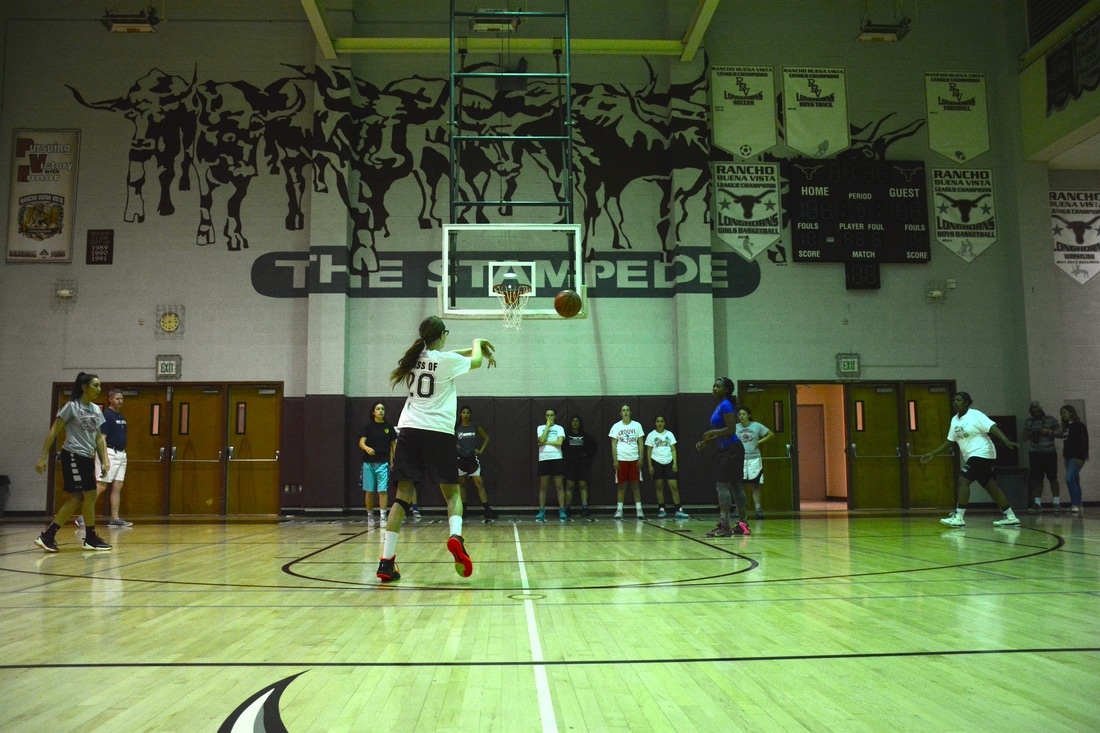
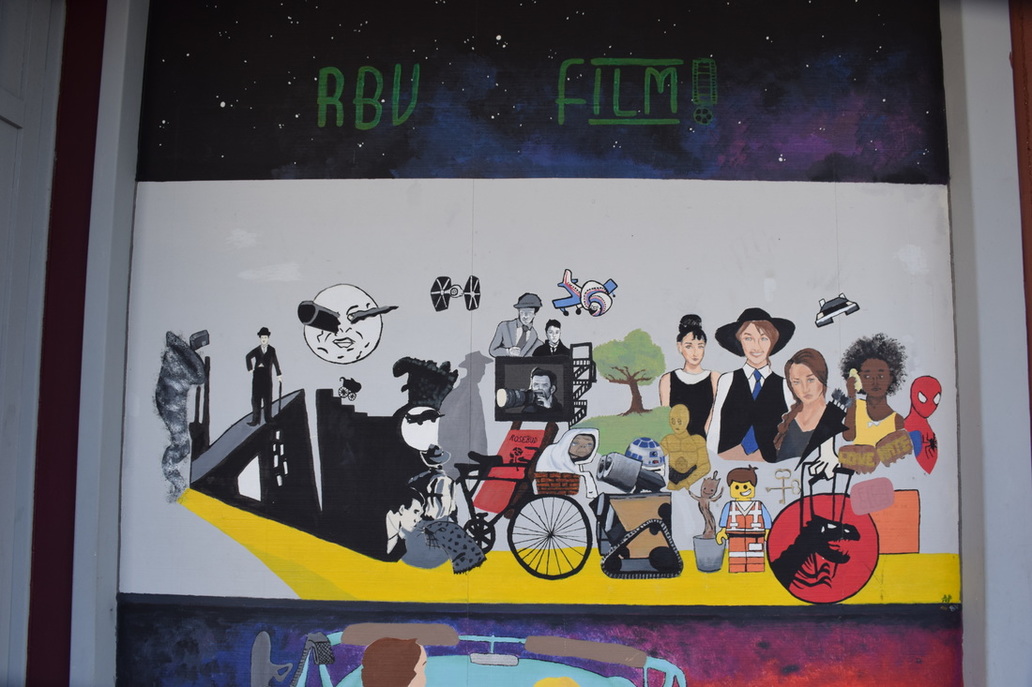
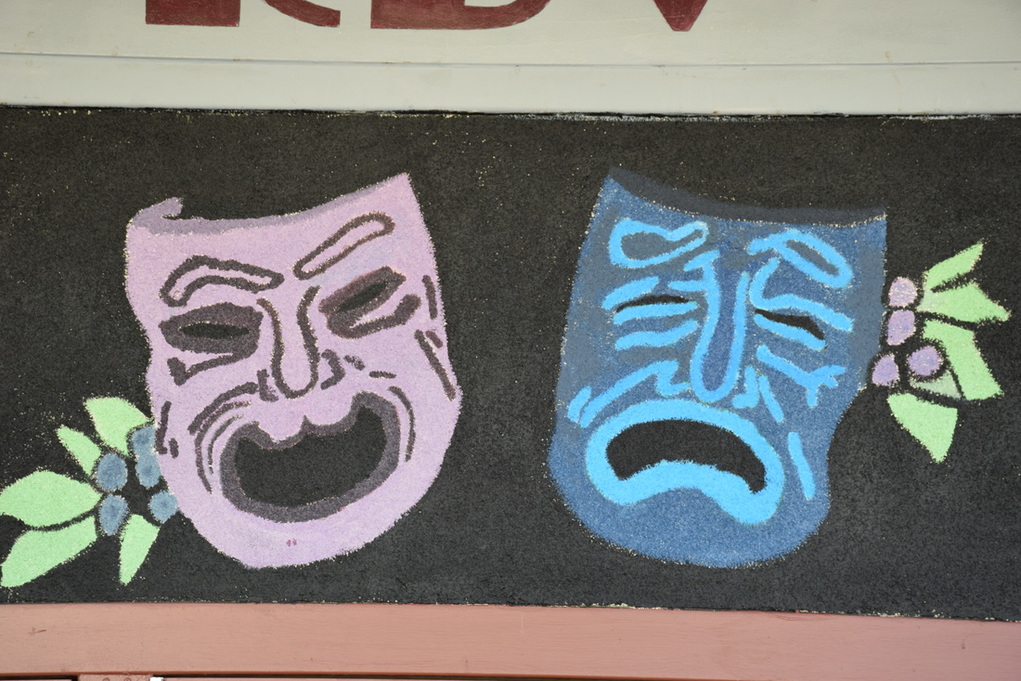
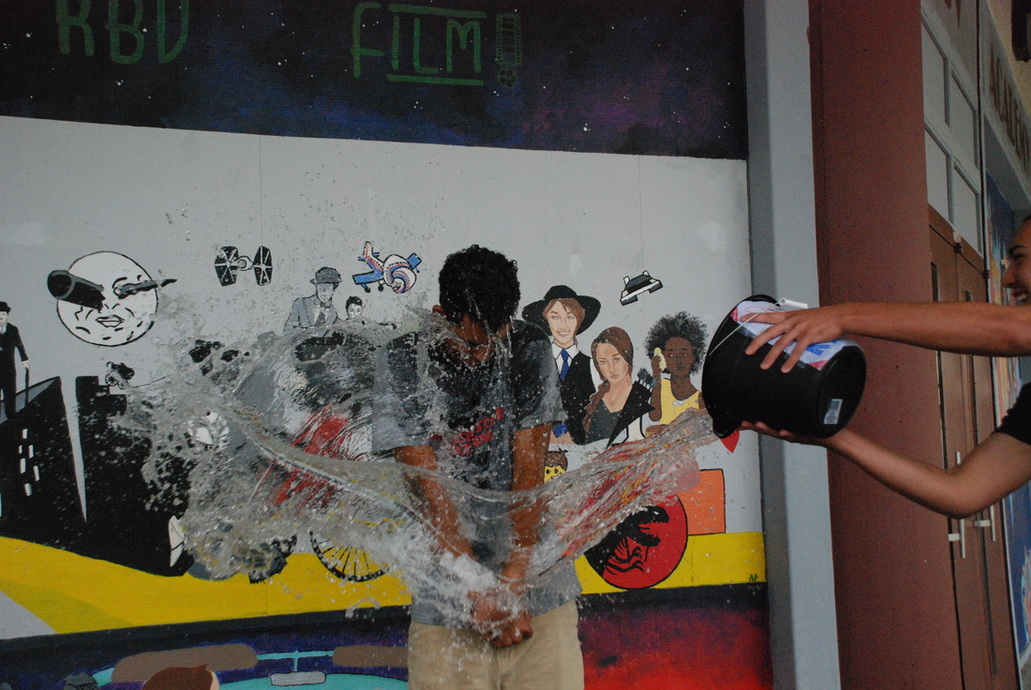
This picture is about the rbv film class and it represents the different types of films you can create. The Principle is within the types of characters that's in the drawing. This picture was successful because its a good example of Unity.
 Aperture f/8, Shutter Speed 1/800, ISO 400
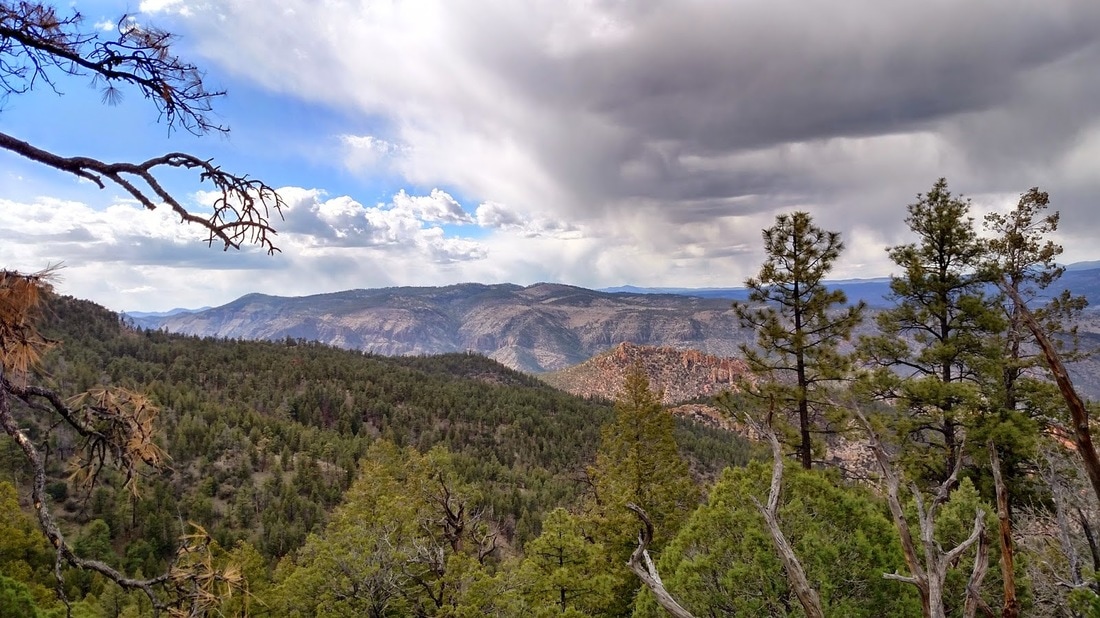
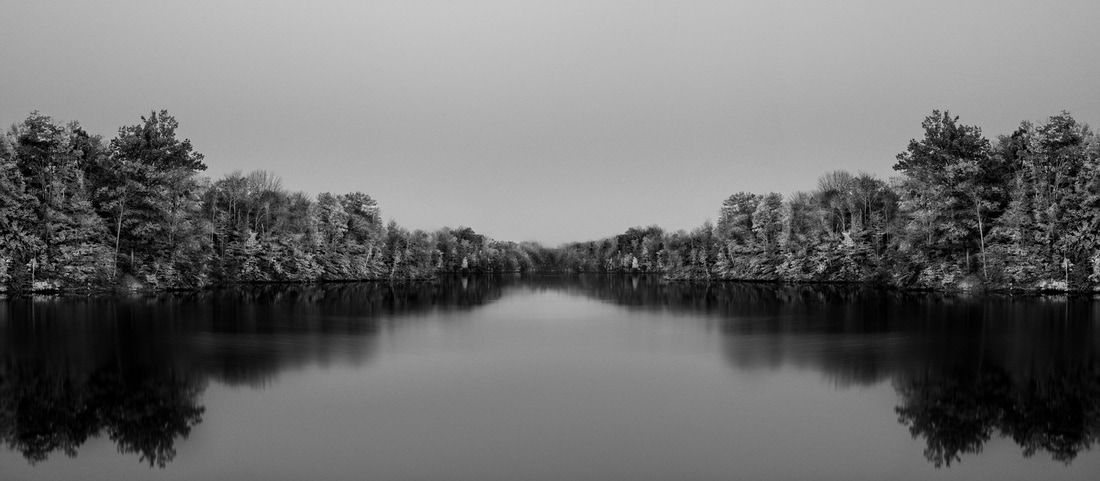
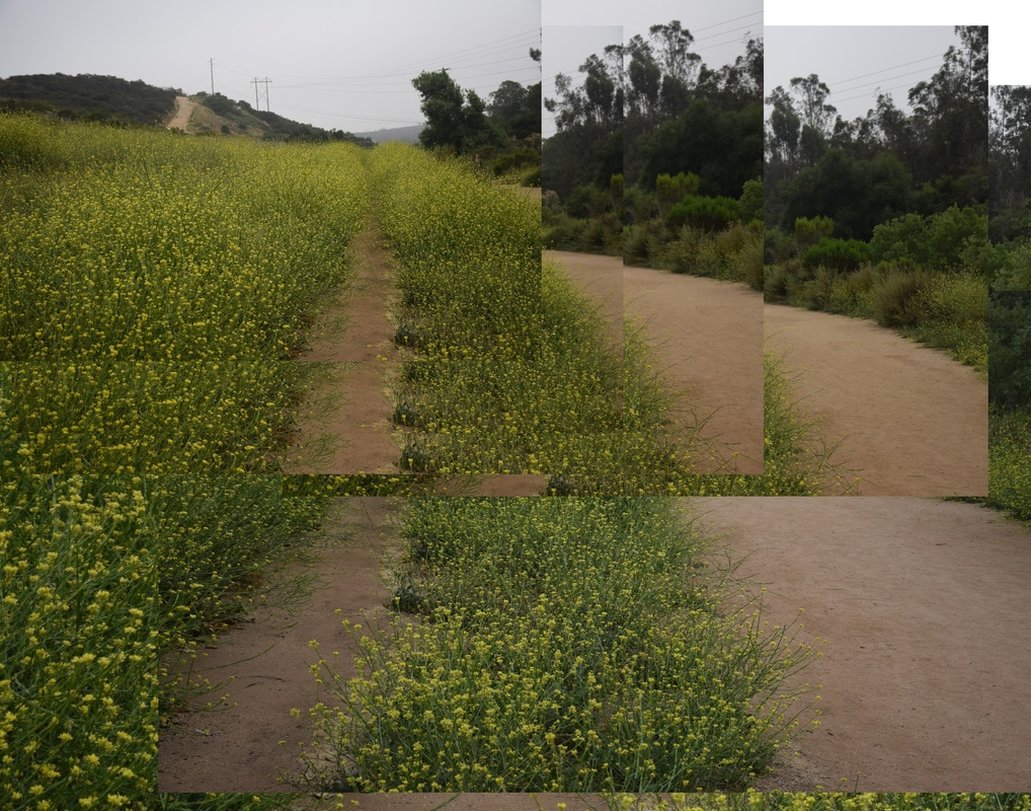
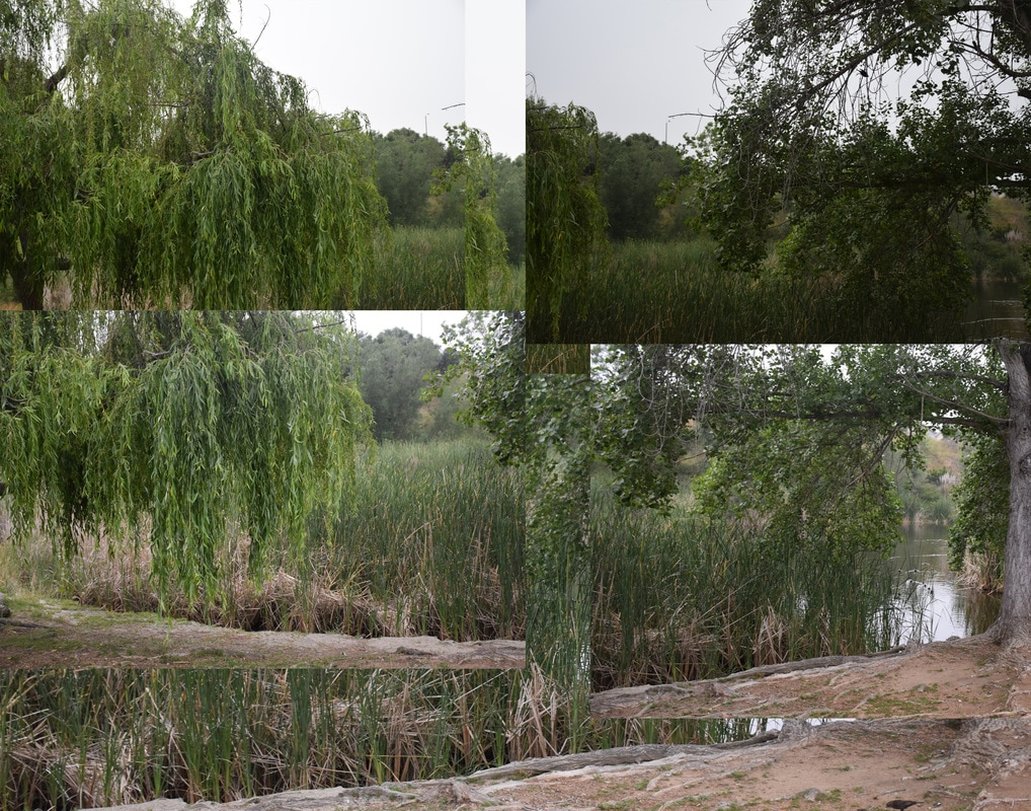
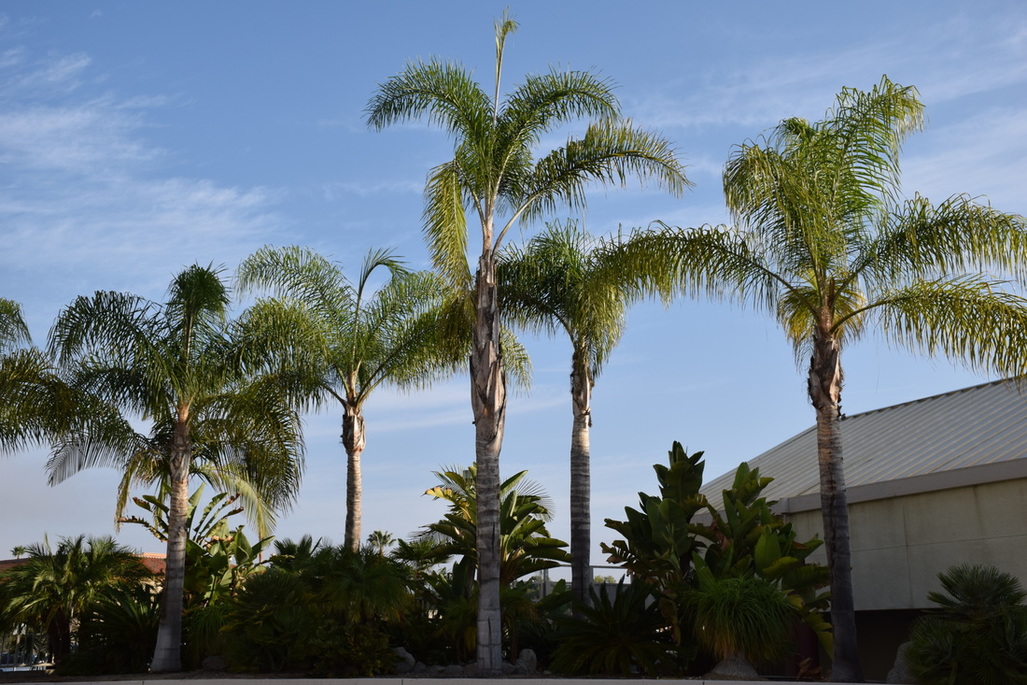
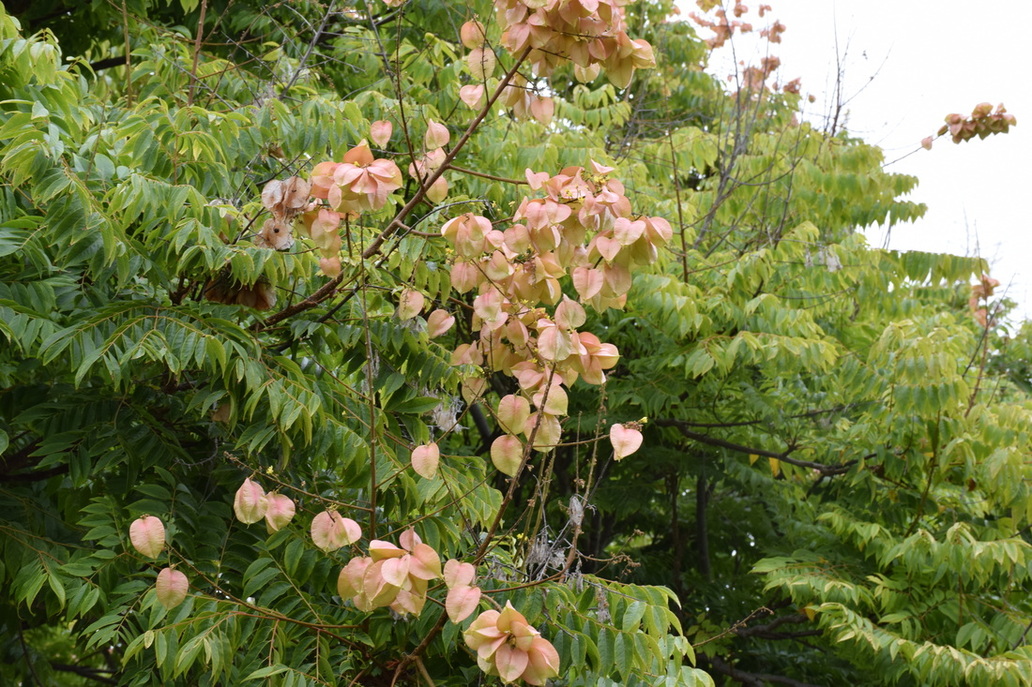
On this picture it was was all about variety with different types of sizes of tree. The principle is within the photograph is in the trees and small bushes. I think this picture was successful because its a good example of Variety.
 Aperture f/8, Shutter Speed 1/800, ISO 400
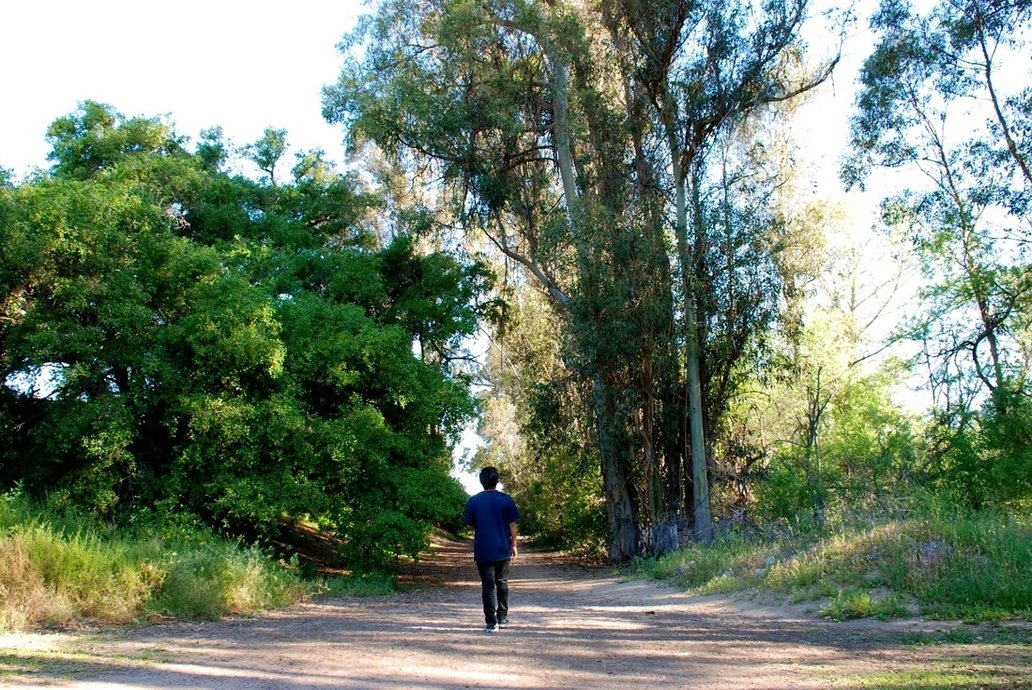
On this picture it was all about harmony within the environment of my partner. The principle is within the photograph is how peace full the picture seems like. I think this picture was successful because its a good example of Harmony.
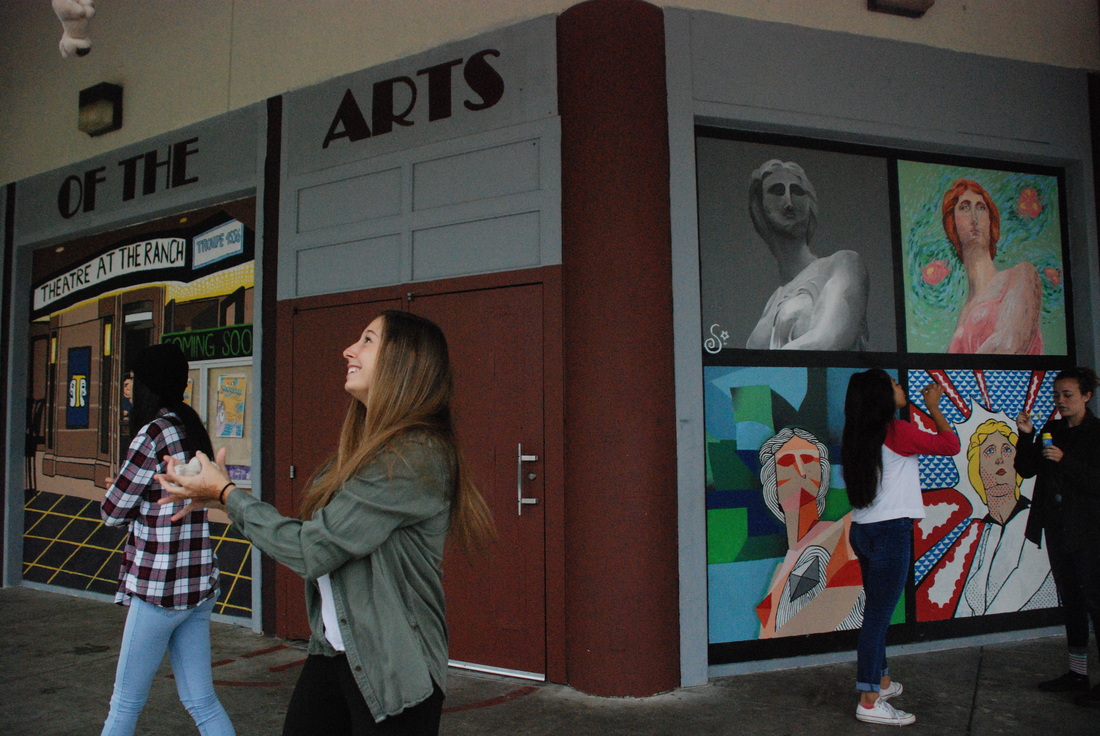
 Aperture f/8, Shutter Speed 1/800, ISO 400
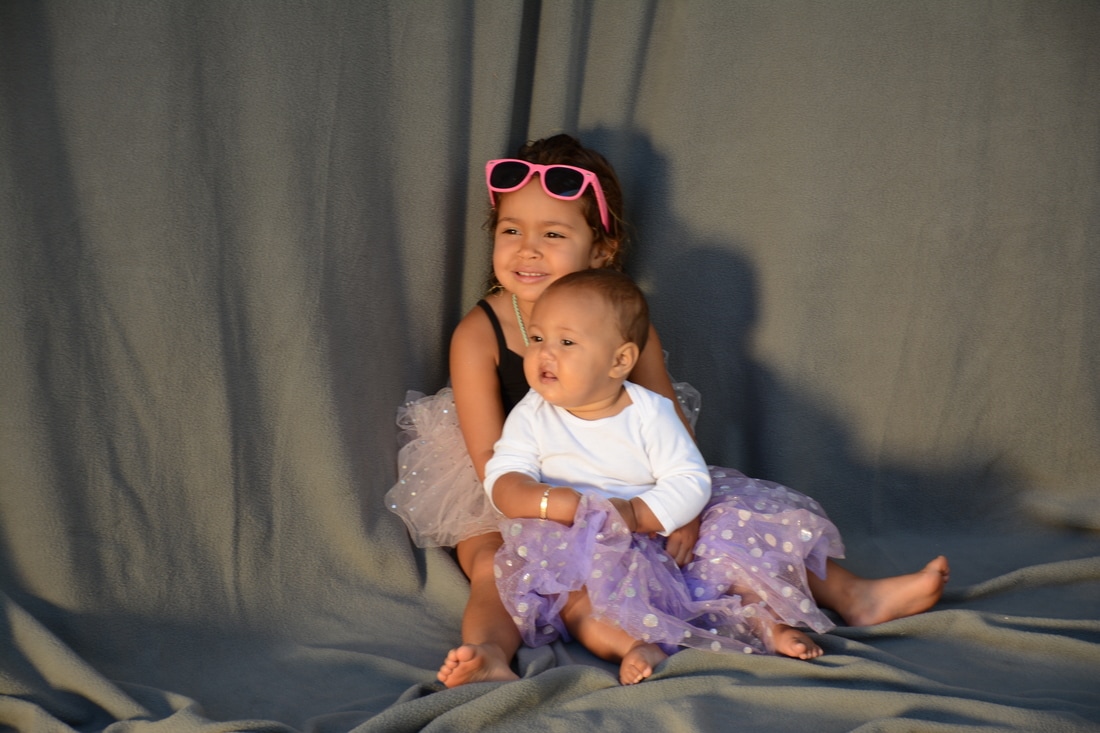
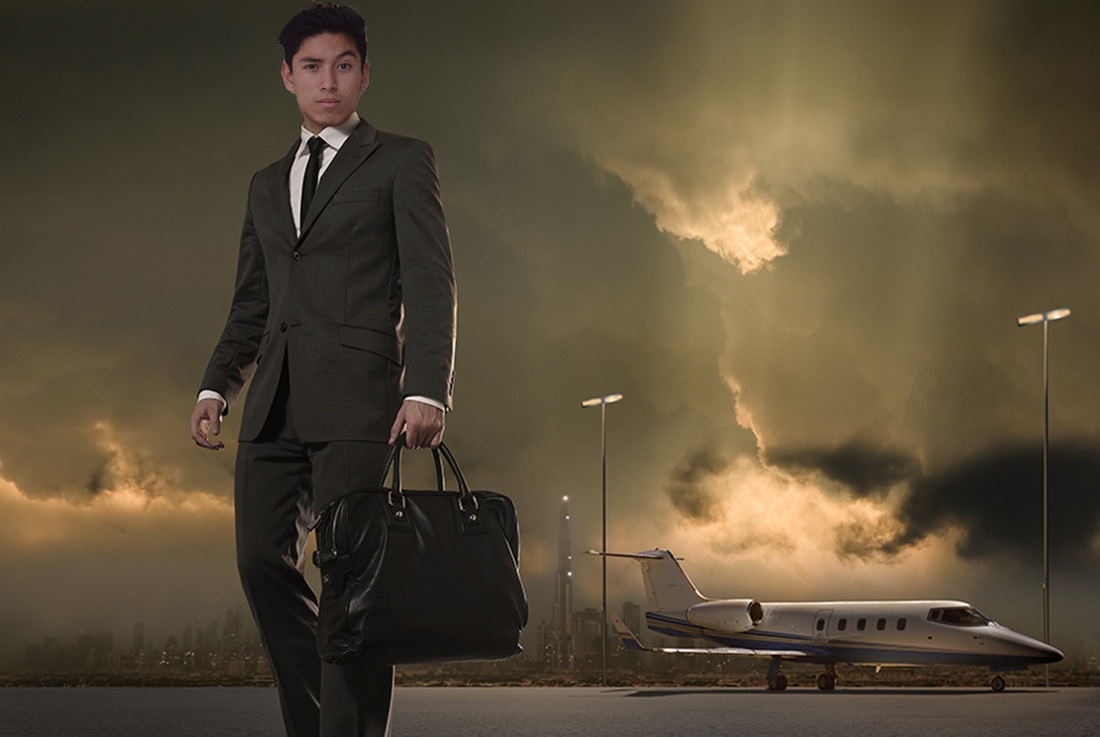
In this photograph you can see the main focus is the models in the image. This is a good example of emphasis because it puts its focus on one thing.
 Aperture f/8, Shutter Speed 1/800, ISO 400
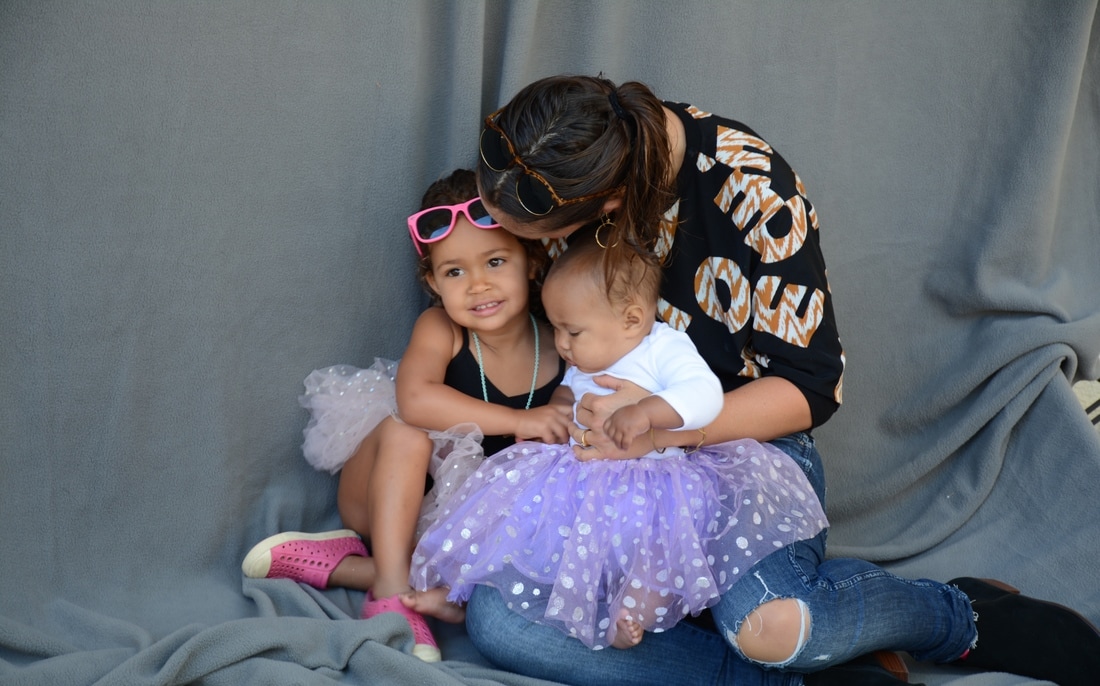
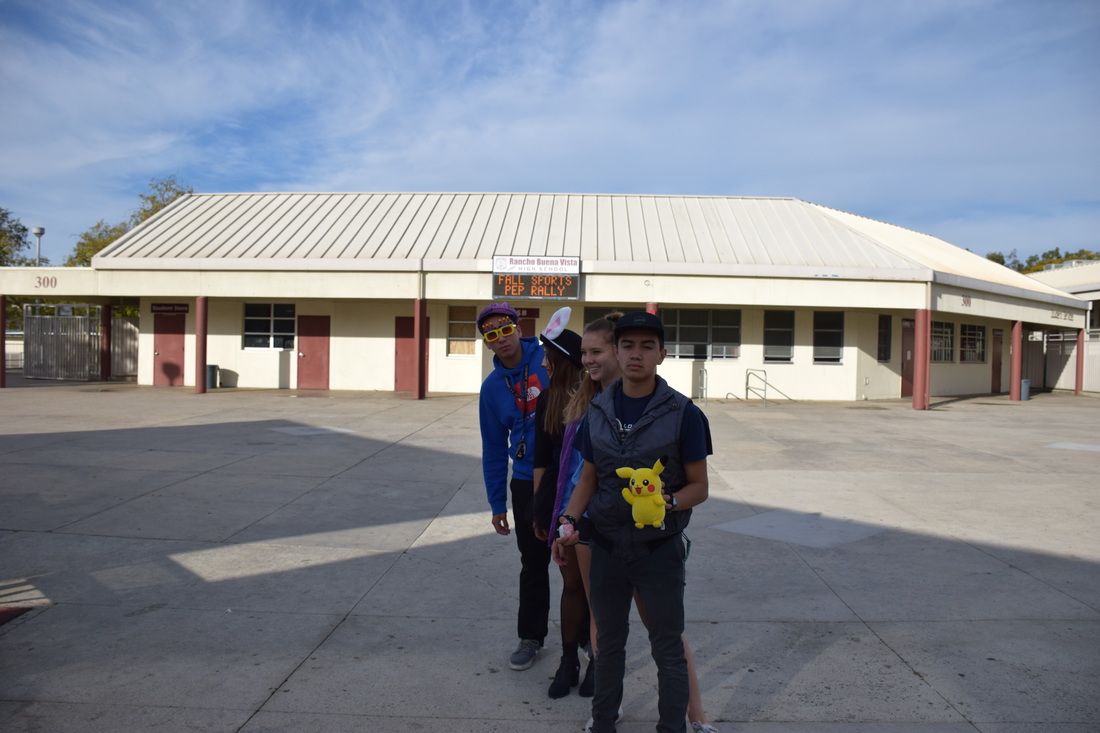
In this photo it was all about proportion between the student and the teacher. The principle is within the photograph its the size of the student and the teacher. I think that this picture was success full because its a good example of proportion.
 Aperture f/8, Shutter Speed 1/800, ISO 400
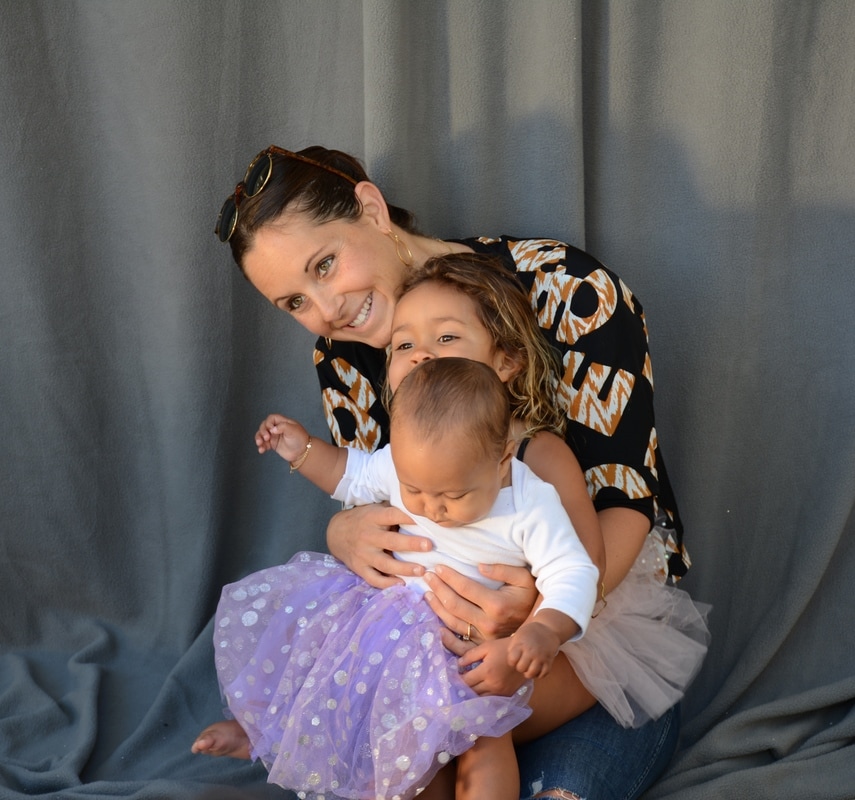
The photo was about balance of so many objects on one side and on the other not so much. The principle is within the photograph between the middle where my partner is standing. I think that the picture was success full because it's a good example of balance.
Elements of art:
 f/8, Shutter Speed 1/640, ISO 200
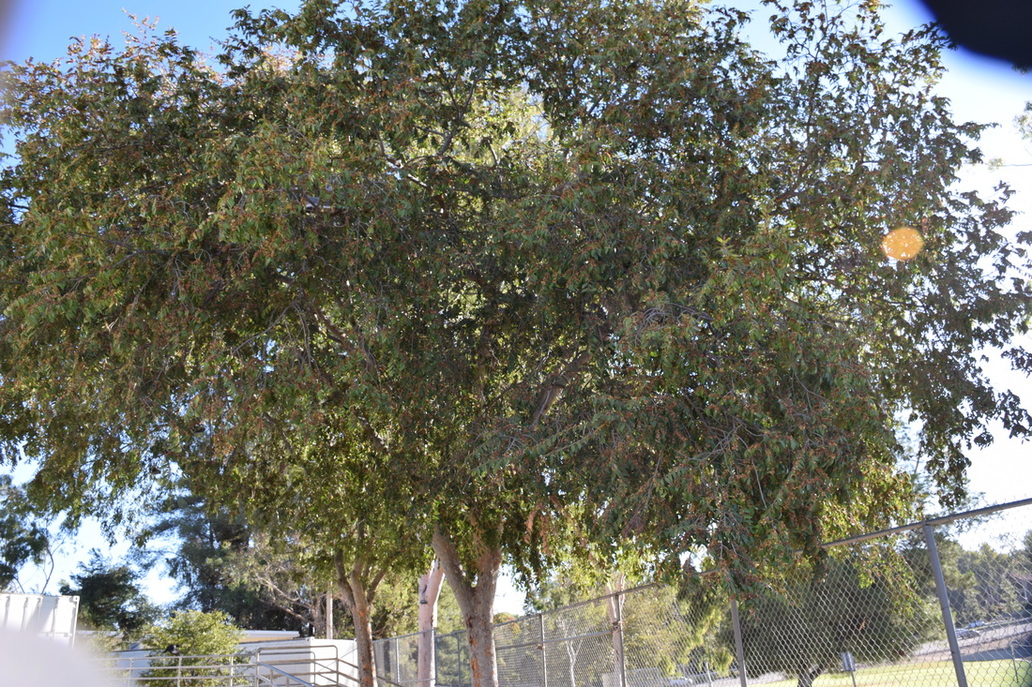
I took this picture of a tree next to the RBV boys locker rooms. The elements on this picture is on the tree and the colors of the leafs. I thought this picture was successful because its a good example of Value.
 f/8, Shutter Speed 1/640, ISO 200
I took this picture of the leaves all the way in the back of of the RBV school. The element in this picture is on the leaves and branches. I thought this picture was successful because its a good example of Texture.
 f/8, Shutter Speed 1/640, ISO 200
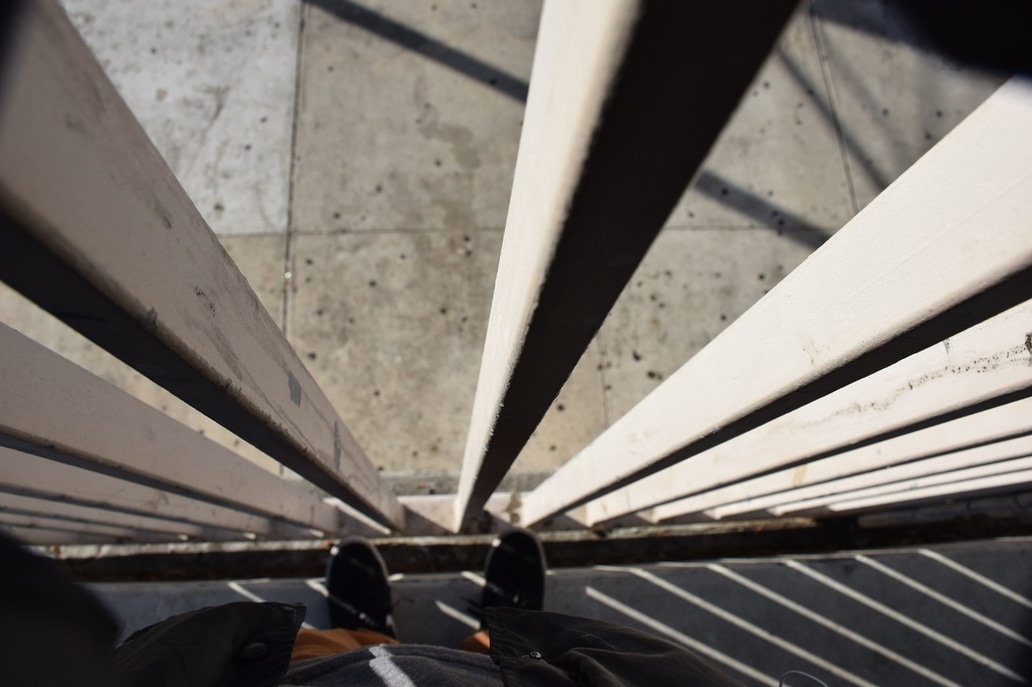
For this picture I decided to take the picture next to the role call numbers on the black top. The element is in the focus of my shoes as the subject of this element. I thought this picture was successful because its a good example of form.
 f/8, Shutter Speed 1/640, ISO 200
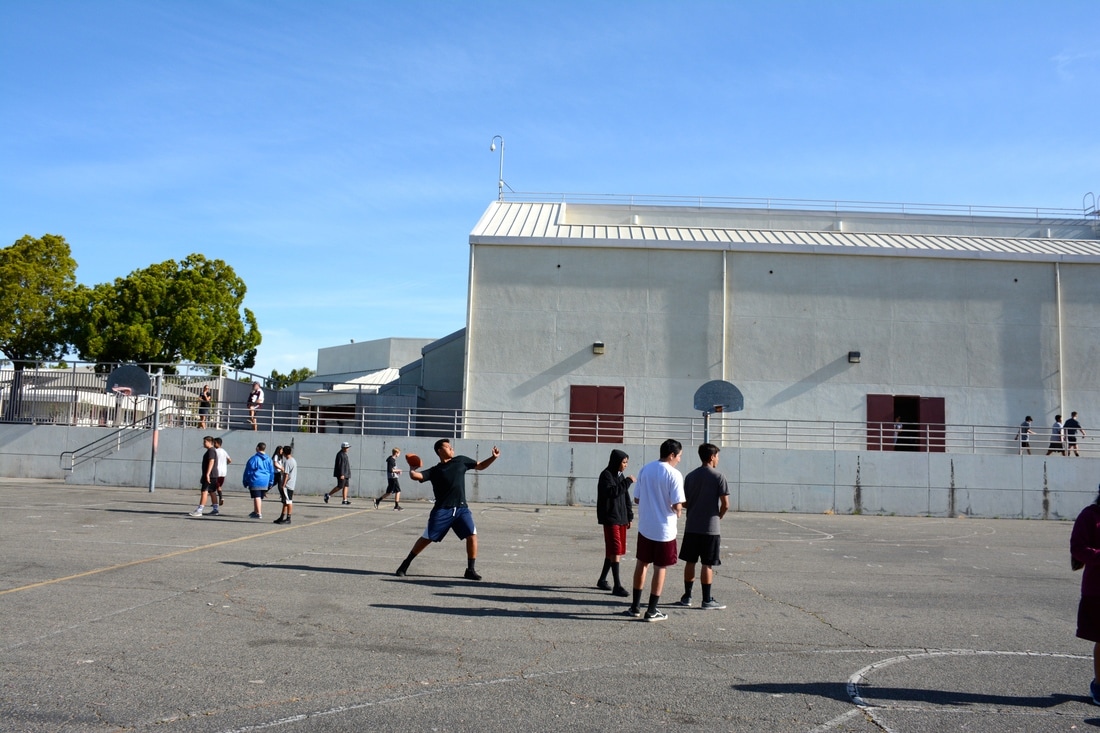
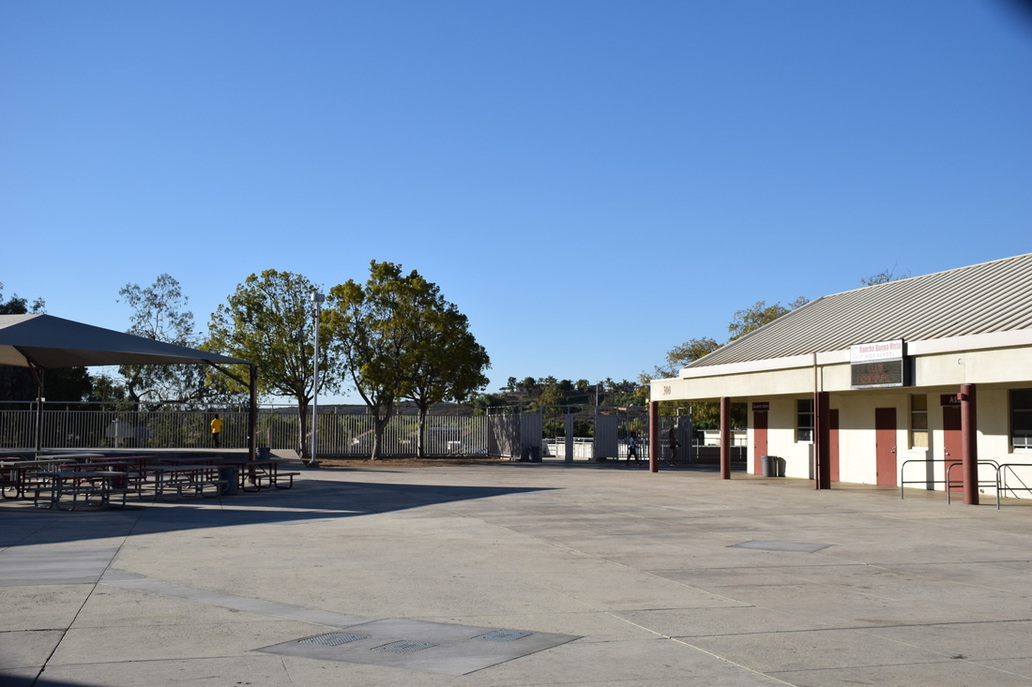
For this picture I decided to take a picture of the school campus on the front of the school next to the lunch tables. The element on this picture was taken in the school campus. I thought this picture was successful because its a good example of space.
 f/8, Shutter Speed 1/640, ISO 200
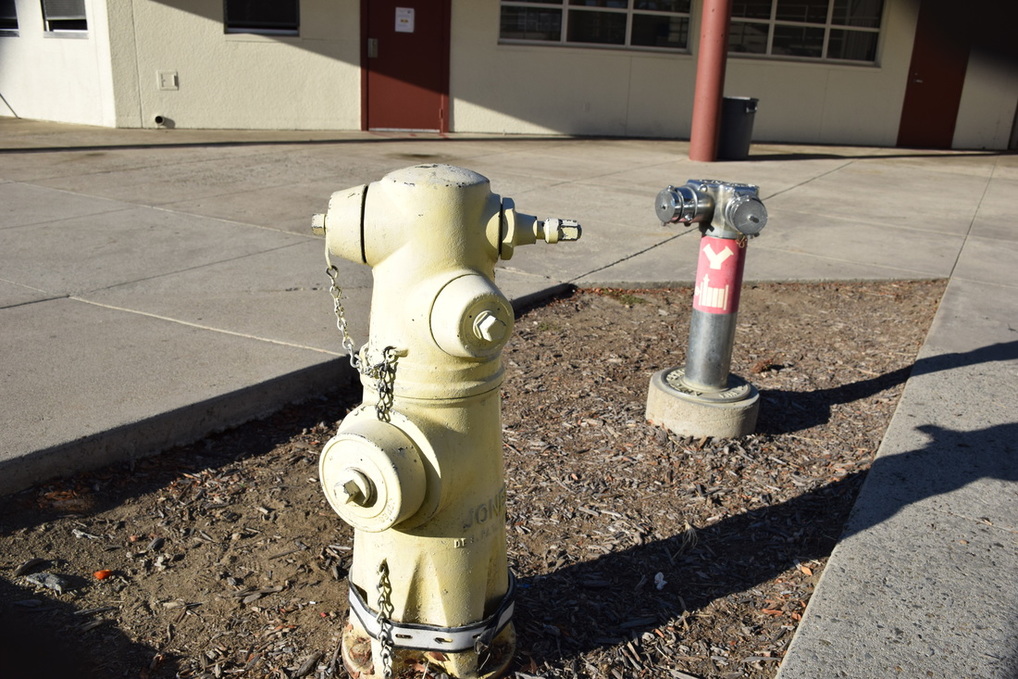
In this photo I decide to take a picture of the water pumps next to the concealing room. the element on this picture are the two objects in the center of the picture. I thought this picture was successful because its a good example of shape.
 f/8, Shutter Speed 1/640, ISO 200
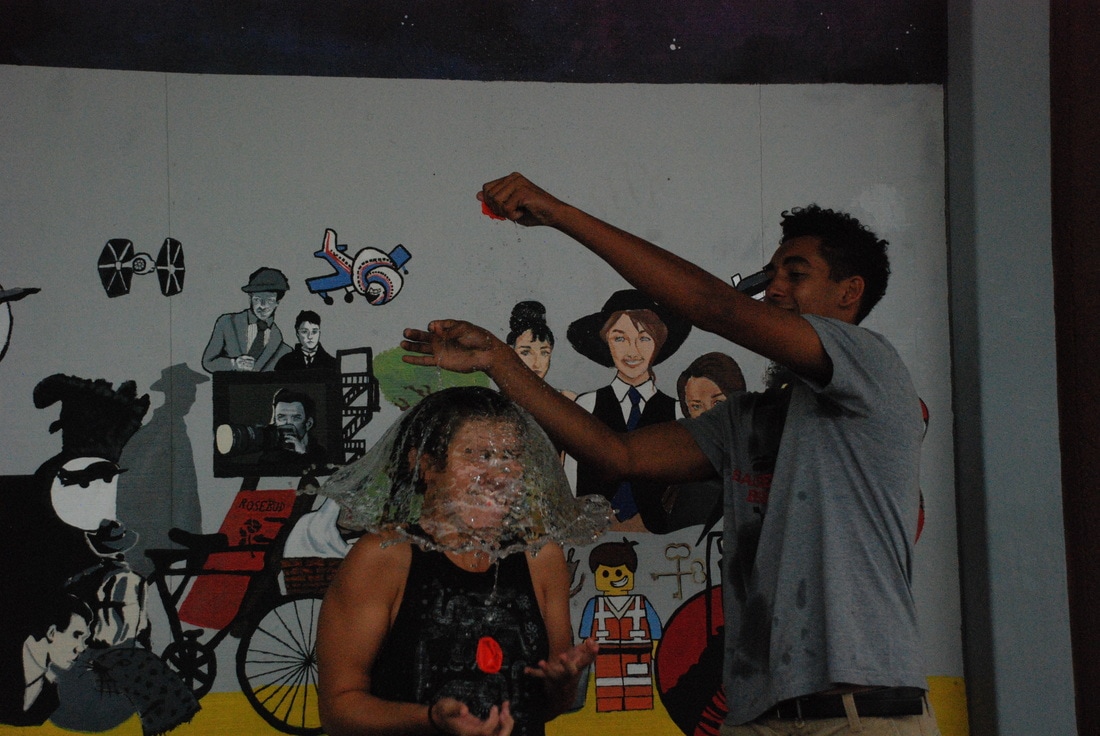
This photo I took the picture of the drawing that was on wall of RBV. The element on this picture was on the painting that was on the wall. I thought this picture was successful because its a good example of color.
 f/8, Shutter Speed 1/640, ISO 200
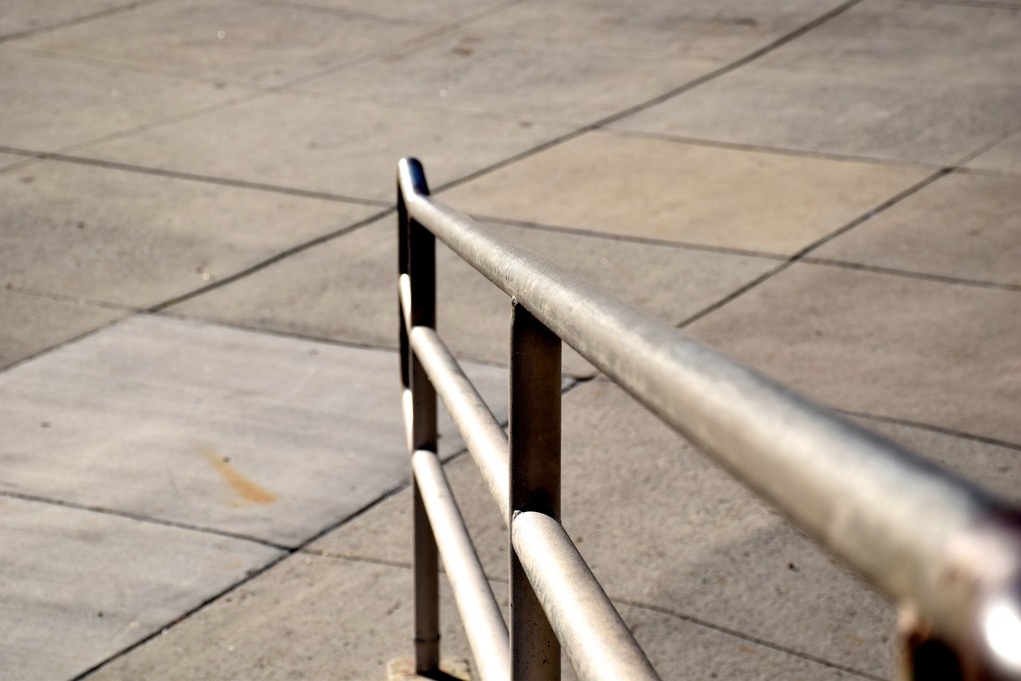
This photo I took was on the school's Stair rails. The element in this picture is on the top of the rail. I thought this picture was successful because its a good example of Line.

Prescott Adamson- Die Kunst in der Photographie 1901, Photoseed.com
the elements and principles of photography:
- The ‘building block’ of design
- All good design will have one or more of these elements: line, color, shape, form, form, texture, space, and value
- This presentation aims to show you some illustrations of these elements through photography. It could also be done through other art methods, such as painting, fashion design, sculpture, ect.
- Line: A line is one dimensional and can vary in width, direction, and length. Lines also can define the edges of a form. Lines can be horizontal, vertical, or diagonal, straight or curved, thick or thin. Lines lead your eye around the composition.
- Color: Color has three main characteristics: Hue (red, yellow, green), value (how light or dark it is), and Intensity (how bright or dull it is), Colors can also be described as warm (red, yellow), or cool (blue, green).
- Furthermore, monochromatic, one color plus its tints (adding white) and shades (adding black).
- Analogous Colors - colors next to each other o n the color wheel (ex. Green & Red).
- Shape: shape is two dimensional, with a height and width.
- Organic Shape: a shape made by nature. Not completely defined.
- Inorganic Shape: man made - such as triangles and rectangles.
- Form: form is three dimensional, has height and width and depth.
- Photographers emphasize form buy the use of highlights and shadows.
- Texture: The surface quality of an object that we sense through touch. All objects have a physical texture ( think - horsehair, dolphin smooth).
- In a two dimensional work, texture gives a visual sense of how an object depicted
- Space: real space is three dimensional. Space in a work of art refers to a feeling of depth or three dimensions. It can also refer to an artist’s use of the area around the picture plane.
- Positive Space: The space occupied by the primary object.
- Negative Space: The space around the primary object.
- Value: Value is the lightness or darkness of a surface. It is frequently used when talking about shading, but is also important in the study of color.
- Principles of Art: The principles of art are the rules or guidelines of art.
- Used to organize or arrange the structural elements of design.
- Principles are balance, proportion, rhythm, emphasis, harmony, variety, and unity.
- Balance: Balance is similar to our physical sense of balance. It is how the artist uses opposing forces in a composition that results in visual stability.
- Most successful compositions achieve balance in one of two ways. Symmetrically ( the same on both sides, like a butterfly wing) or asymmetrically.
- Proportion: Proportion relates to the relative size and scale of the various elements in a design. Specifically, the relationship between the objects.
- Rhythm: Rhythm in an artwork indicates movement by the repetition of elements. Rhythm can make an artwork seem active.
- Emphasis: Emphasis is to make one part of an artwork dominant over the other parts. It attracts the viewer’s eyes to a place of a special importance in an artwork.
- Harmony: Harmony is the pleasing quality achieved by different elements of a composition interacting to form a whole. Harmony is often accomplished through repetition of the same or similar characteristics.
- Variety: Differences achieved by opposing, contrasting, changing, elaborating, or diversifying elements in a composition to add individualism and interest.
- Unity: Unity is the result of bringing the elements of art into the appropriate ratio between harmony and variety to achieve a sense of oneness. It is the sense that everything works together and looks like it fits
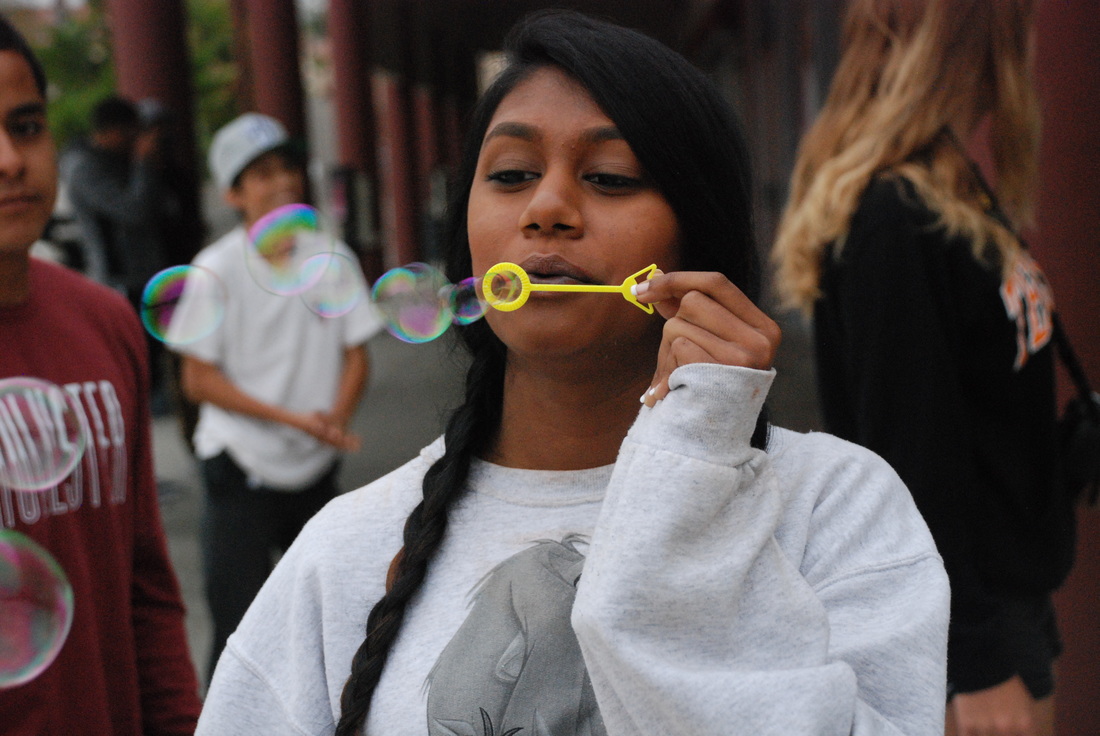
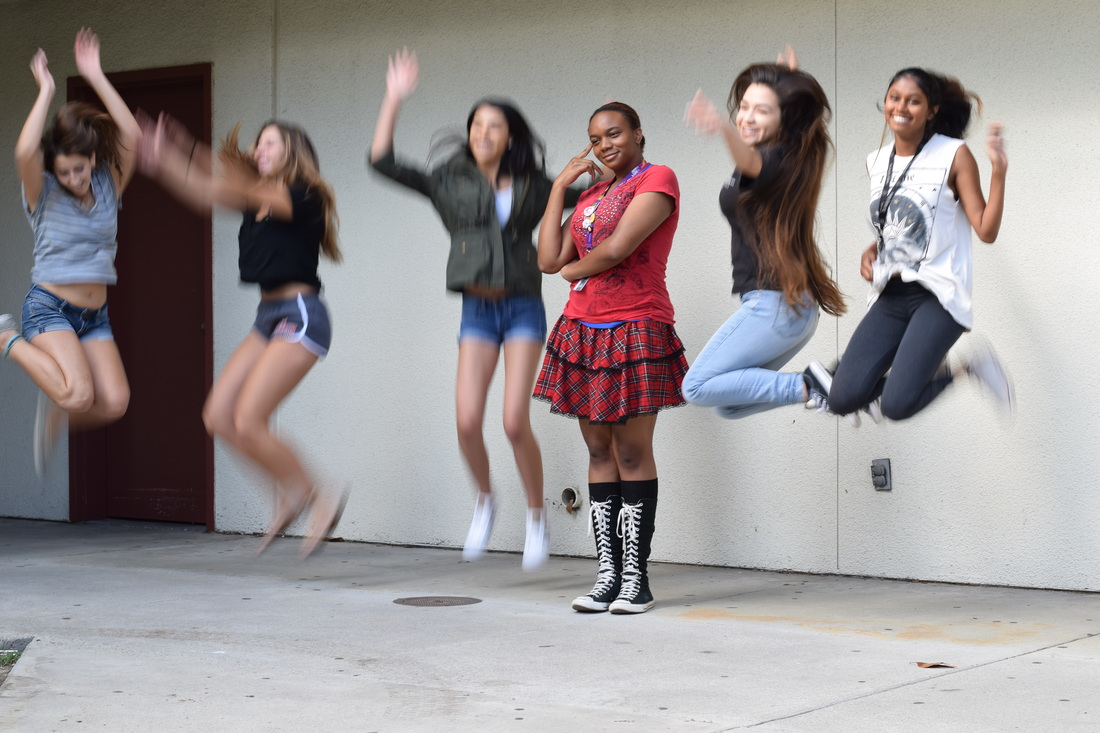
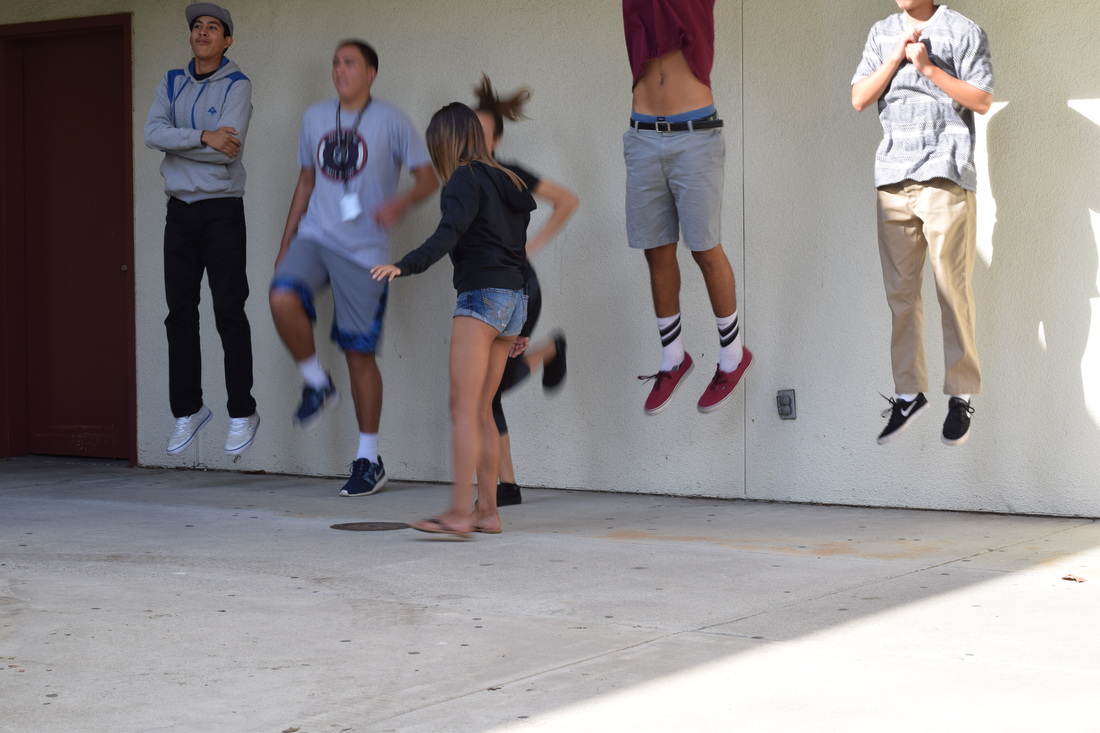
Fast Shutter speed
ISO 1600, Aperture f/11, shutter speed 1/1000th of a second.
ISO 1600, Aperture f/11, shutter speed 1/1000th of a second.
ISO 1600, Aperture f/11, shutter speed 1/1000th of a second.
ISO 1600, Aperture f/11, shutter speed 1/1000th of a second.
ISO 1600, Aperture f/11, shutter speed 1/1000th of a second.
ISO 1600, Aperture f/11, shutter speed 1/1000th of a second.
ISO 1600, Aperture f/11, shutter speed 1/1000th of a second.
ISO 1600, Aperture f/11, shutter speed 1/1000th of a second.
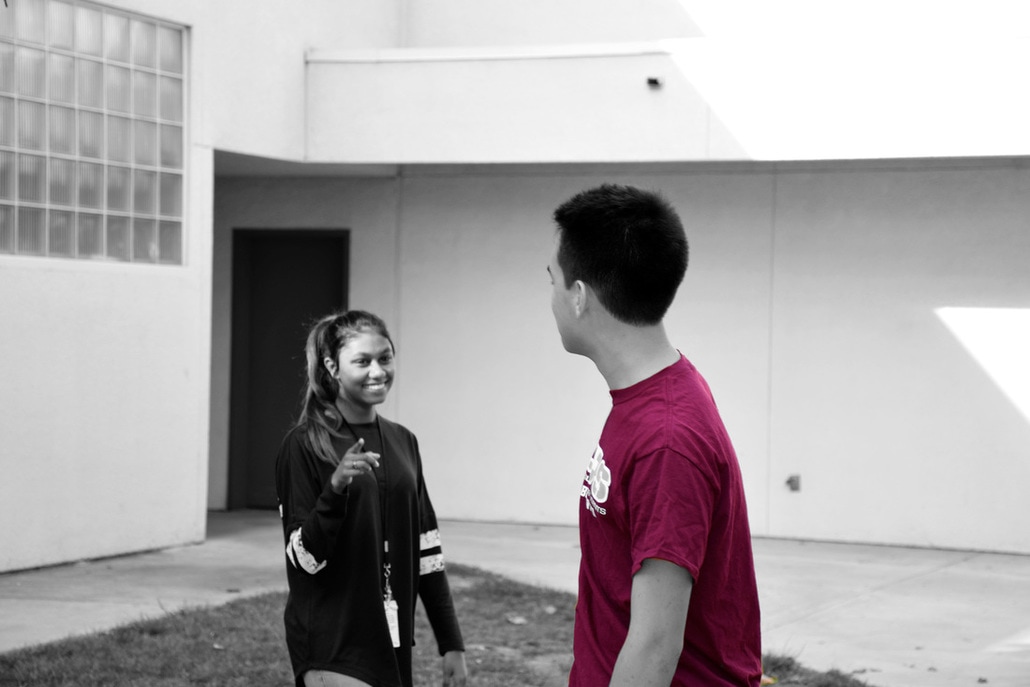
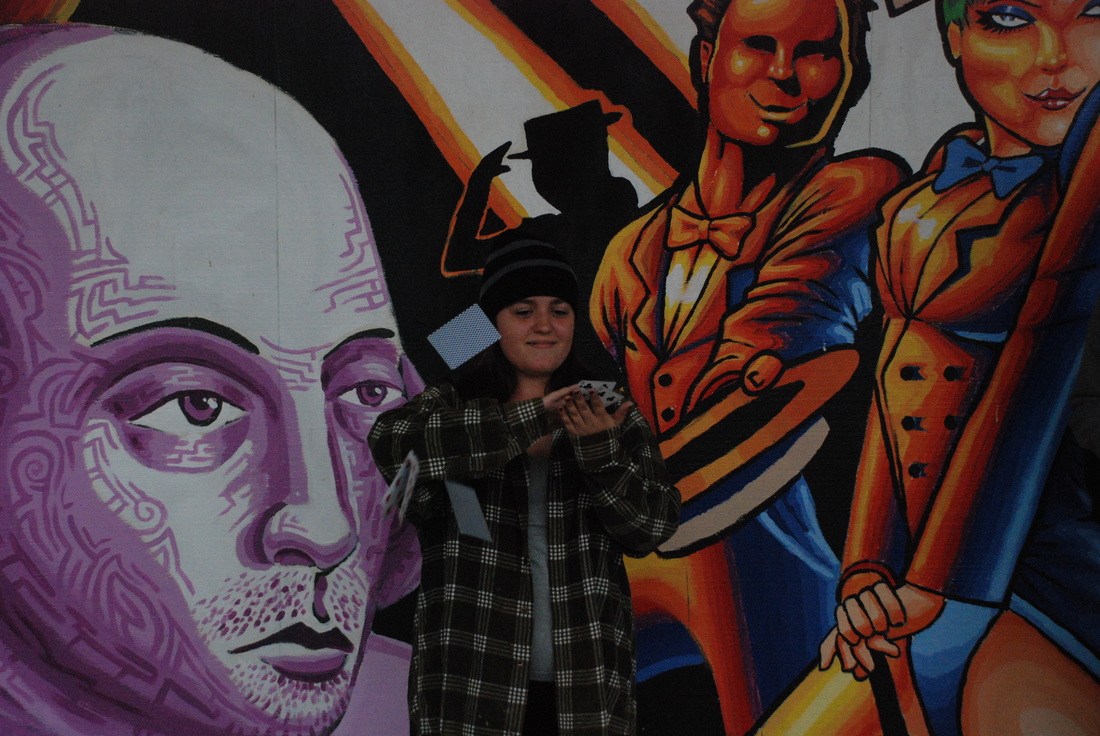
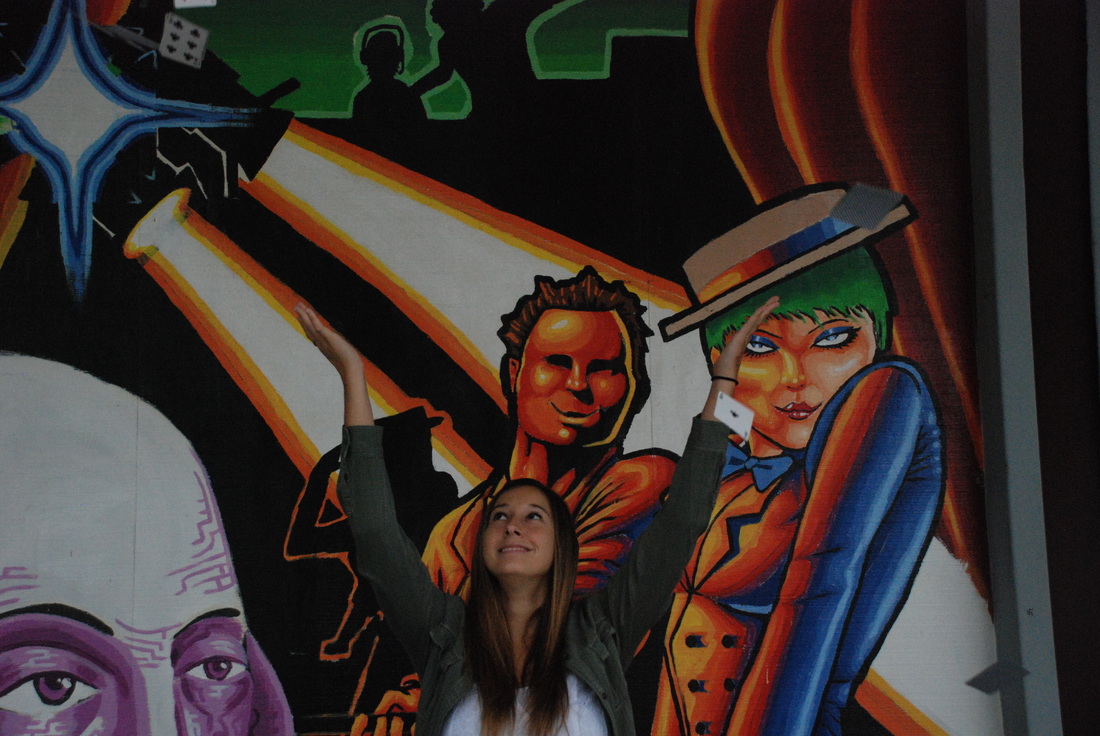
RESPECT YOURSELF:

In this picture I decided to use two of my classmates as my models for my project “Respect Yourself”. From my perspective I think that this pictures talks a lot about respecting yourself and others around you. An example is in this picture it shows my classmate giving a compliment to another one of my classmates, to me she is telling me that she respects herself and others around her. Also the way she is smiling it gave me another reason to believe that she respects herself and others around her.
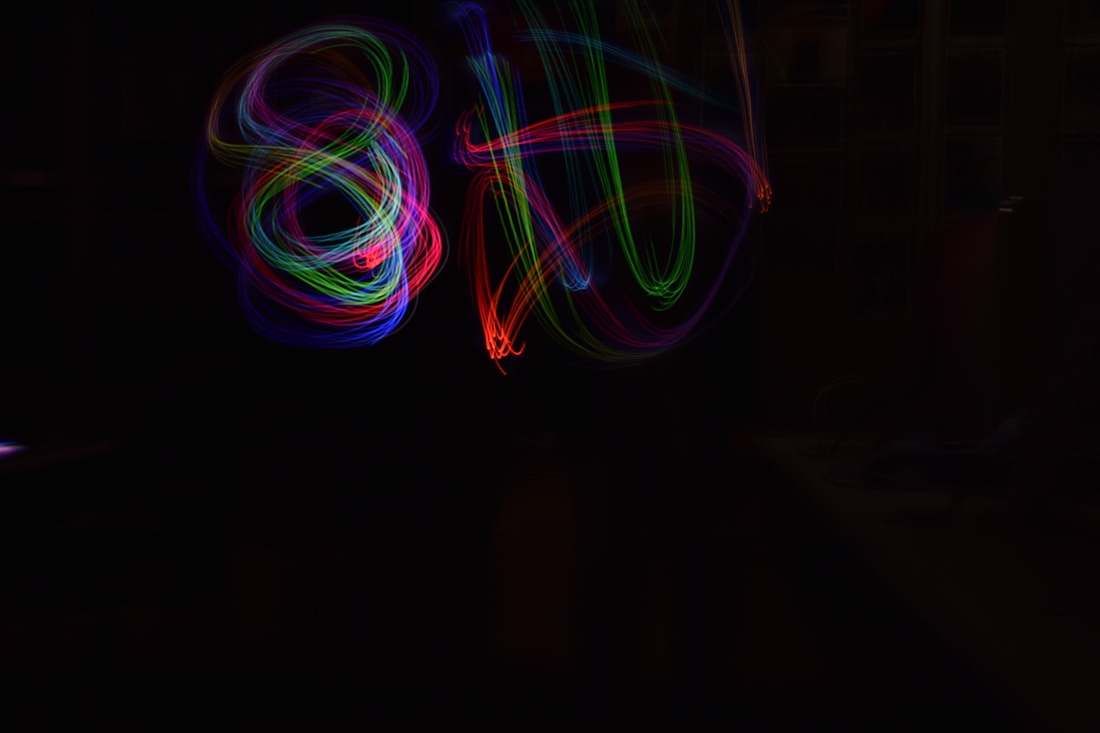
Light Painting
Silly class photo's
Shutter Speed 1/3rd of a Second, Aperture f/16, ISO 100
Shutter Speed 1/30th of a Second, Aperture f/11, ISO 100
Shutter Speed 1/60th of a Second, Aperture f/8, ISO 100
Shutter Speed 1/1000th of a Second, Aperture f/2, ISO 100
daguerreotype & Cyanotype :
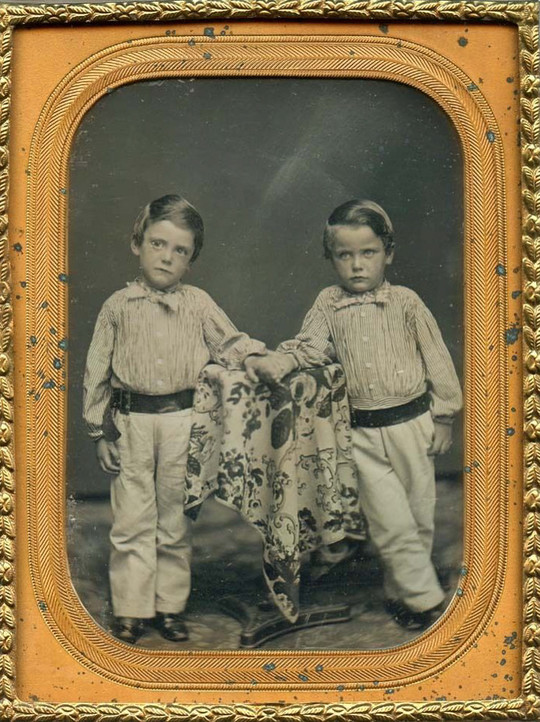
Daguerreotype : Daguerreotype process, or daguerreotypy, was the first publicly announced photographic process, and for nearly twenty years, it was the one most commonly used. It was invented by Louis-Jaques-Mandé Daguerre and introduced worldwide in 1839. It's a photograph taken by an early photographic process employing an iodine-sensitized silvered plate and mercury vapor.
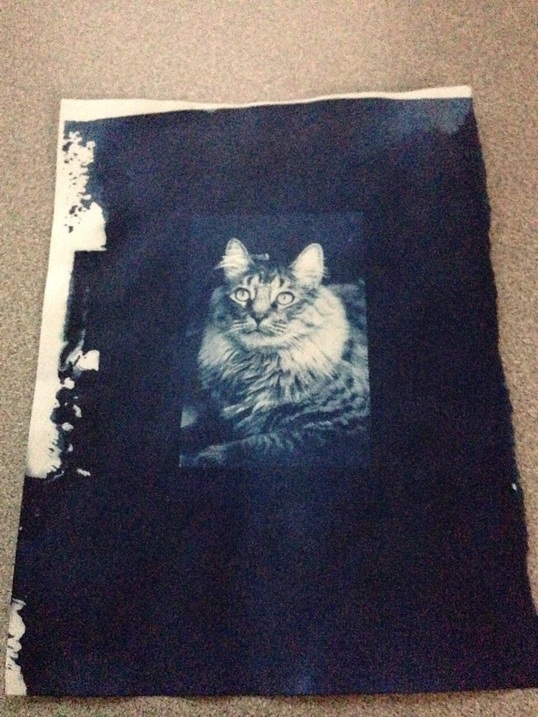
Cyanotype : What I did to create my cyanotype is first decide which negative I wanted to use, next I laid down the objects I wanted to put on my cyanotype. Once I finished that I grabbed a paper with the Ferric ammonium citrate and potassium ferricyanide solution already applied on it, then I put a piece of plexiglas on top of the design and went outside and set it in the sun for 5 to 10 minutes. Once the 5 to 10 minutes were up I wet the paper in water and it started turning blue, I let it dry and I was finished, the out come of the picture was great !!
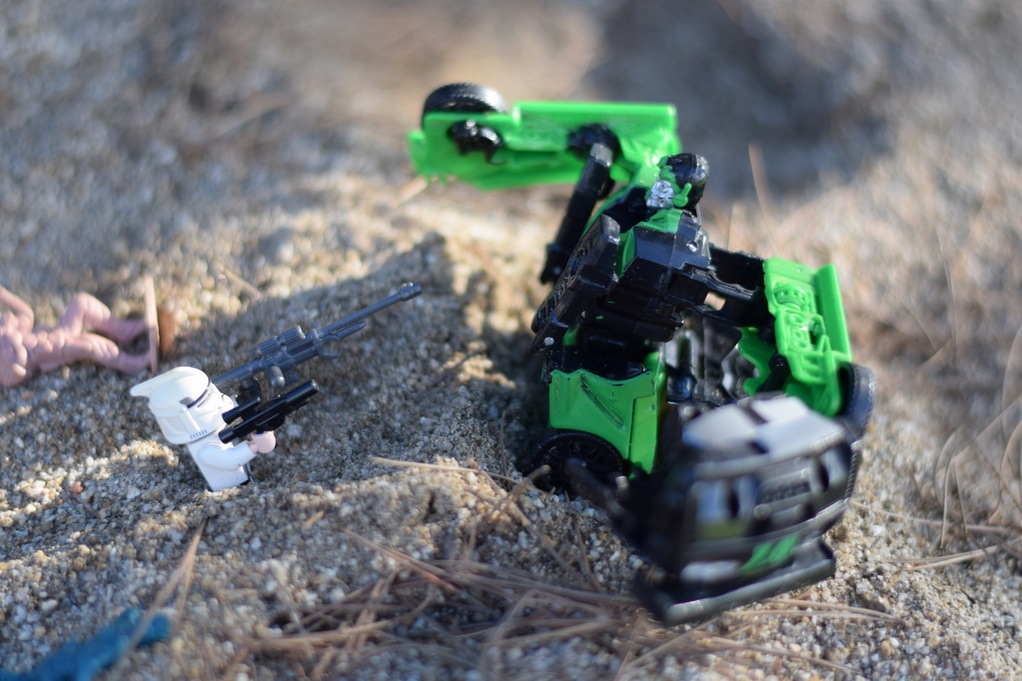
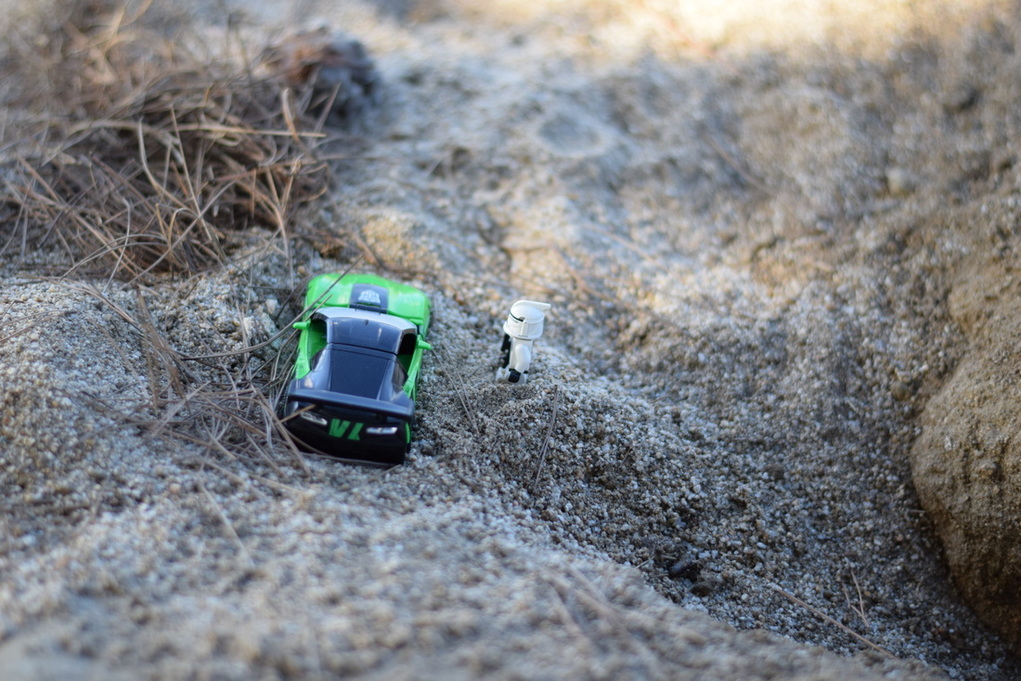
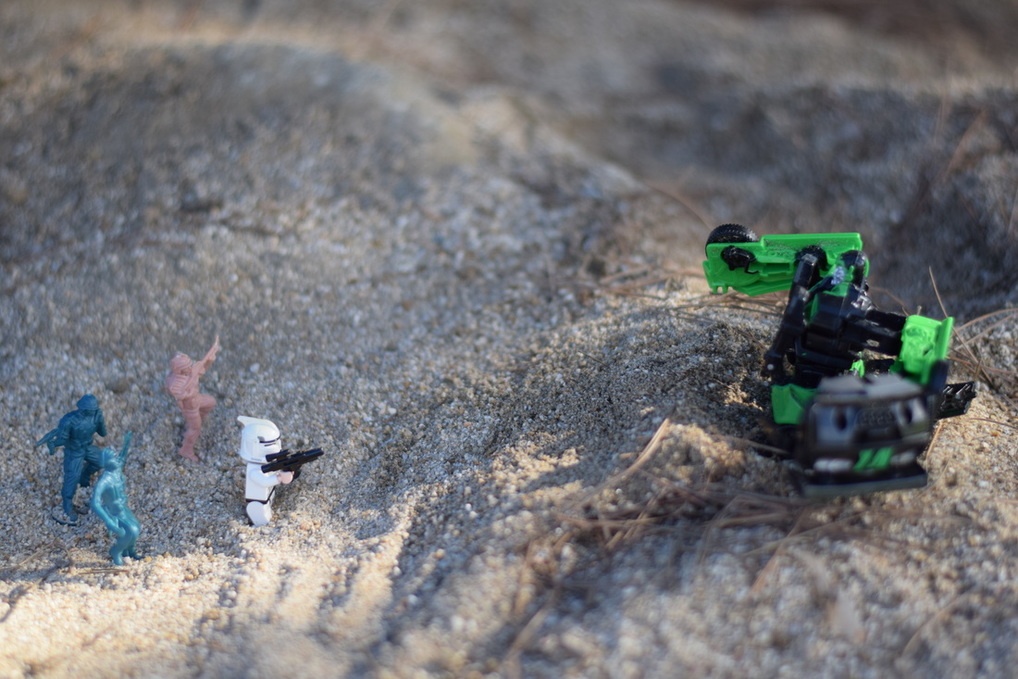
Toy story : the one who walked the path of reveng
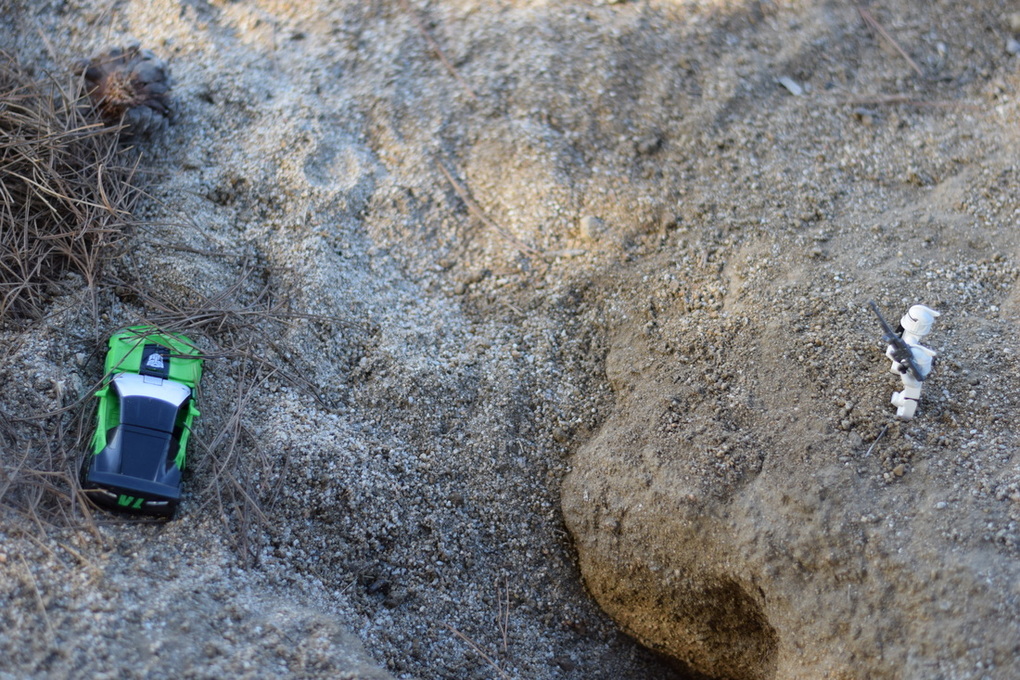 SO:400 F/16 Shutter Speed: 1/250
On October 7, 2082 Sargent Conner & Keith had discovered something rare while scouting out the perimeter. Keith was really anxious to check out the strange object because he thought it was something the enemy had left behind before they got raided. Conner on the other hand thought it was best if they just went back to headquarters and just leave the situation to their captain to take care of. Keith decided to just ignore Conner and went on ahead to check out this mysterious object but Sargent Keith didn't know what he was dealing with.
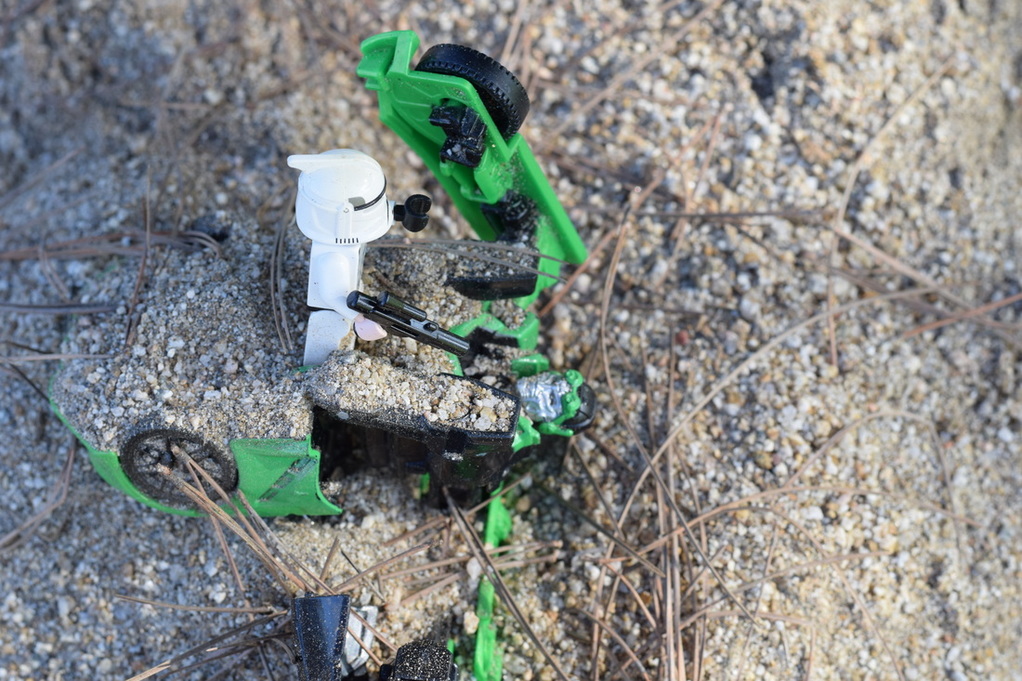
 ISO 400 f/8 1/125
As soon as Keith got close to the strange object he was having second thoughts on the choices he had made. Keith Ignored his thoughts and reached for the handle of the cars door, as soon as he touched the handle the car started acting up. He thought he was just hearing and seeing things so he continued to search the car. Once he got inside the car he had found the car keys hanging on the mirror, he grabbed them and started up the car but once he had turned on the car, the car itself started to transform and Keith couldn't believe what he was witnessing. The strange object started to transform into something dangerous.
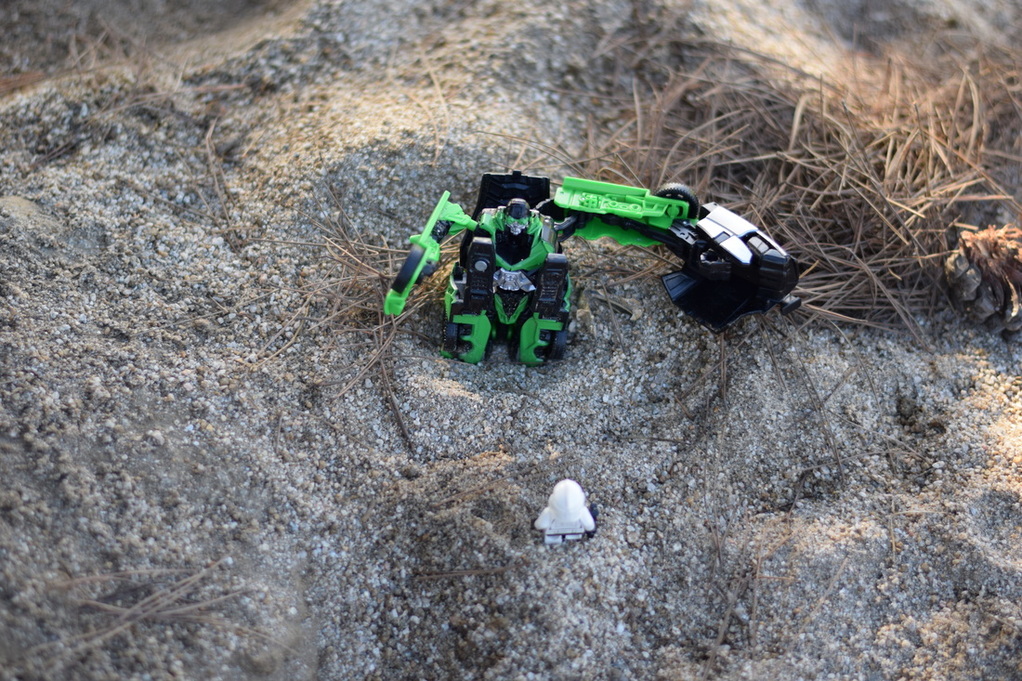 SO:400 F/16 Shutter Speed: 1/250
Conner also saw the strange object transforming and ordered Keith to fall back but Keith was in so much shock he stood there just looking at the strange thing eye to eye. Once Keith realized what was happening he reached for his weapon to shoot the thing down but it was to late. The strange object had attacked Sargent Keith before he could reach for his weapon and the damage was to great that it ended up killing Sargent Keith. Conner didn't know what he was dealing with so he couldn't just attack and be so reckless so he just stood his ground watching his best friend being killed.
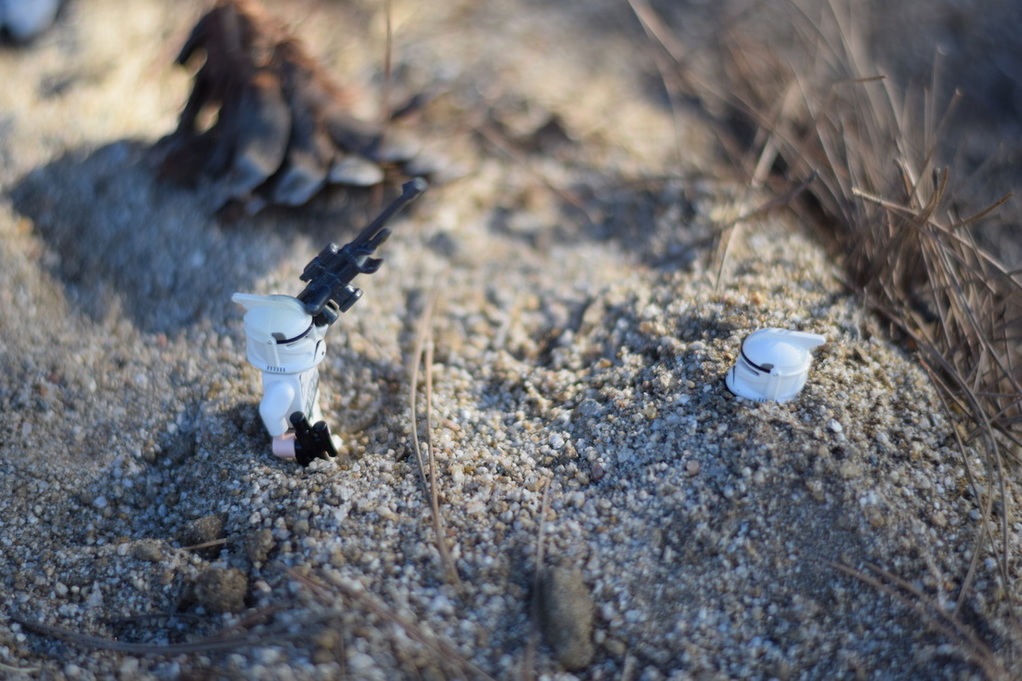 ISO 400 f/8 1/125
Conner was really devistated and really angry with himself because all he did was watch and he couldn't live with himself so he swore reveng on the object that had killed his best friend. Conner knew he couldn't fight this thing alone so he had to make some calls to help him get his revenge. Conner knew had to study this creature in order to understand how to take it down so he studied this strange creature while he was waiting for his friends to arrive.
ISO 400 f/8 1/125
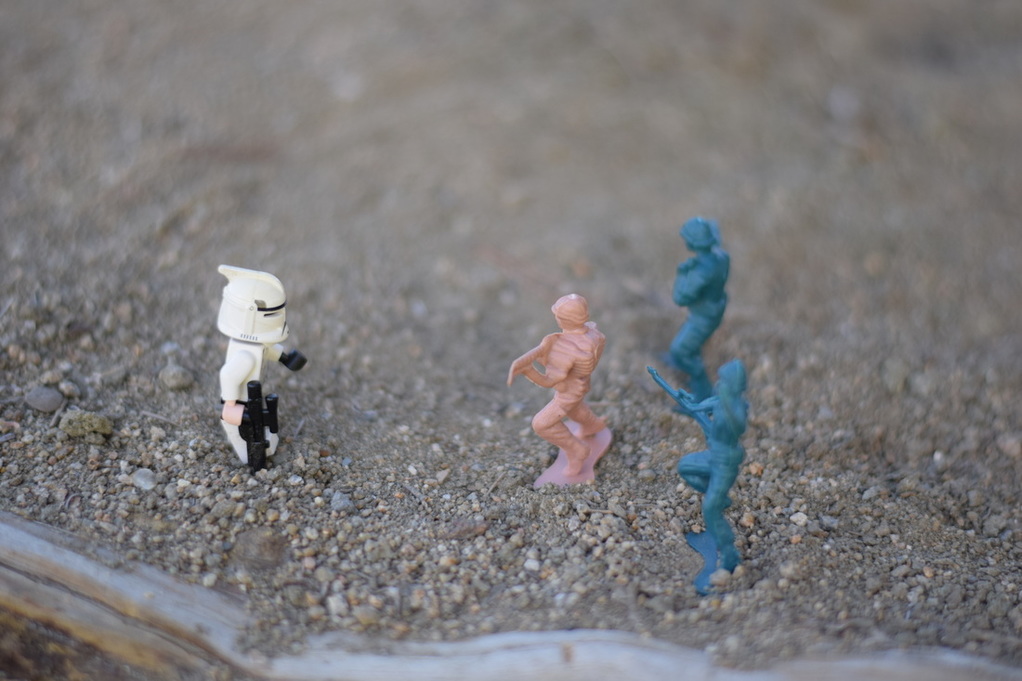
Conner's friends had arrived to assist help him achieve his revenge and to get rid of this strange creature for once and for all. Conner had given his friends Gunner,Raven, and Jax all the information he had gathered to take down the creature. Gunner the the leader of this this mission told Conner "Its never to late to turn back from all this" Conner looked at him and responded " He killed my best friend the only person that can take get rid of this creature is me". Conner was so determined to fulfill his mission so they all headed out to the place where Conner last saw the creature.
SO:400 F/16 Shutter Speed: 1/250
Sargent Conner had been waiting for this day to come to finally get his revenge for the death of Sargent Keith. The soldiers had been fighting really brave and strong but as soon as they kept getting closer on achieving their mission a soldier had been sacrificed. First Raven used himself as a distraction to push their way closer into the enemy. Then it was Jax he had given up his life in order to prevent Gunner and Conner to be killed my the creatures weapons. Lastly it was Gunner he was willing to die for Conner because he understood Conner's pain and knew how he felt losing a close friend.

ISO 400 f/8 1/125
Before Gunner had died he made Conner promise him that after this was over he would walk away alive. After Gunner had died Conner viciously ran up to the creature and started attacking him. He had done so much damage to the creature that it finally went down and could no longer move. Conner knew that he had finally defeated the creature but he wanted to let go of all his anger that he had in himself.
ISO 400 f/8 1/125
Sargent Conner had a few final word to say to this creature face to face before he could walk away from all this. He said " You took away my comrades but mainly my best friend way and I will never forget the good memories we shared together" Conner had token out a special bullet that he had kept in his pocket for the creature. Conner told the creature "This final bullet carries out the names of Gunner,Jax,Raven and Keith and I want you to keep it to remember the friends you took away from me". Conner had put the final bullet into the chamber of his weapon and aimed it towards the creatures head a few moments of silence had passed by then he pulled the trigger. All the hate Conner had inside was finally gone, Conner now lives a normal life with two kids and a wife all he does now is just spend all his time with his family.
Aperture Basics :
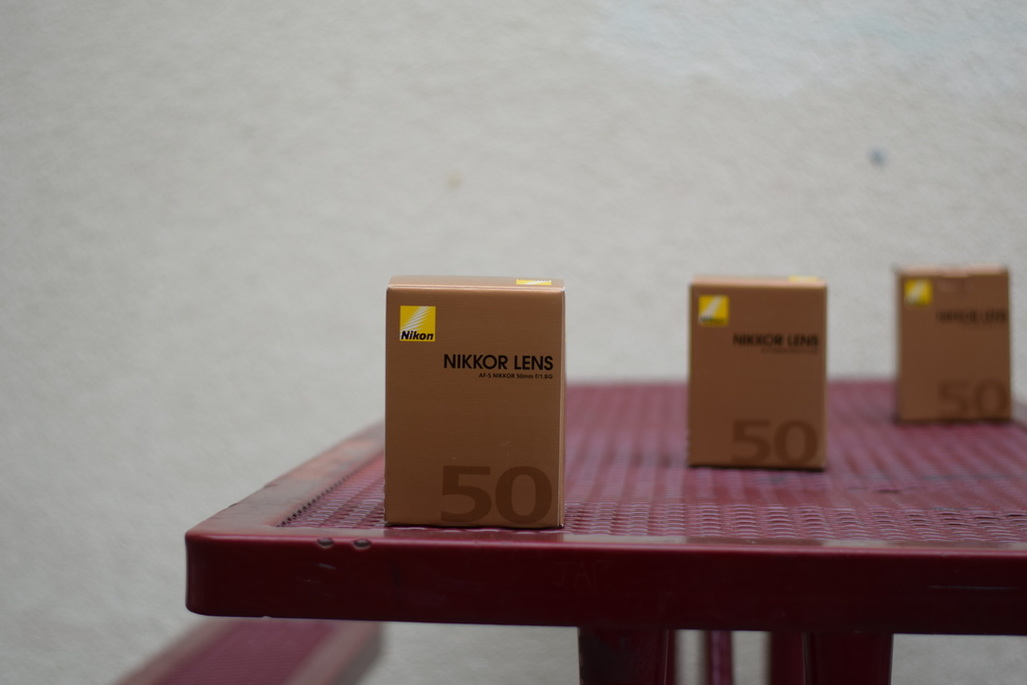 Aperture f/1.8, Shutter Speed 1/2000th of a second, ISO 200o
On the first picture the sarounding was blurry expect for the object that I took a picture of. the reason for that is because of the aperture that I used. the aperture I used was the f/1.8. I believe that is the reason for why the background was blurry because it was focused on the first box. Another believe I have was because of the exposure it had
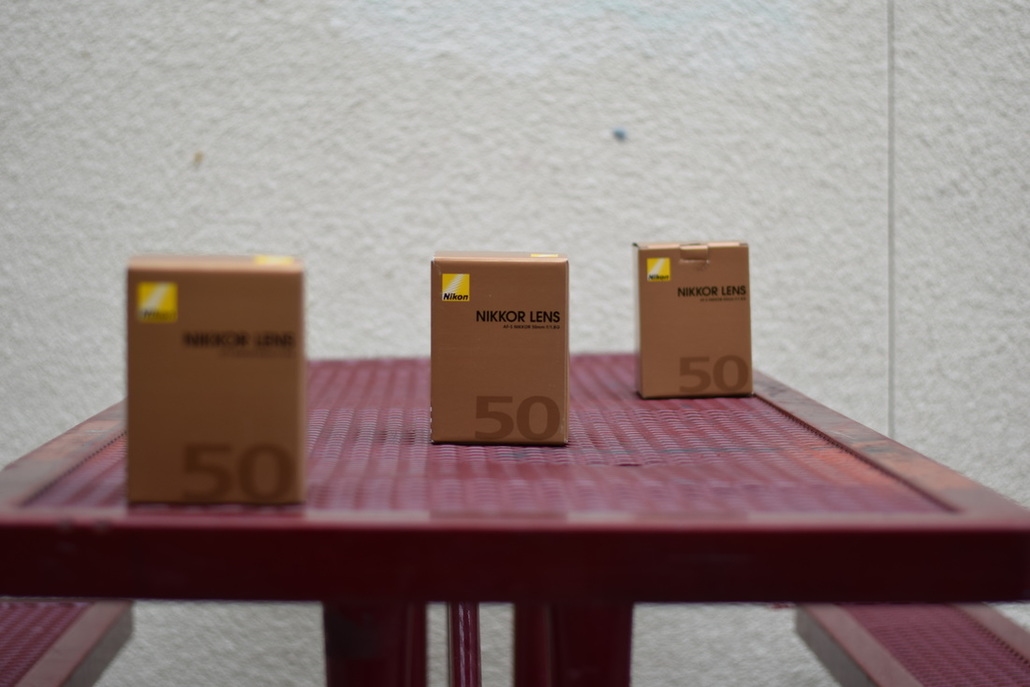
Aperture f/8, Shutter Speed 1/100th of a second, ISO 100
On my second picture this time it was focused on the object in the middle. The aperture I used was f/8. I believe that this aperture mad the other two objects blurry. The reason why the two objects were blurry was because we used a different aperture.
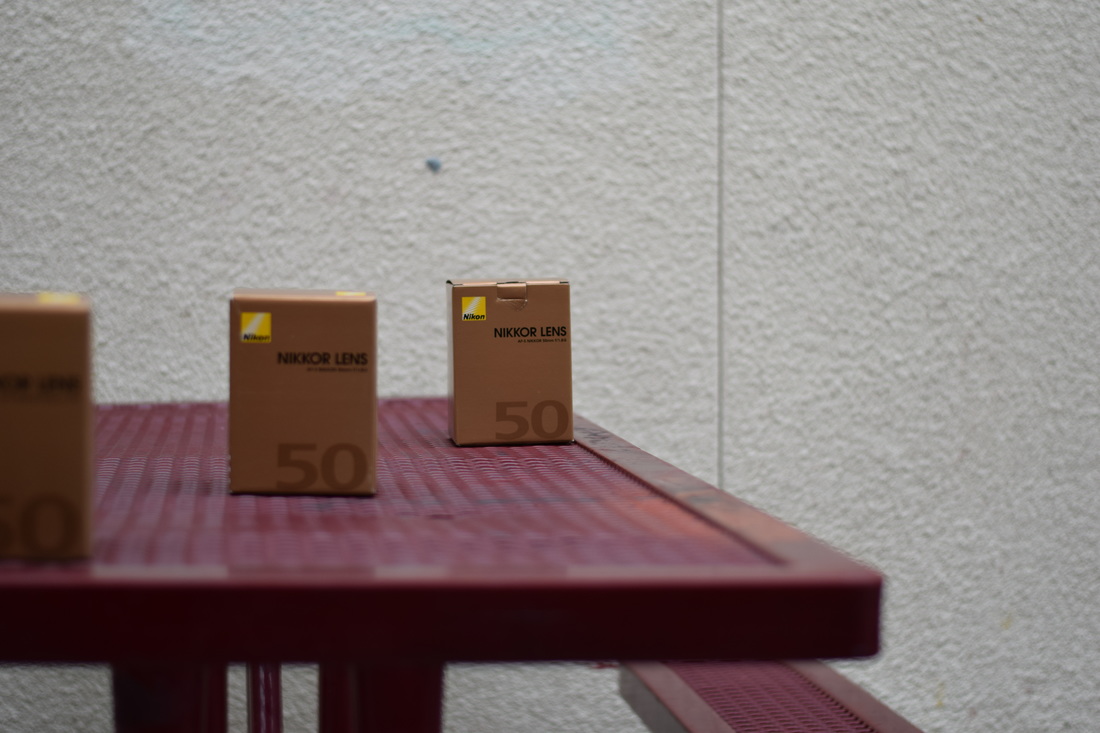
Aperture f/16, Shutter Speed 1/25th of a second, ISO 200
On the third picture I decide to use aperture f/16. I also decide to focus on the object that was the farthest to the camera. What I saw by using aperture f/16 was that it made the object thats the farthest clear and the other objects around it blurry. The reason why that happened was because of the aperture I used.
DSLR NOTES :
What does DSLR stand for for ?
- DLSR stands for “Digital single lens Reflex”
- A DSLR is a digital camera that uses mirrors to direct light from the lens to the viewfinder, which is a hole on the back of of the camera.
- Amount of light collected by the sensor in your camera during single picture
- If exposed to long it washes away
- If exposed too short it will appear dark
- mostly all cameras have light meters which measures light
- Primary controls Aperture,Shutter Speed,ISO
- Aperture is a hole within lens, through which light travels into the camera
- Every camera is similar to the human eye
- “f-stops” is a way of describing the size of aperture
- A small f-stop means a larger aperture, a larger f-stop means a smaller aperture
- Small apertures increases the depth of field, bringing main subjects and background into focus.
- Large aperture soften background details
- Depth of field- distance to which objects behind and in front of the focal point appear to in the focus
- Exposure time- stands for the length of time a camera shutters is open to expose light into the camera sensor.
- Shutter speed can freeze action completely
- If shutter speed is slow it will create a blurr
- ¼ means quarter of a second
- Anything lower then 1/60 should ether be a tripod or on a straight, solid surface
- Slower handheld begins to get motion blur and can be out of foucus
- Level of sensitivity of your camera to available light
- Lower the ISO number the less sensitive it is to the light, while if it’s higher it increases the sensitivity
- bright - 100iso
- Cloudy - 250iso
- Indoors - 500iso
- Night time without a flash - 1600iso
- M- Manual control over aperture and shutter
- A- aperture priority
- S- shutter Priority
- P- Camera sets shutter speed and aperture
- Have camera strap around your neck at all time
- Hold camera by lens and hand grip if possible treat with care
camera obscura :
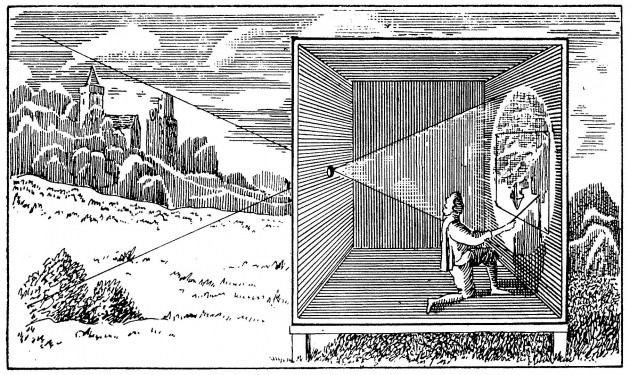
Camera Obscura is a dark room with a hole in the wall. Light comes out of a lens in the hole and projects an image onto the wall, the image is displayed upside down with color added to it. Camera obscura made it easier to take images of things, people would stand outside and it would show a portrait of them on the wall.
Surrealistic Selfie :
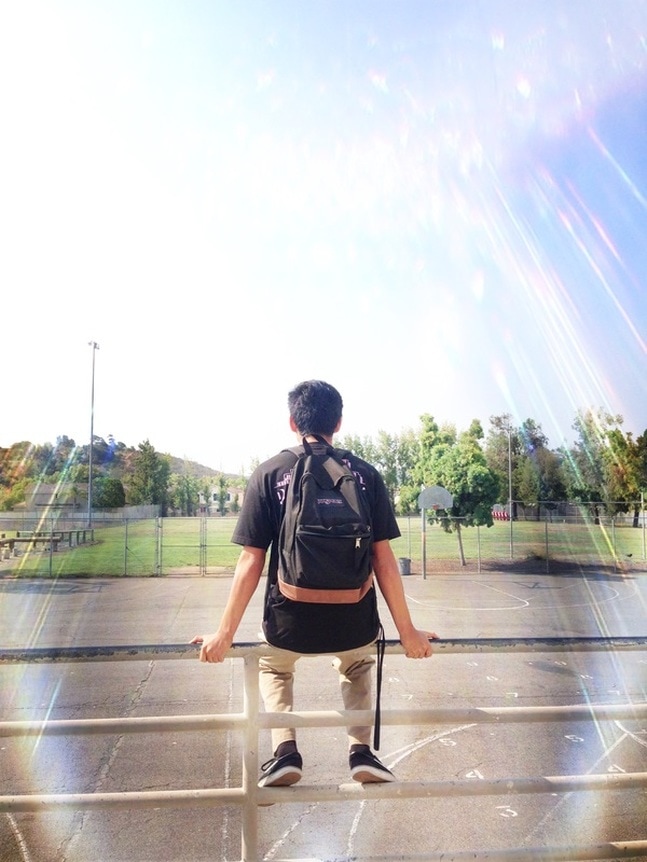
On my picture that I captured on my phone I used an app called PixLr. PxLr is a great app especially when you are editing a picture. I came across a lot of cool effects like overlay and stylize and much more. Although I had so many options I decided to go with Divine. The reason why I decided to go with divine is because I thought it matched perfectly with the picture that I took. I also decided to blur some of the surrounding to make it more dramatic.
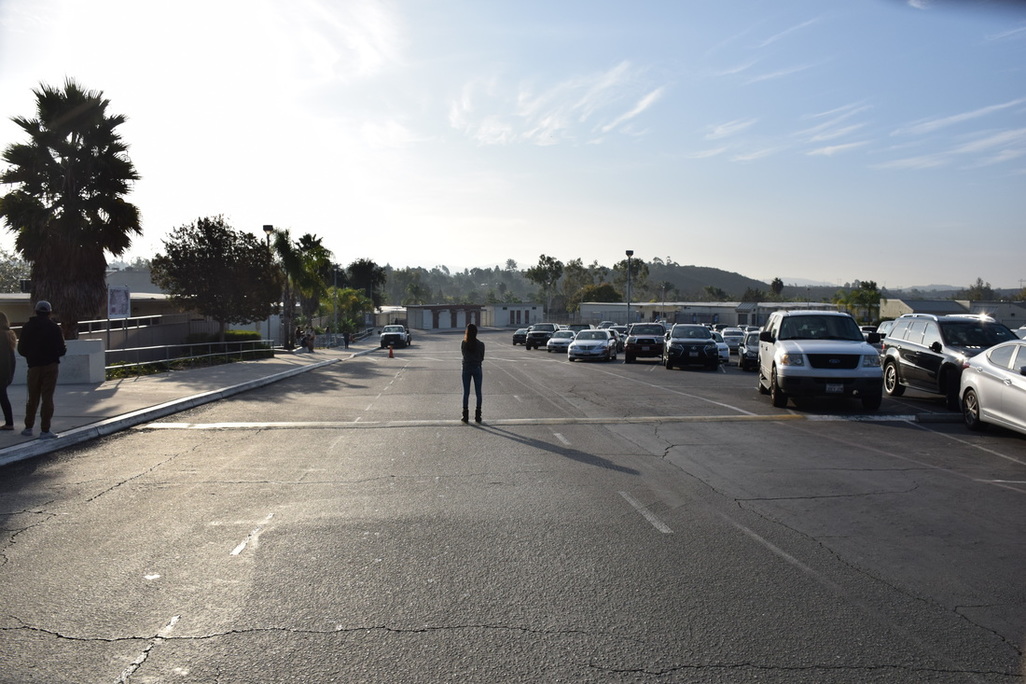
I took this image during nutrition break on the RBV campus next to the basket ball court. The image relates to to me because I like to think about my education a lot. It also relates to me because I like being in school to see my friends.
This picture says a lot about me in some way. It shows that sometimes I like to be alone and to think about whats going around me or the choices that I am taking. I also enjoy looking at the view thats right in front me. When I am alone I like to appreciate the things and people that I have in my life and also about how much I value them so much.
Photos used under Creative Commons from Ansel Edwards Photography, oakenroad
